DIY Rock Trivet - A Father's Day Gift
Materials
- Hot glue gun with glue sticks
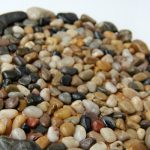
- Smooth river rocks
- Round cork plant coaster
- Clear Elmer's glue
- Free printable
Instructions
- Start by laying out some of the larger rocks around the perimeter of the coaster. I thought laying them out first was a smart plan before I started gluing, just to make sure everything fit.
- Once you have your plan, begin gluing the rocks in place with your hot glue gun.
- I started gluing down the smaller rocks for the center of the trivet with my glue gun.
- You need to ensure that none of the smaller rocks are stacked on top of one another. Use your hand to smooth out the rocks so each one has their resting place in the glue.
- The drying process takes at least a day since you basically dumped a puddle of glue into the center of the trivet.
Notes
- Strategic Layout: Before starting to glue the rocks onto the cork coaster, lay them out around the perimeter to ensure they fit well and create a visually pleasing design. This step allows you to plan the placement of the rocks and make any necessary adjustments before committing to the gluing process. Take your time to arrange the rocks in a pattern or layout that appeals to you or your dad's taste.
- Careful Gluing Technique: Use a hot glue gun to securely attach the rocks to the cork coaster. Start by gluing the larger rocks around the edge of the coaster, then fill in the center with smaller rocks. Ensure that each rock is firmly attached to the coaster and that none are stacked on top of each other. Take care to apply the glue evenly and avoid excess glue, as this can affect the appearance of the finished trivet.
- Patience During Drying: Allow sufficient time for the glue to dry completely before handling the rock trivet. Since a significant amount of glue is used, the drying process may take at least a day. Be patient and avoid moving or disturbing the trivet while it dries to prevent any rocks from becoming dislodged. Once the glue has fully dried, the rock trivet will be ready to use or gift to your dad for Father's Day.