Want to Save This Recipe?

Happy Friday! And welcome to my official countdown to Easter! I'll be sharing a fun and easy egg decorating idea each week starting today through the week before Easter. Decorating eggs is one of my fondest memories as a child. Our decorating years ago really only consisted of dying hard-boiled eggs with food coloring. . . and we normally didn't sit down to do that until the week before Easter.
Today, thanks to the Internet and social media, we all have access to oodles and oodles of great egg decorating ideas that use plastic or ceramic eggs, rather than real. Why would you want to decorate plastic eggs? Well, they have a much longer shelf life, so you can start decorating earlier and they can also be reused year after year. Smart? I think so!
The ideas I'll be sharing in the coming weeks are all VERY simple and easy to do, but the results are pretty awesome! In fact, all of the ideas I'll be sharing use eggs, glue and what I like to call a "wow" item. Today I'm sharing a tutorial on creating Crystal Eggs using plastic eggs, Epsom Salt and glue. Simple, huh? Let's get started!

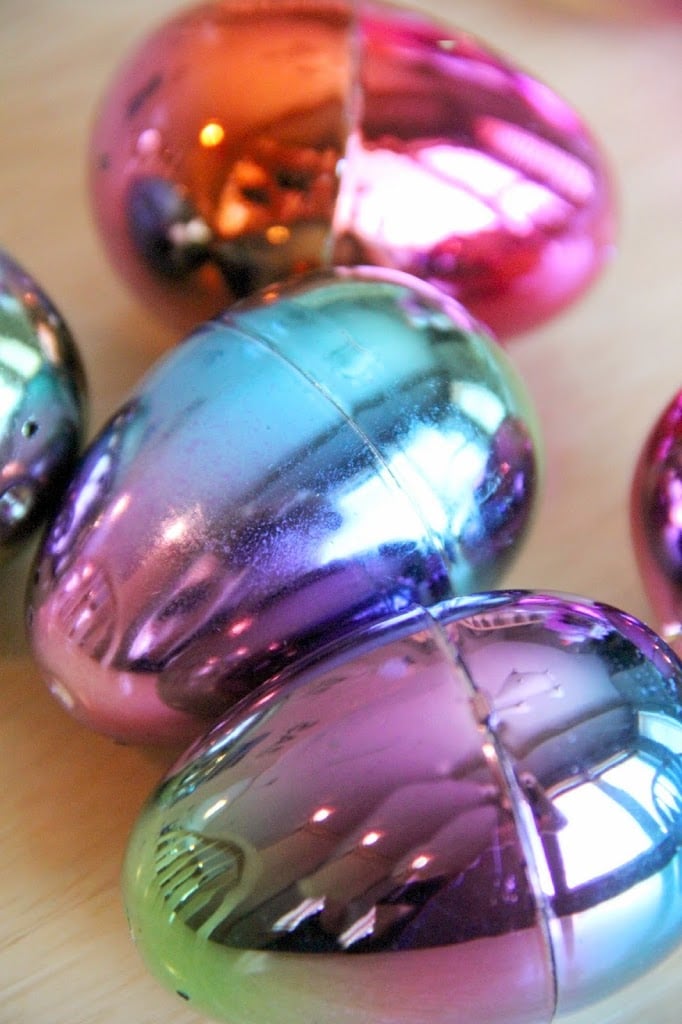
I found these awesome metallic eggs this year and knew they would be perfect for gluing the Epsom Salts to. They're much more fun and interesting to look at than just the solid colored eggs, don't you think?
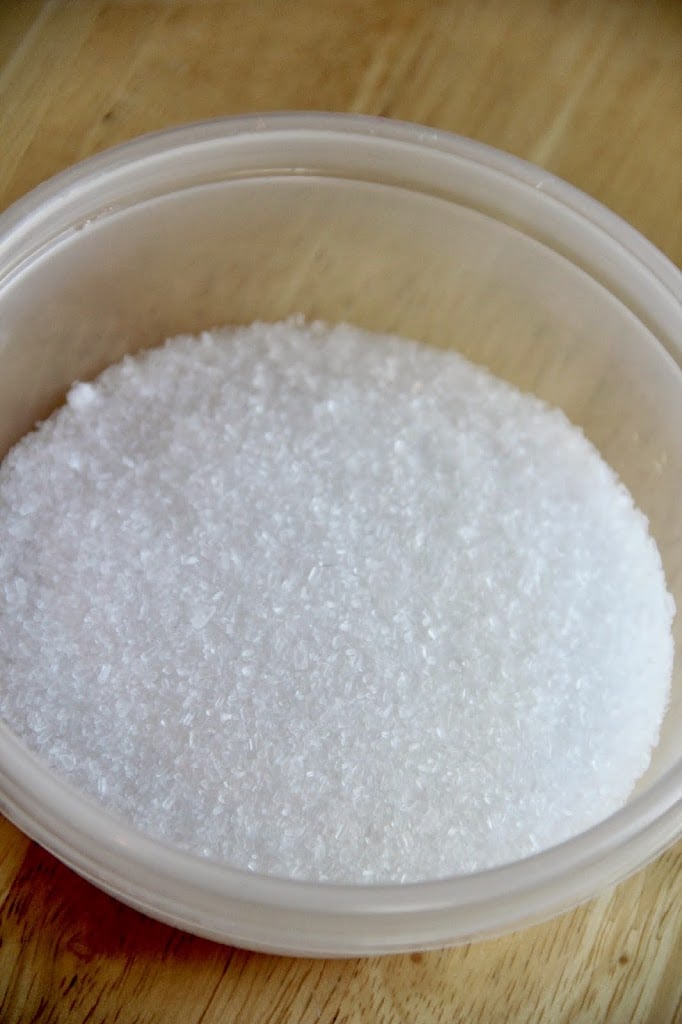
This is a bit silly, in fact, that I'm even offering a tutorial on this since it's so simple, but pictures make the post, right? I started by filling a small bowl full of Epsom Salts. Make sure you use the finer grained salts rather than the coarse. Also, grab a paper plate and squeeze some glue onto it. I like the clear glue because it goes on clear and dries clear as well.
I don't have a photo of when I dipped the egg in the glue for obvious reasons. I couldn't put my Canon through it. Poor thing gets enough food and glitter on it already. Did you notice I said "dipped in glue?" Some people choose to use a paint brush to put glue on an egg. I actually dipped the egg in the glue, smeared it all over with my fingers and plopped it into the bowl with the Epsom Salt.
Here's where you take a quick break and go and wash your hands.
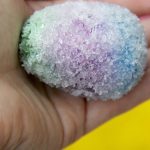
For the next step, grab a spoon and start spooning the salts over the egg while using your other hand to rotate it. I used the back side of the spoon to pack the salts onto the egg also to make sure they stuck.

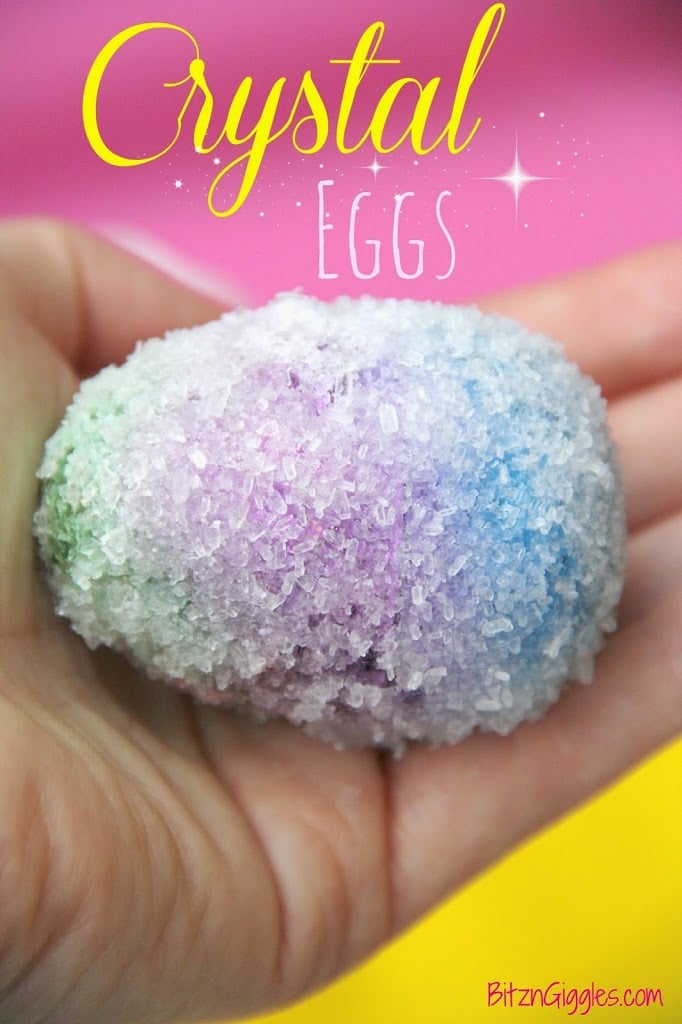
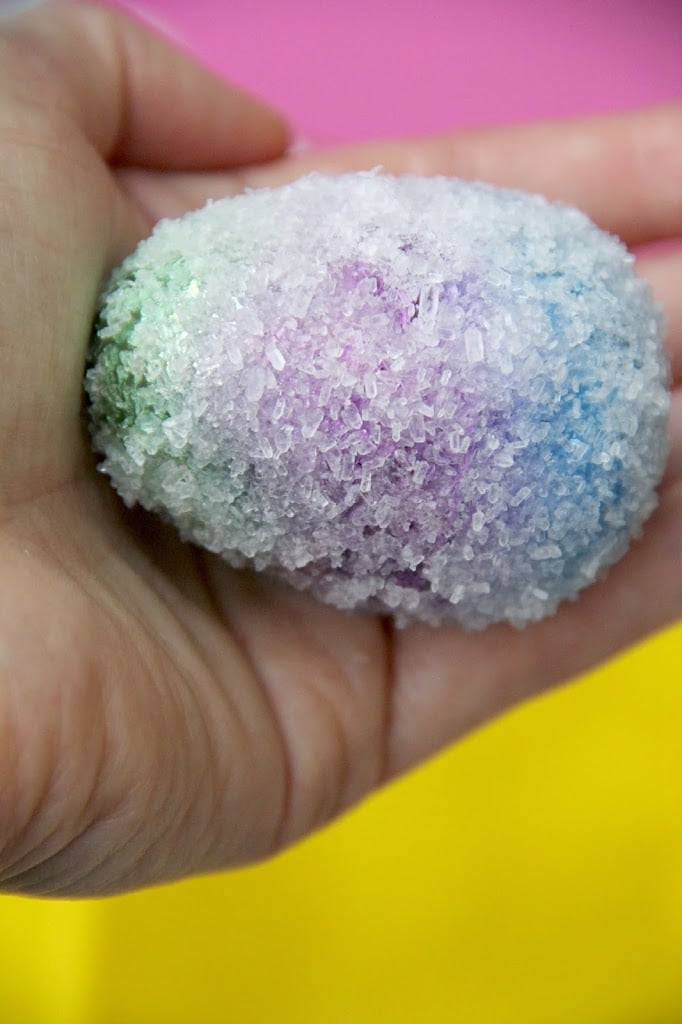
Allow the egg 30-45 minutes to dry. There you have it. A beautiful "crystallized" egg! Make a few of these and throw them in a bowl or vase to display proudly. Have fun decorating, and don't forget to continue to check back for more fun, easy and quick egg decorating ideas as we countdown to Easter Sunday!
SHARE IT
Crystal Eggs
Materials
- Plastic eggs
- Epsom Salt
- Glue
Instructions
- I started by filling a small bowl full of Epsom Salts. Make sure you use the finer grained salts rather than the coarse.
- Also, grab a paper plate and squeeze some glue onto it. I like the clear glue because it goes on clear and dries clear as well.
- I actually dipped the egg in the glue, smeared it all over with my fingers and plopped it into the bowl with the Epsom Salt.
- For the next step, grab a spoon and start spooning the salts over the egg while using your other hand to rotate it. I used the back side of the spoon to pack the salts onto the egg also to make sure they stuck.
- Allow the egg 30-45 minutes to dry. There you have it. A beautiful "crystallized" egg!
Notes
- Choose the Right Salt: Opt for fine-grained Epsom salts rather than coarse ones for better adherence to the egg surface and a smoother crystallization effect.
- Use Clear Glue for Transparency: Clear glue works best for this project as it goes on clear and dries clear, allowing the crystallized effect to shine through without any cloudy residue.
- Pack Salts Carefully: When spooning Epsom salts onto the egg, use the back side of the spoon to gently pack the salts onto the glue-covered surface. This helps ensure the salts adhere well and create a more uniform crystallized appearance.
Steph Seibert
This is so simple and awesome! Thanks for linking up!! http://timeforseason.blogspot.com/2014/04/my-favorite-things-saturdays-45.html
Angelique Ouellette-Tower
I have an 8 year old niece that would just love this! I found you on the Wonderful Wednesday blog hop - thanks for sharing!
Angie
PS – I would also like to invite you to a networking blog hop that lasts 1 month long: “The Chain Linky CLIMB” on my blog– Thank you! Chain Linky CLIMB