Want to Save This Recipe?

November is definitely the month to have fun with turkeys! Honestly, I can't say that I ever really think about turkeys any other time of year. Should I be thinking of turkeys more often than that?
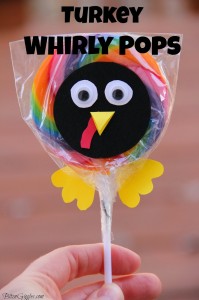
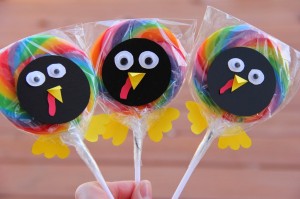
Well, the point is, there are so many fun turkey crafts to do with kids in preparation for Thanksgiving and when I dreamed this project up I thought of so many fun things to do with them. They would be a great treat for your kids to take to school, they would be so much fun as part of your Thanksgiving table place settings, and for anyone that might attempt a fun holiday centerpiece with these guys, I think it would turn out absolutely adorable!
These fun whirly pops are SUPER simple to make and your kids could probably make them for you!
Here's what you'll need to make one pop:
Materials:
- Whirly pop (I used these 3" swirl pops from Oriental Trading Company)
- Construction paper (Red, yellow, black and white)
- Google eyes (small to medium in size)
- Scissors
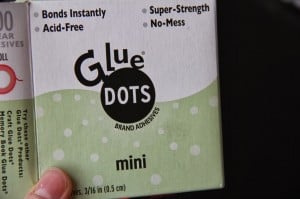
- Glue dots
Instructions:
Turkey Whirly Pops
Materials
- Whirly pop
- Construction paper Red, yellow, black and white
- Google eyes small to medium in size
- Scissors
- Glue dots
Instructions
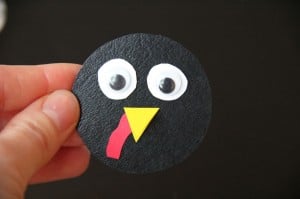
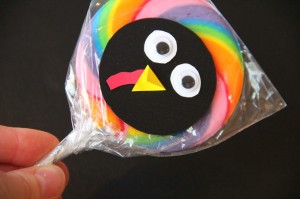
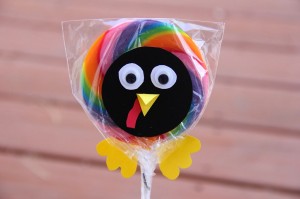
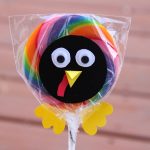
- Start by cutting out a black circle for the face, two smaller white circles for the eyes and a curvy shape out of the red paper for the wattle.
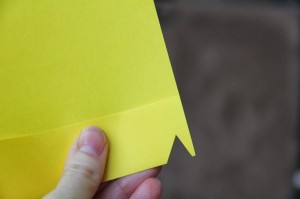
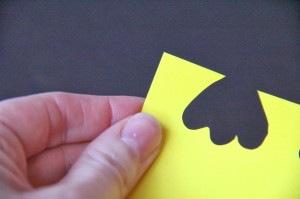
- Then take your sheet of yellow construction paper and create a vertical fold in the sheet of paper.
- Turn the piece of paper horizontally and cut a triangle out of the end that you put the fold in.
- Now you're going to glue all of the pieces to the larger black circle. Grab your glue dots!
- Next, take your whirly pop and glue the turkey face towards the bottom of the pop.
- Take your piece of yellow construction paper again and cut out two feet for the turkey.
Notes
- Secure Assembly with Glue Dots: Use glue dots to attach the various paper pieces to the whirly pop and to each other. This ensures a strong and secure assembly, preventing pieces from falling off easily, especially if the pops are going to be handled by children.
- Customize with Google Eyes: Add character to your turkey pops by using small to medium-sized google eyes. These can bring the turkeys to life and make them more appealing and fun, especially for kids.
- Creativity with Colors: Feel free to experiment with different colors of construction paper for the feathers, wattle, and other parts of the turkey. Encourage creativity and personalization, allowing each turkey pop to be unique and eye-catching.
Leave a Reply