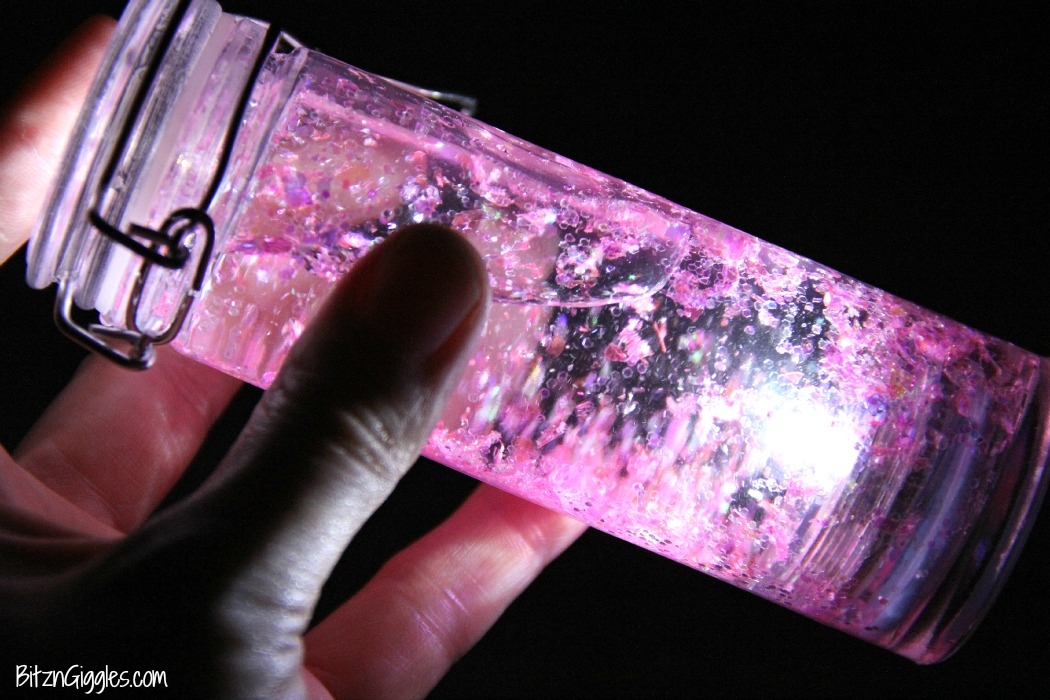
Glowing Fairy Bottle - A beautiful glittery, water-filled jar that illuminates and glows in the dark. A simple craft that mesmerizes both adults and children!
Want to Save This Recipe?
This post includes affiliate links. Please see my disclosure.
What a strange autumn we're having. The leaves turned colors really late this year, October has had temps in the mid-70's. . . yet this weekend, there's a possibility we're going to see some snow. With weather as crazy as this, I don't know how to dress the kids or myself!
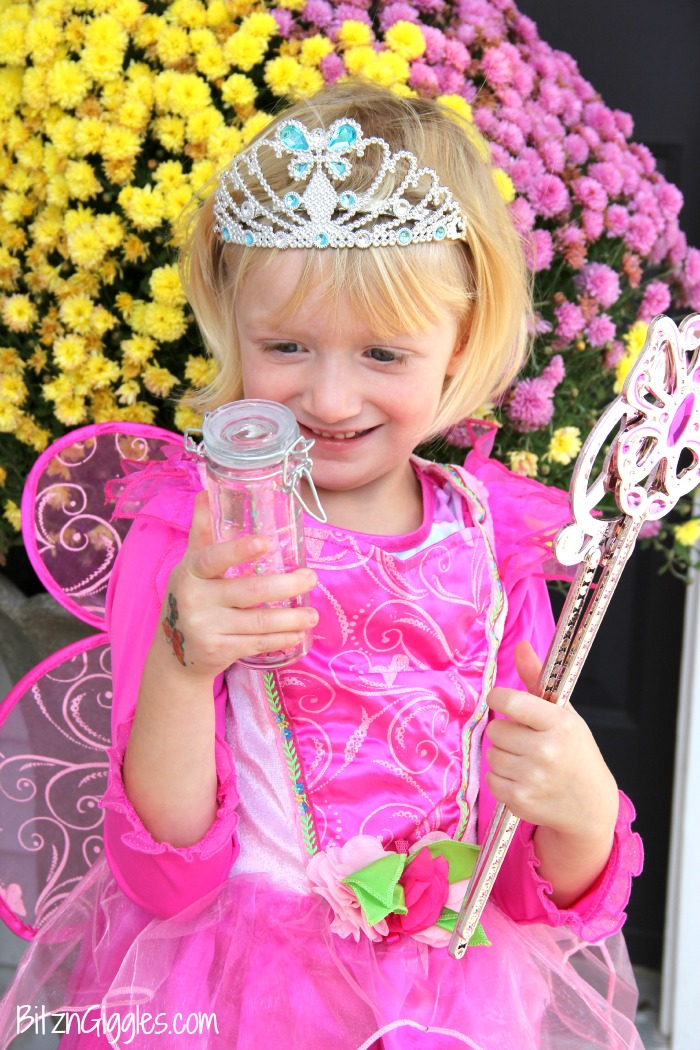
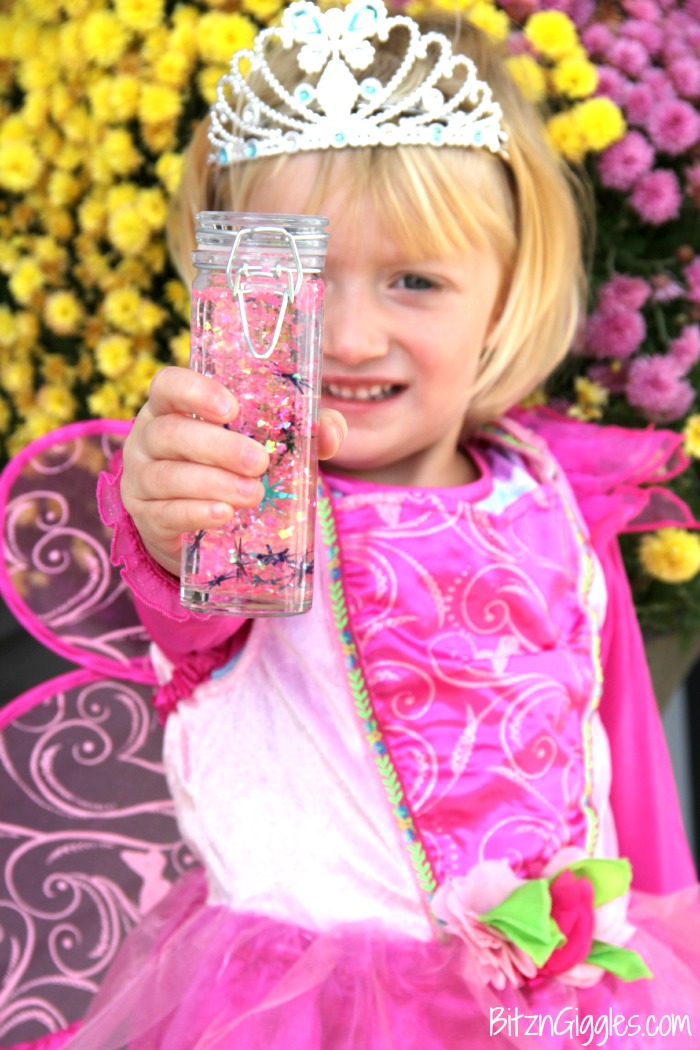
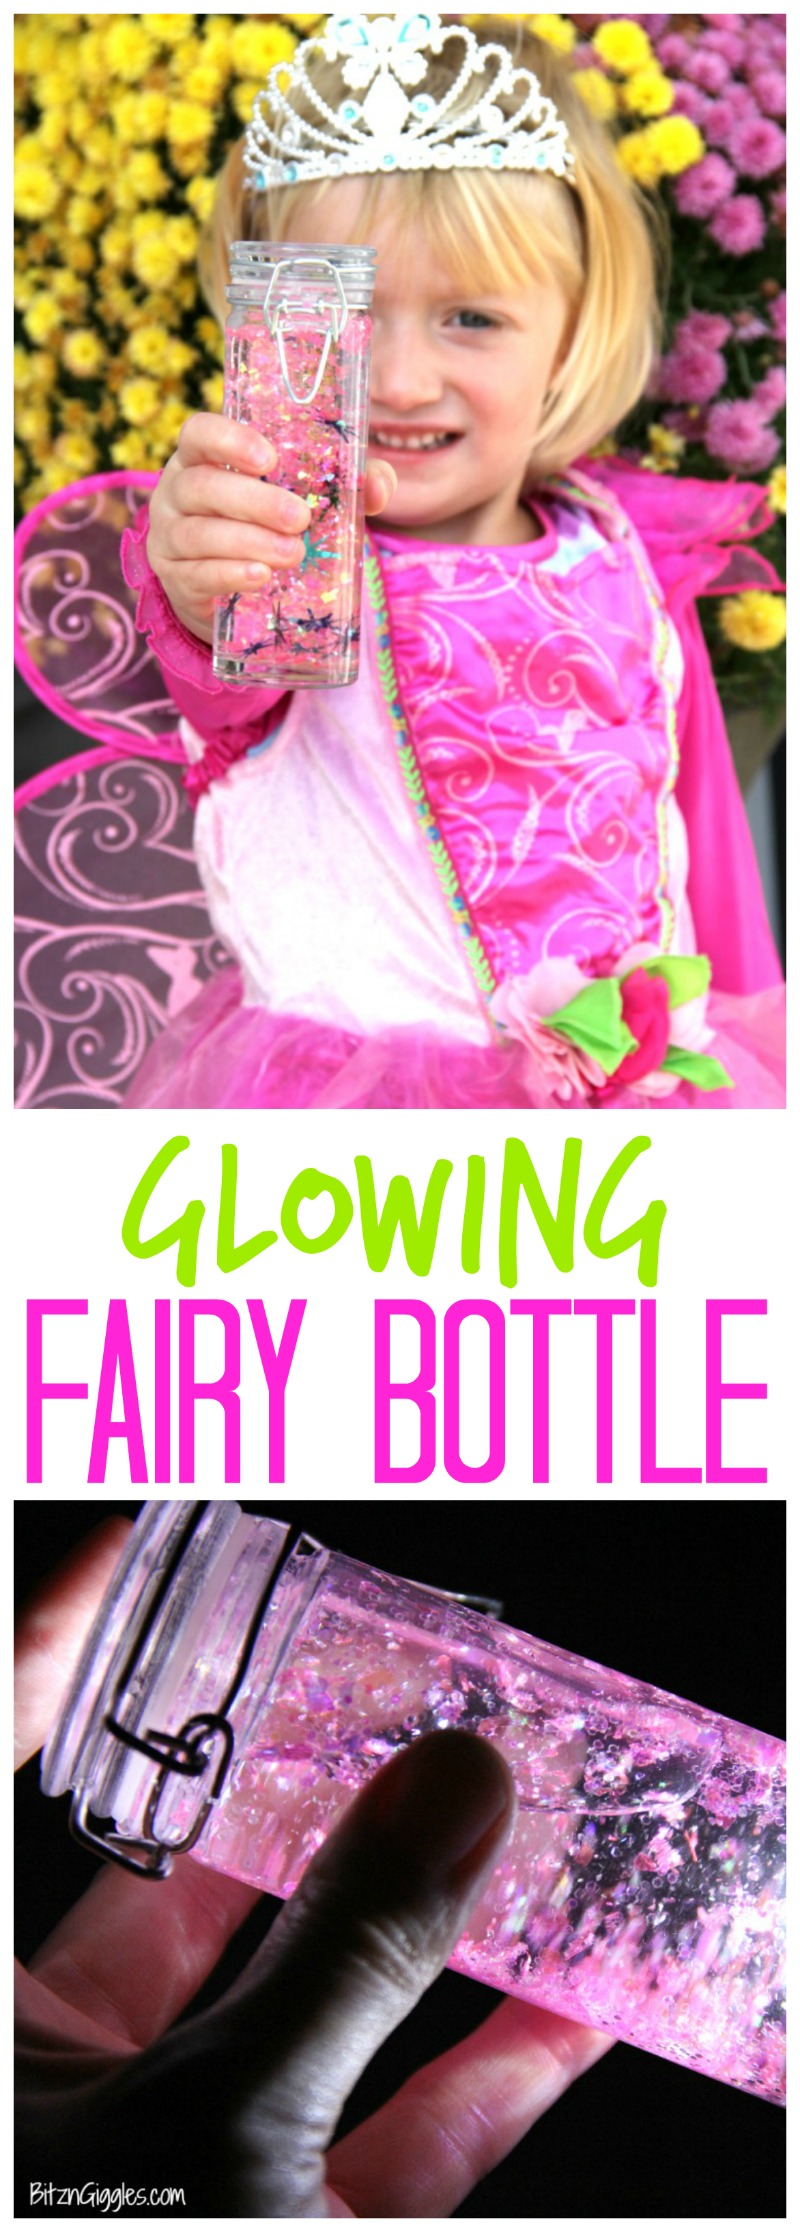
So, this past weekend we decided to ditch the clothes for our Halloween costumes and ran around the house like a bunch of monkeys (okay, so it was just Friday night - not the whole weekend). Cora, our 4-year-old, was loving it because playing dress-up is one of her favorite things EVER right now. One of the costumes she adores at the moment is a fairy costume. Who am I kidding? She loves anything princess-like. The tiaras, the shoes, the bling, the never ending pink upon pink.
To go along with her "at-the-moment-fairy-love," I planned a super fun Glowing Fairy Bottle craft this past week that I knew she would love.

I'm including the list of materials you'll need to make yours below, along with some links on where you can get some of the items if you're curious.
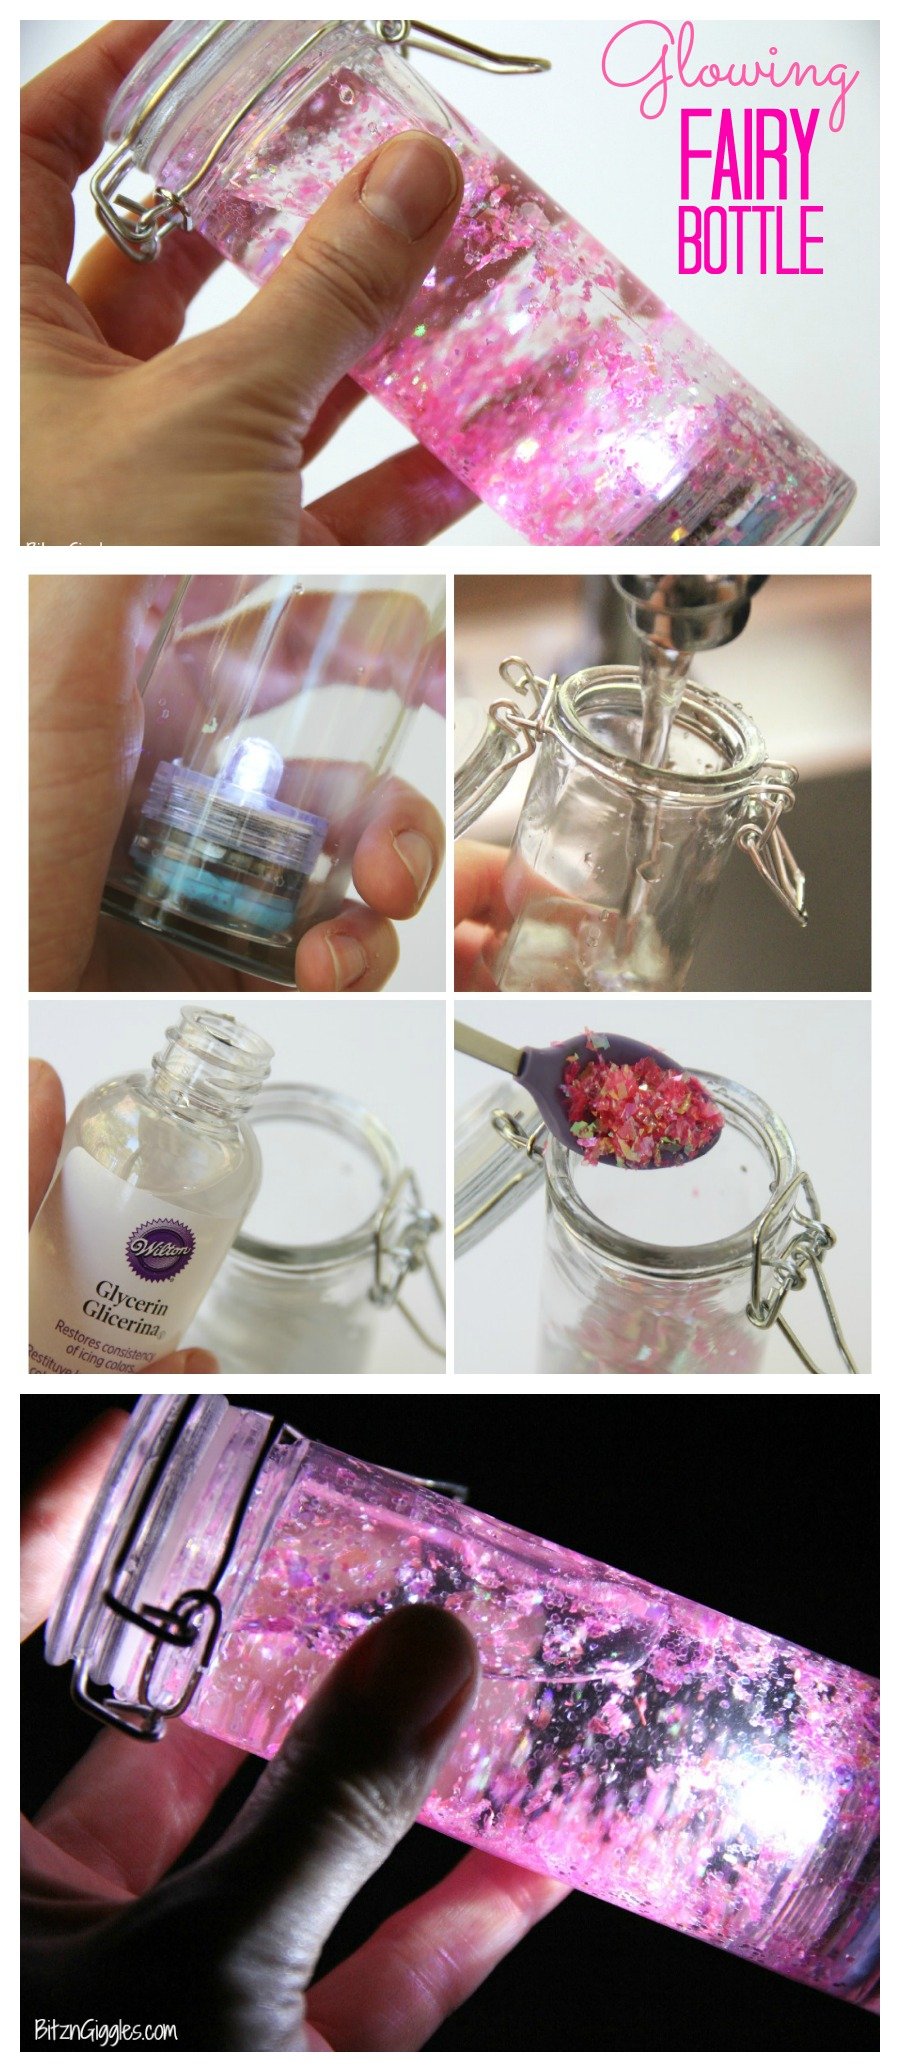
Materials:
- Plastic or glass bottle with sealing lid (I found mine at Hobby Lobby)
- Submersible LED light (light will last up to 60 hours)
- Glycerin
- Mounting putty
- Glitter
- Foil confetti pieces
- Water
Instructions
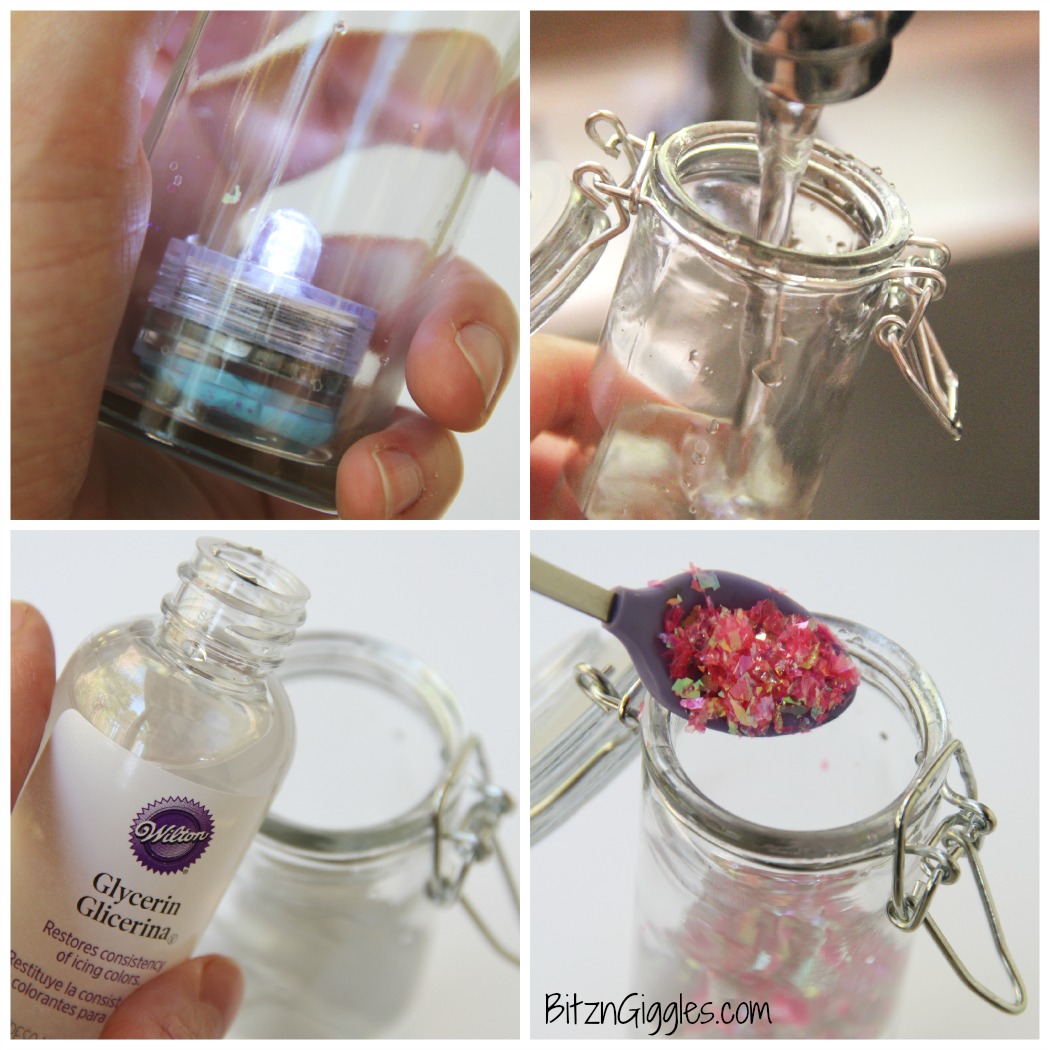
Step 1: Turn on your submersible LED light and stick a piece of putty to the bottom of the light. You'll want to make sure it covers the entire bottom of the light before you adhere it to the bottom of your jar. I used a pencil to apply some pressure to get it to stick well.
A quick note about the LED light. The LED light is not necessary unless you want your fairy bottle to glow. Most LED lights will last up to 60 hours after they are activated which will give your little one plenty days of enjoyment.
Step 2: Fill the bottle about ¾ of the way full with water.
Step 3: Add a few drops of glycerin. The amount of glycerin you add will depend on the size of your bottle. My bottle was about 4 ounces so I added about a tablespoon or so.
The glycerin helps distribute the contents in the jar and prevents the glitter and confetti from settling too quickly. I've also seen recipes that use dish soap or light corn syrup if you don't have any glycerin.
Step 4: Add your glitter and confetti. Fill the rest of the bottle with more water, leaving about ¼ inch room at the top. Screw or place the lid on tightly.
The finer the glitter, the longer the pieces will stay suspended in the liquid. If you use too heavy glitter or confetti, even with the glycerin, you'll find that it will sink to the bottom.
If you are making your bottle just for a one-use type of project, you may want to consider sealing the top of the jar with a waterproof glue so the lid cannot be removed. If you choose not to glue the lid so you can reuse the bottle again (like we did) just make sure your child is supervised when handling the jar in case any leaking occurs. We didn't have any problems with ours.
Step 5: Shake and watch the magic begin!
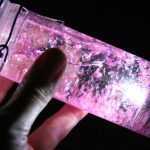
These fairy bottles are so much fun and they're mesmerizing to kids especially when observed in the dark. They can be fun little nightlights that will make going to bed so much more fun!
Glowing Fairy Bottle
Materials
- Plastic or glass bottle with sealing lid
- Submersible LED light (light will last up to 60 hours)
- Glycerin
- Mounting putty
- Glitter
- Foil confetti pieces
- Water
Instructions
- Turn on your submersible LED light and stick a piece of putty to the bottom of the light. You'll want to make sure it covers the entire bottom of the light before you adhere it to the bottom of your jar. I used a pencil to apply some pressure to get it to stick well.
- Fill the bottle about ¾ of the way full with water.
- Add a few drops of glycerin. The amount of glycerin you add will depend on the size of your bottle. My bottle was about 4 ounces so I added about a tablespoon or so.
- Add your glitter and confetti. Fill the rest of the bottle with more water, leaving about ¼ inch room at the top. Screw or place the lid on tightly.
- Shake and watch the magic begin!
Notes
- Choose the Right Bottle: Select a plastic or glass bottle with a sealing lid that is sturdy and transparent. The size of the bottle can vary depending on your preference, but a smaller bottle, around 4-8 ounces, works well for creating an enchanting fairy effect. Ensure the lid seals tightly to prevent any leaks or spills once the fairy bottle is assembled. Additionally, consider using a clear bottle to maximize the visibility of the glowing LED light and the glittery contents inside.
- Experiment with Glitter and Confetti: Get creative with the glitter and confetti you add to your fairy bottle. Mix and match different colors, shapes, and sizes to create a magical and whimsical effect. Fine glitter works best for creating a subtle sparkle, while larger foil confetti pieces add depth and dimension to the bottle. Consider using glow-in-the-dark or iridescent glitter for an extra enchanting touch that glows alongside the LED light.
- Adjust Glycerin for Desired Effect: Glycerin helps the glitter and confetti float and swirl gracefully inside the fairy bottle. The amount of glycerin you add can affect the movement and longevity of the glittery display. Start with a small amount, such as a tablespoon, and adjust as needed based on the size of your bottle and the desired effect. Too much glycerin can cause the glitter and confetti to clump together, while too little may result in them sinking too quickly. Experiment with different amounts until you achieve the perfect balance for a mesmerizing and magical display.
Debbi
It looks like you may have used plastic confetti in this bottle. Does the plastic glitter or confetti last long in something like this or is foil better? Can you use nail glitter or must it be craft glitter?
Sara
I think either type of confetti would be fine. As far as glitter, I would use craft glitter. Good luck, Debbi!
Deb
Love this. This is a must try. Thank you
lexicoleyy
how do you make it
Sara
Just take a look at the post. All instructions are provided!
CHRISTY
Melissa I was just wondering if the LED Light in the Glowing Fairy Bottle Be Changed out when it goes dead or do you have to start over it is Very Pretty and Cool my Daughter is an adult with special needs and she thinks it's so Cool.
Thanks for SHARING YOUR BEAUTIFUL DIY CRAFT IDEA PLEASE let me know of any other Ideas U Have my Kids are Autistic and mentally Challenged I have 4 so these DIY CRAFTS R Perfect.
CHRISTY
Sara
Hi Christy! Instead of placing the light in the bottom of the bottle as I suggested in my instructions, you could always place it in the cap of the bottle as well so it's easier to switch out without having to empty out the bottle. Good luck and I hope this works out for you and your daughter!
~Sara