
Want to Save This Recipe?
The countdown to Easter has begun and it's now less than a week away! Today I'm sharing the next super easy and super cute project I promised in my egg decorating series. I hope you all enjoyed my Crystal Eggs from last week! My life (and I'm sure yours, too) is BUSY! If I could continuously change the décor in my home to fit every season and holiday I would, but sometimes (most of the time) that's just not possible - so I need to rely on simple crafts and quick projects to help make my house a home.
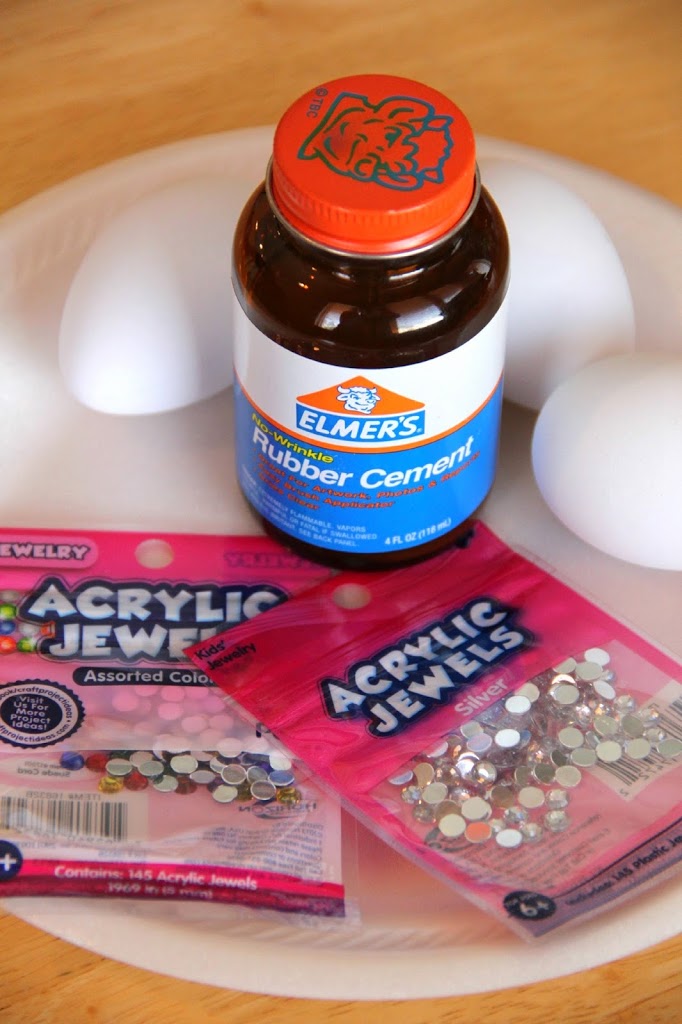
I also love BLING and that's why it was so much fun putting together these simple Jeweled Eggs. You'll need:
Materials:
- Plastic eggs (I found mine at Walmart)
- Acrylic jewels
- Rubber cement or clear Elmer's glue
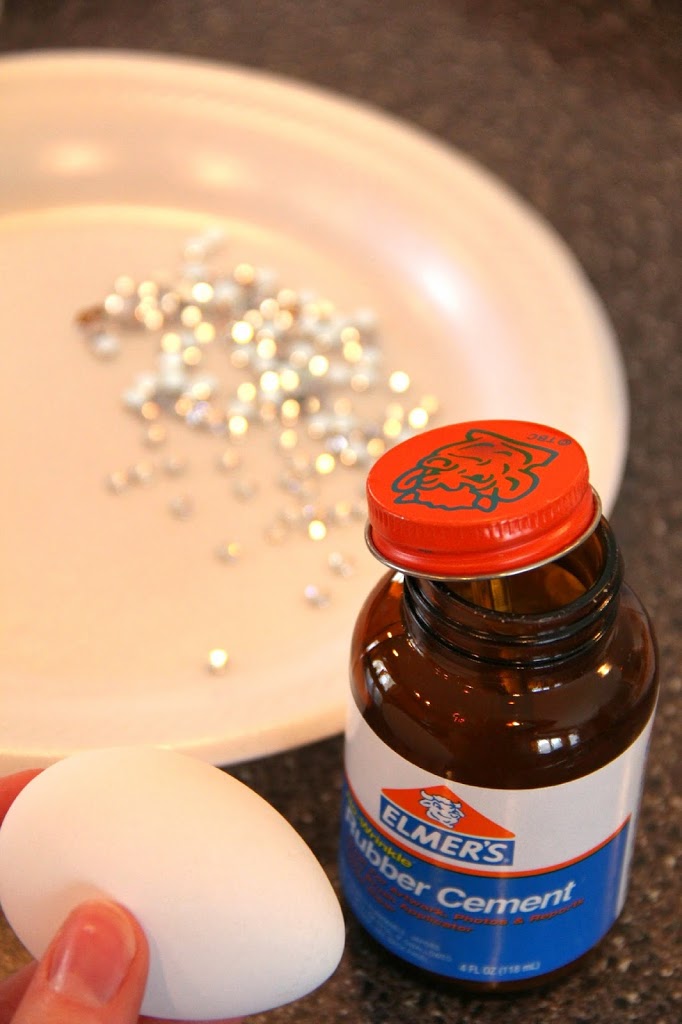
I ended up making a few of these eggs, and when I started out, I took a photo showcasing the rubber cement. I thought it would be a bit more forgiving if I needed a little more time positioning the jewels, etc. Well, after I made the first egg, I made the switch to the clear glue. It dried more transparent and actually a little slower than the rubber cement did.
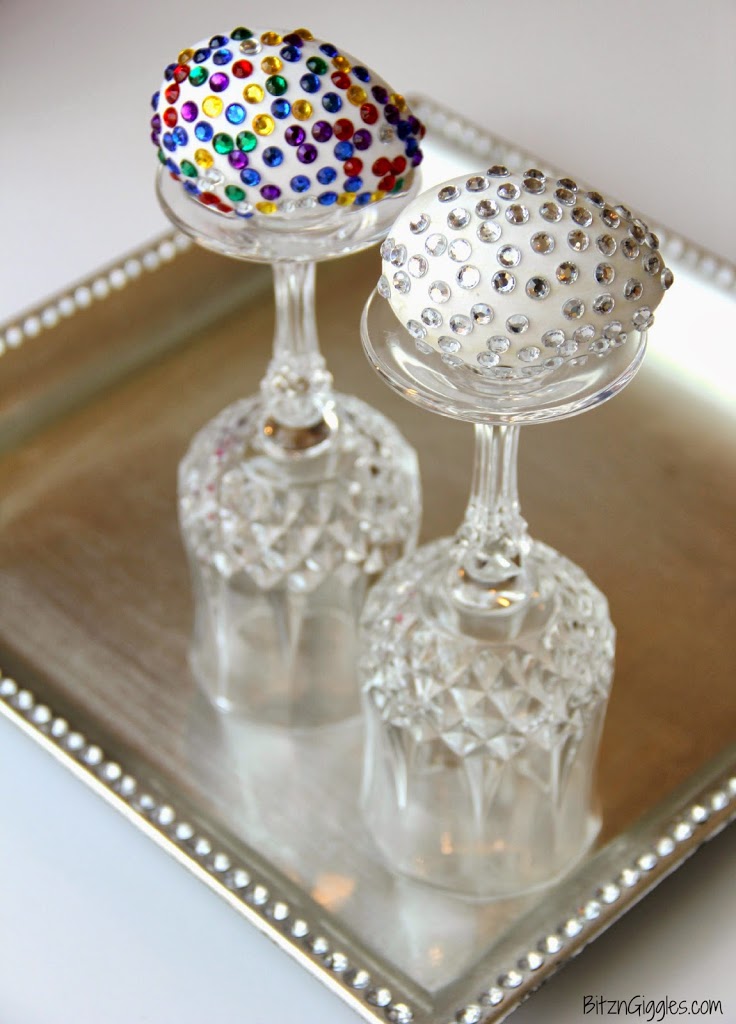
A small bowl of these eggs would be a great addition to an Easter centerpiece. If you want to go all out, and have enough jewels to work with, go ahead and cover the entire egg leaving no white space. If you need to incorporate a little sparkle and bling into your Easter celebration, consider creating a few of these eggs! So fast, so easy, and they look great - especially when you place several together!

Jeweled Eggs
Materials
- Plastic eggs
- Acrylic jewels
- Rubber cement or clear Elmer's glue
Instructions
- I got out a paper plate and dumped the jewels onto it. I carefully turned each jewel upside down so I could quickly grab each one and get it onto the egg (the right way) even with sticky hands.on
- Because I'm too impatient to use a paint brush to put the glue on, I squirted some onto the paper plate and started rolling the egg in the glue
- I took my pointer finger and picked up the jewels, sometimes two or three at a time to get them onto the egg.
- I positioned them better after I placed them onto the egg. I made some silver eggs and some multicolored. Personally, I think I liked the silver the best.
- If you want to go all out, and have enough jewels to work with, go ahead and cover the entire egg leaving no white space.
Notes
- Prepare Your Workspace: Lay out all your acrylic jewels on a paper plate or a flat surface where they won't roll away. This makes it easier to pick them up quickly and efficiently during the decorating process. Additionally, consider working on a protected surface to catch any excess glue.
- Efficient Gluing Technique: If you're too impatient to use a paintbrush, squirting glue onto a paper plate and rolling the egg in it can be a faster alternative. This method allows for quick and even coverage of glue on the egg's surface, facilitating a smoother application of jewels.
- Optimize Jewel Placement: After placing the jewels onto the egg, take a moment to adjust their positions for optimal aesthetics. Using your pointer finger, you can easily reposition the jewels to create a balanced and visually pleasing design. Experiment with different jewelry arrangements to achieve your desired look, whether it's a uniform pattern or a more eclectic style.
Ashley @ 3 Little Greenwoods
Oh... anything blinged up is fantastic! Love this project!
Thank you so much for sharing your creativity with us at Show-Licious Craft & Recipe Party! Join us again on Saturday morning at 8:00 am EST!
~ Ashley
Sara
I'll do that Ashley! Thanks so much for stopping by!
Dee
These are so adorable, and I'm really loving the bling! Happy Easter! 🙂