Ninja Foodi Roast Chicken - Deliciously moist chicken that's flavorful and crispy on the outside! So easy to make in your Ninja Foodi in no time at all!

Want to Save This Recipe?
This post includes affiliate links. Please see my disclosure.
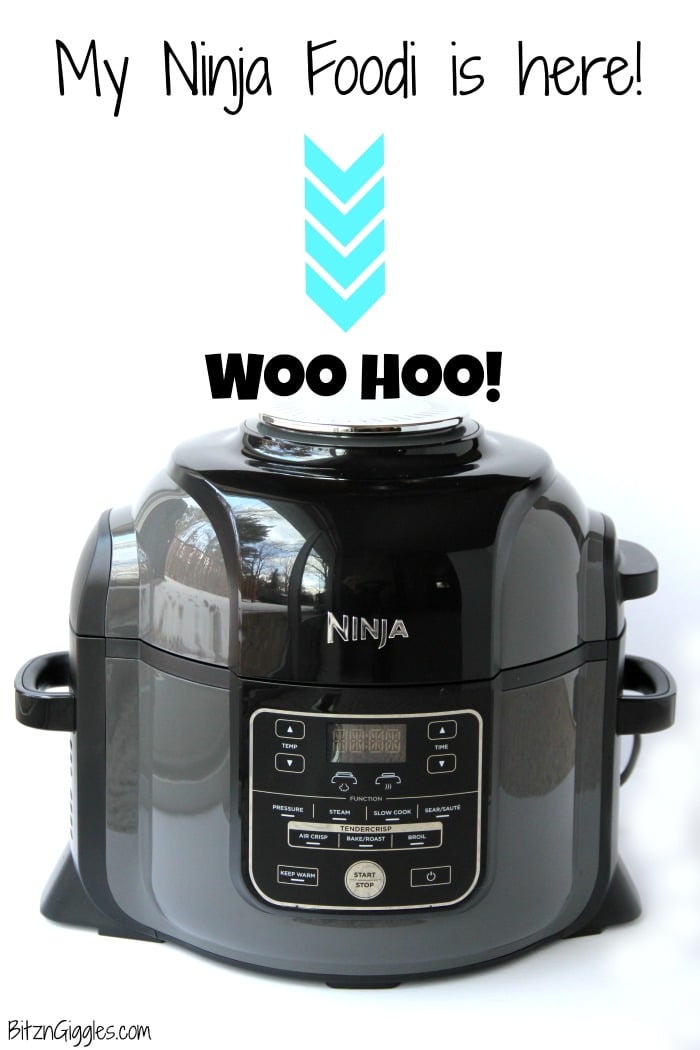
So, I'm pretty excited about today's post because I get to show you all my newest cooking appliance - the Ninja Foodi! I first heard about the Ninja Foodi in one of my recipe groups.
Everyone was going crazy over this thing and promised that it will replace almost every other "cooking" appliance you own. Why?
WHAT'S A NINJA FOODI?
Well, it's a slow cooker, pressure cooker, steamer, air fryer, dehydrator (some models) and can bake, roast and broil too. All. In. One. I never bought an Instant Pot because an Instant Pot can't crisp up food - it reminded me too much of just a slow cooker (but it was a faster cooker?).
The Ninja Foodi can be used for all air fryer and Instant Pot recipes as well, so technically, if I really want to go down the Instant Pot recipe road, I'm able to with the Ninja Foodi.
I did a ton of research on this thing before I purchased the Ninja Foodi- and purchasing it - was a challenge in itself. Every store out there is sold out of these babies. I went to Target and tried to buy the floor model, but the associate told me it was just the shell and there was no cooking unit actually in it?
Right before the New Year my friend actually found some in stock at Walmart and sent me the link. I ordered one up right away and hoped that I wouldn't receive an out-of-stock email right after I placed my order.
I didn't. It has arrived!
If you're also a new Ninja Foodi owner, I invite you to join my new Facebook group called Ninja Foodi Easy Recipes, where we all can gather, share new recipes and talk about our Ninja Foodis and Air Fryers.
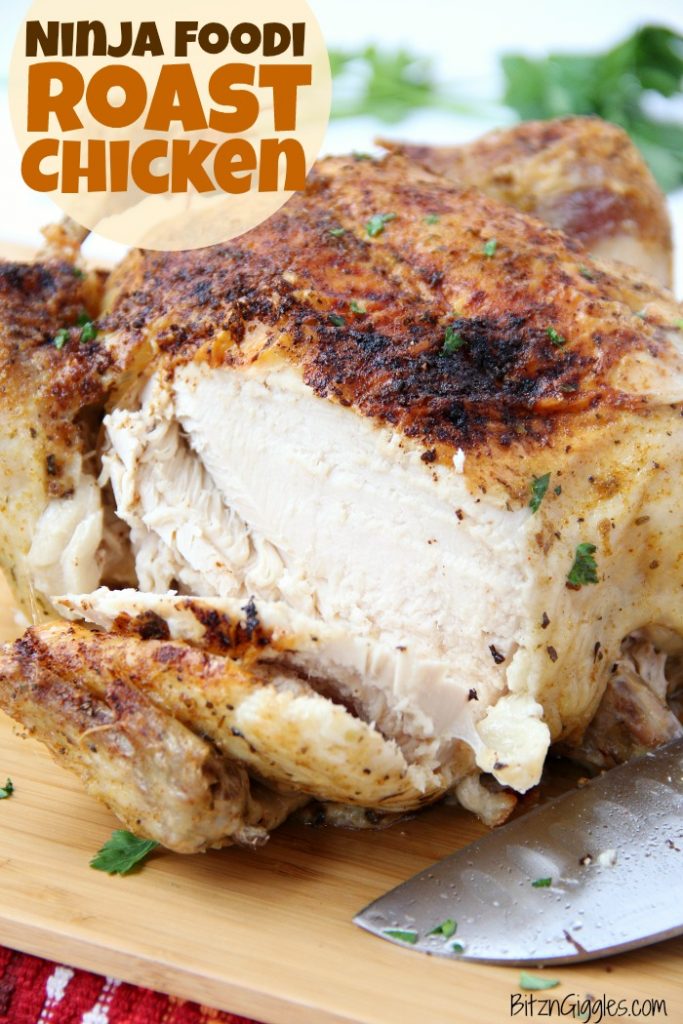
Today I'm sharing a recipe for Ninja Foodi Roast Chicken. It's my first recipe in the Ninja Foodi and it turned out great - even better then my local grocery store's rotisserie chicken.
Unlike an Instant Pot that just "pressure cooks" a chicken, the Ninja Foodi pressure cooks it AND crisps it up. Win-win.
STEP-BY-STEP INSTRUCTIONS FOR PREPARING NINJA FOODI ROAST CHICKEN
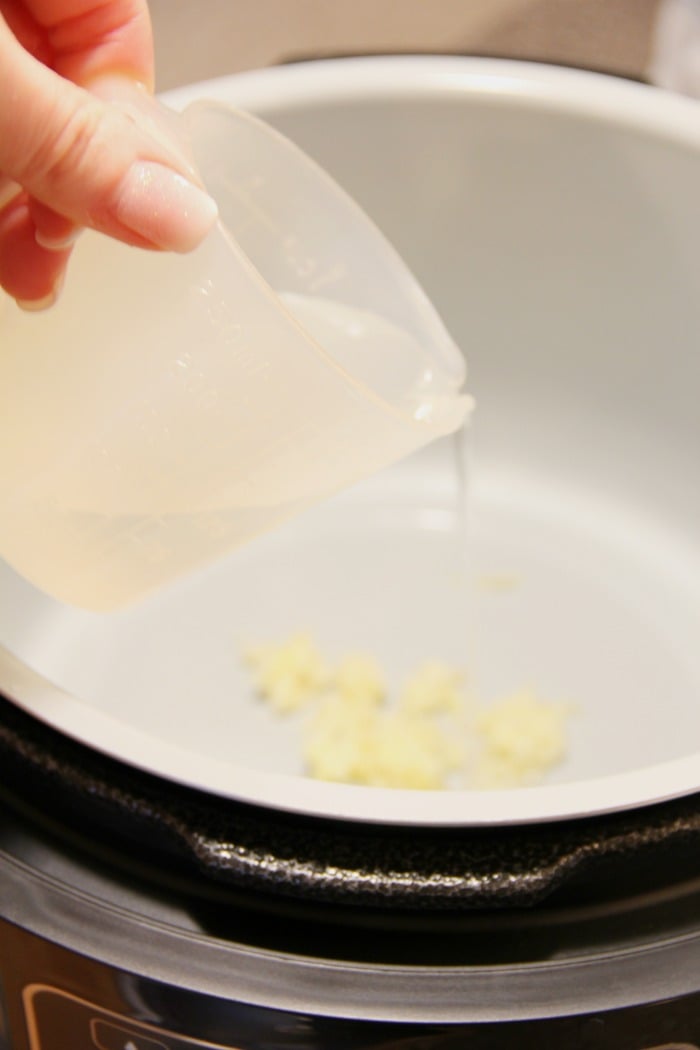
The first step to your flavorful golden bird is adding some liquid to the pot. I added ¾ cup hot water and some cloves of garlic.
If you'd like, you could add some chicken broth in place of the water.
Then I seasoned the chicken with my favorite poultry seasoning, which is this homemade dry rub, and placed it in what's called the Cook & Crisp basket (or air fryer basket).
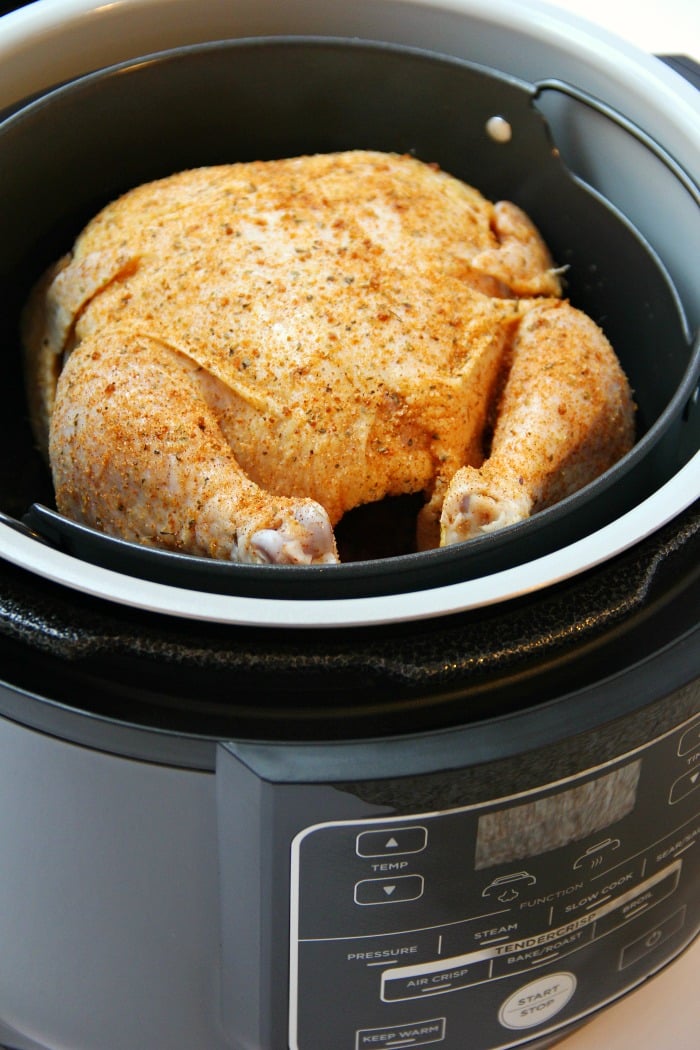
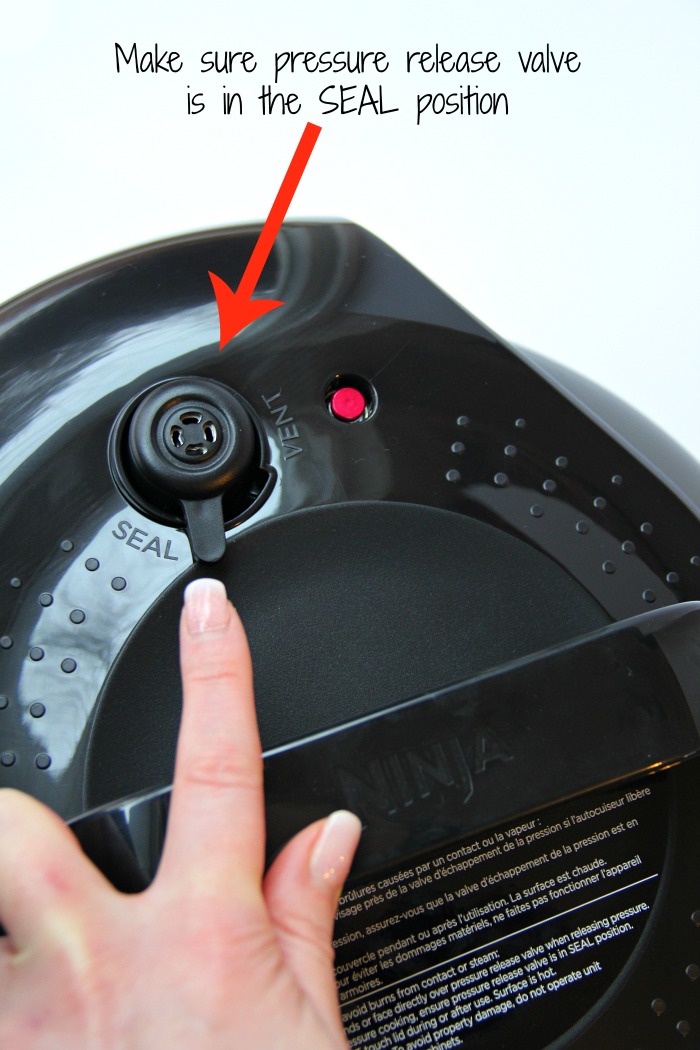
The first step is pressure cooking. You want to pressure cook the chicken for 21 minutes. Once you have the pressure lid on, you'll want to ensure that the pressure release valve is in the SEAL position.
After 21 minutes, I just did a "natural release" for about 15 minutes.
WHAT'S THE DIFFERENCE BETWEEN A NATURAL & QUICK RELEASE?
A natural release means you don't move the pressure release valve at all. You just let it sit to release naturally.
A quick release is when you would switch the pressure release valve from SEAL to VENT manually.
I've read quite a few comments from users of the Ninja Foodi that said they never use quick release with meat because it toughens it.
After more experimentation, I'll find out if that's true or not. For my first time using the machine, I didn't want to ruin my beautiful chicken so I did a "natural" release.
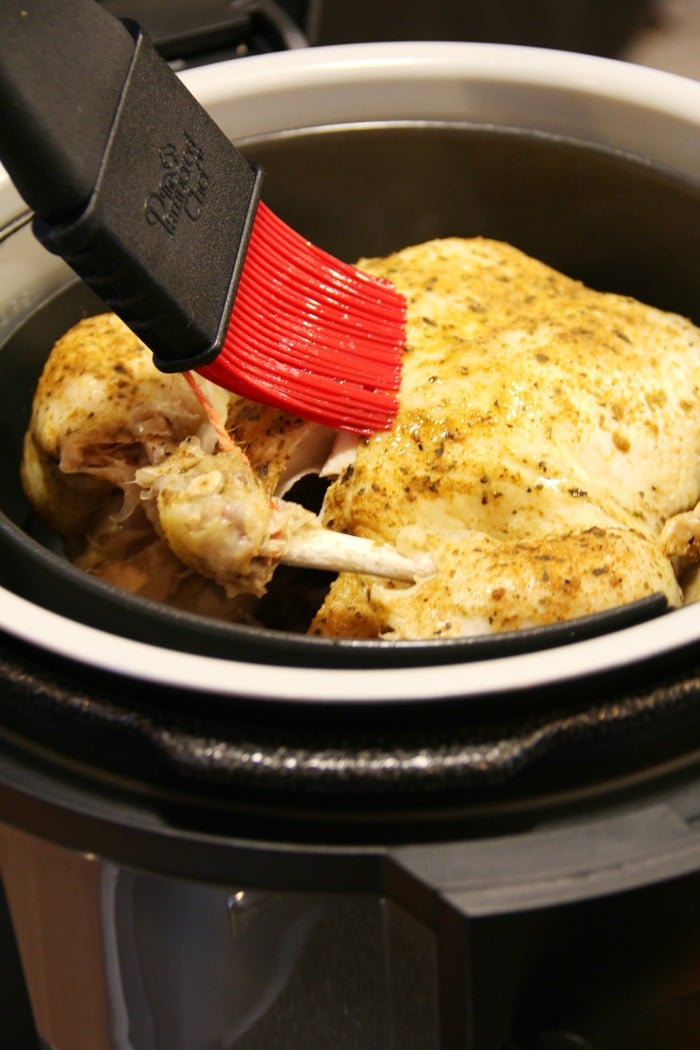
After the natural release, I did a quick release but it wasn't needed. All of the pressure had already released. I removed the pressure lid and brushed the chicken with butter and sprinkled a little more seasoning on.
I also ended up tying up the legs at this point with some twine. This step isn't necessary. I just thought it may look nicer for photos once the chicken was done.
I closed the air fryer lid - AKA crisping lid (the crisping lid is permanently attached to the Ninja Foodi) and set it on AIR CRISP for 20 more minutes.
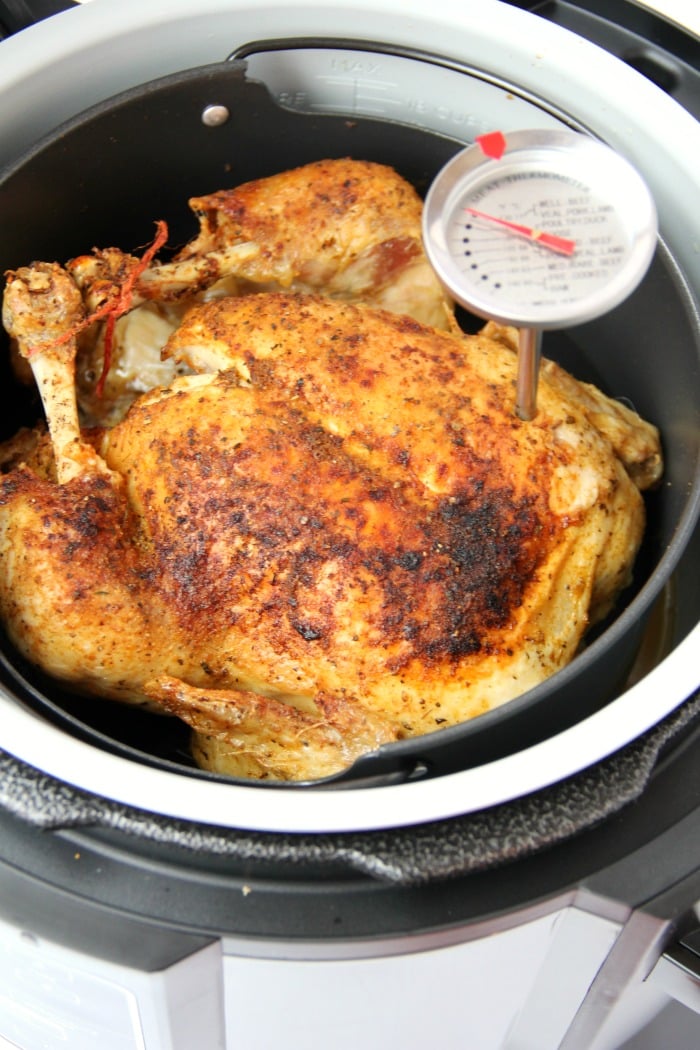
Make sure to check the temperature of the chicken a few times while it's in Air Crisp mode. Depending on the size of the chicken, it may not need to go the full 20 minutes.
Just make sure the internal temperature of the chicken reaches 165º Fahrenheit.
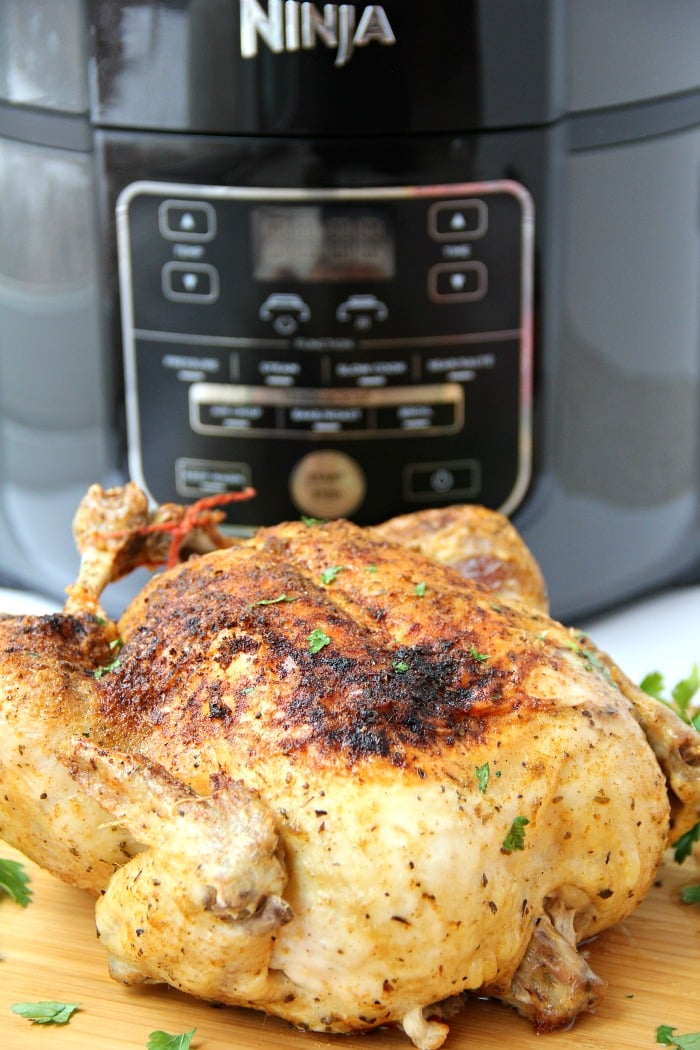
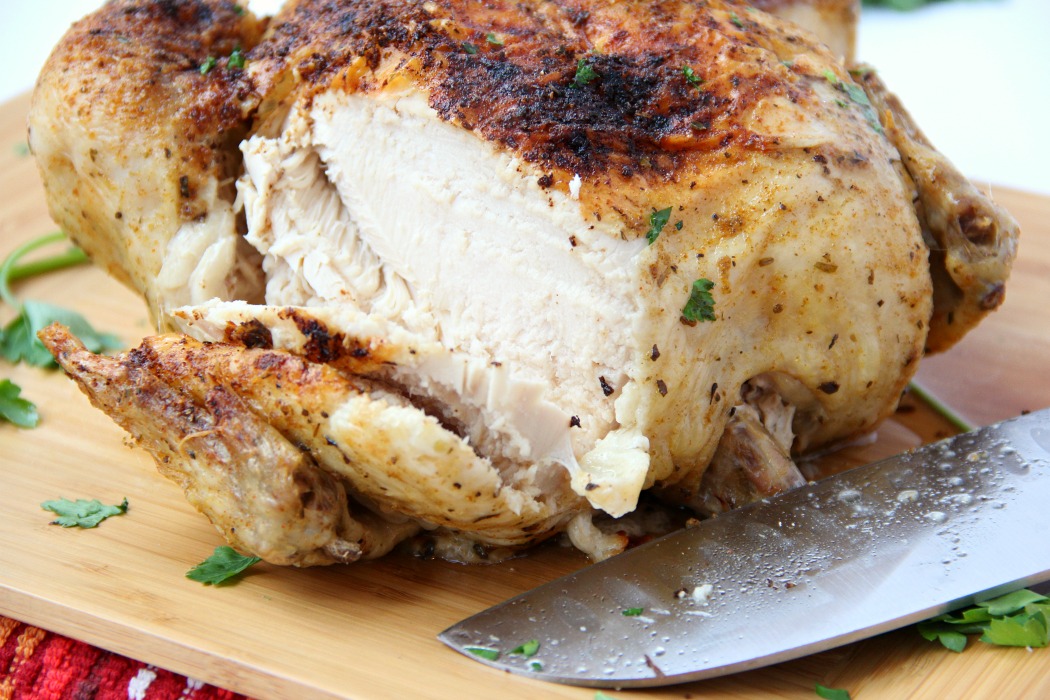
I couldn't wait to cut into it.
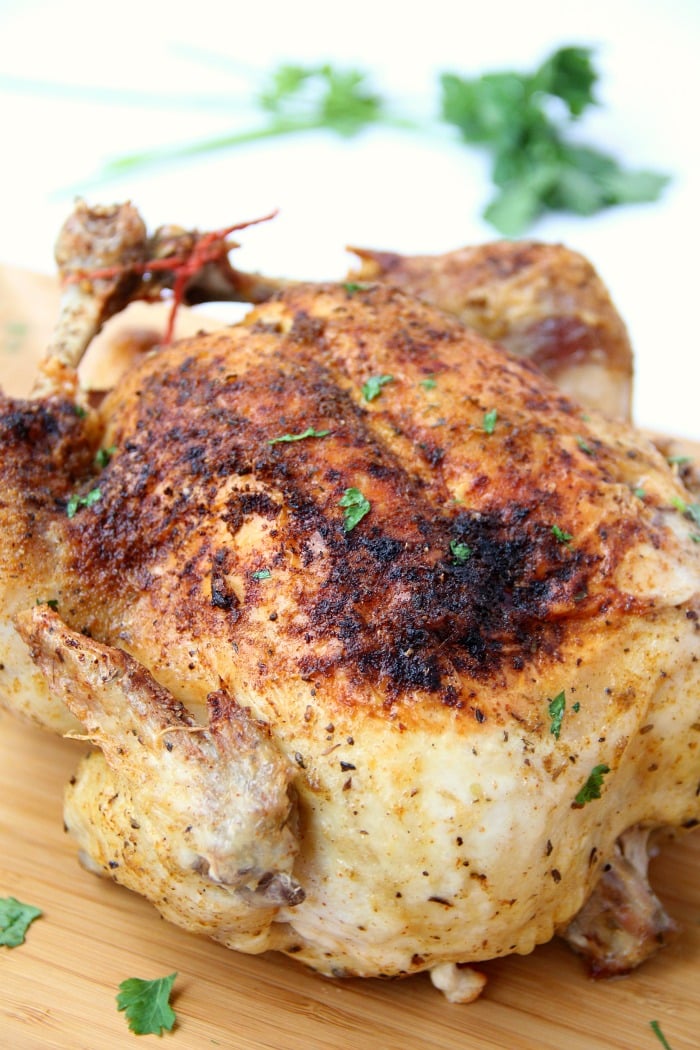
It was golden brown and crispy on the outside, but how did the inside look?
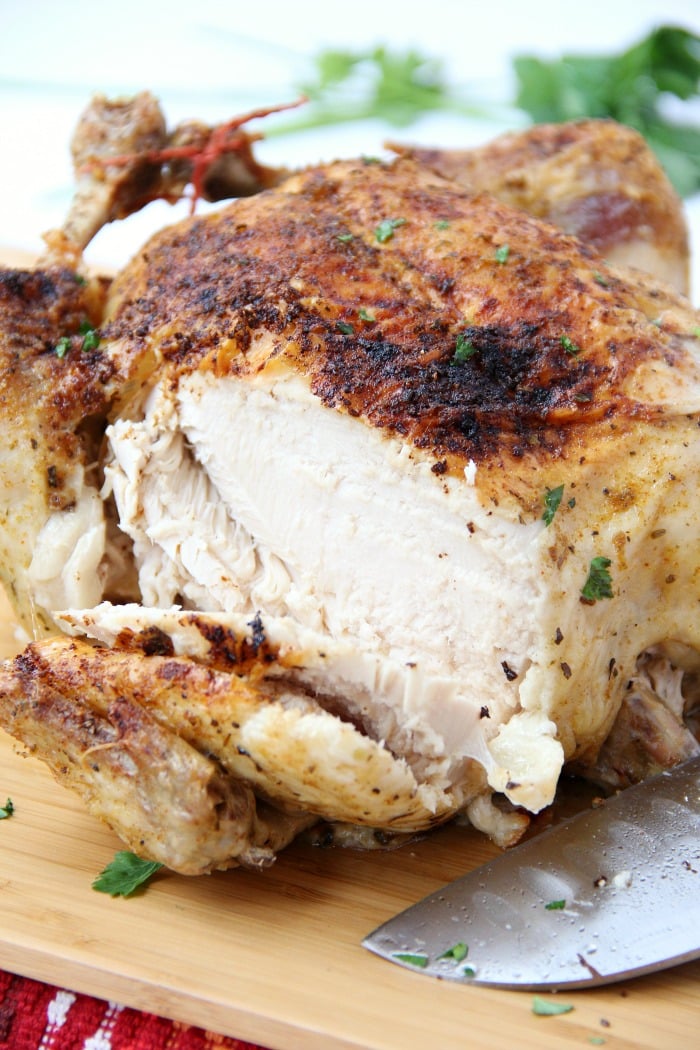
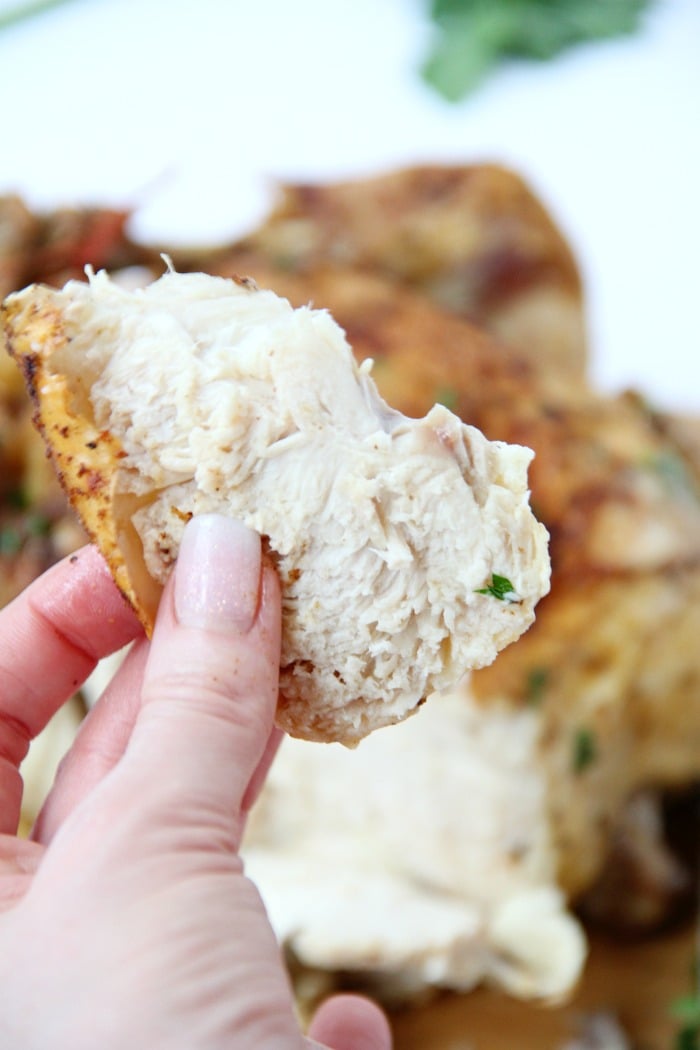
Moist and delicious! Yay!
I felt like the results of my Ninja Foodi Roast Chicken were pretty similar to my Air Fryer Roast Chicken.
I suppose you want to know if I got rid of my air fryer. Absolutely not.
While I really love all of the features of the Ninja Foodi, the Cook & Crisp basket for the Foodi is not as large as my air fryer basket. When I truly want to "air fry," my air fryer will still be my "go-to" appliance.

But for the first run, the Ninja Foodi didn't let me down. I'll be experimenting more with my Foodi in the next few weeks so keep an eye out for more recipes and learnings as we go along.
Join Our FB Group for Ninja Foodi Fans!
And remember, if YOU are a Ninja Foodi owner, join me over in the Facebook group! I'd love to have you!
Ninja Foodi Roast Chicken Recipe
Ingredients
- 3 - 4 pound whole chicken
- 5 cloves garlic (peeled and crushed)
- ¾ cup hot water
- Ingredients for dry rub recipe or your own seasonings
- 2 tablespoons butter (melted)
- Parsley for garnish (optional)
Instructions
- Clean chicken and pat dry. Set aside.
- Place garlic and water in Ninja Foodi pot.
- Sprinkle chicken generously with dry rub or own seasonings. Make sure to season the inside of chicken as well as under skin.
- Set Cook & Crisp Basket in pot and place chicken in basket breast side up.
- Assemble pressure lid, making sure the pressure release valve is in the SEAL position.
- Select PRESSURE and set to high for 23 minutes.
- When pressure cooking is complete, allow to natural release for 15 minutes. Carefully remove lid when pressure has been released.
- Brush chicken with melted butter and lightly sprinkle with a bit more seasoning.
- Close the crisping lid and AIR CRISP at 400º Fahrenheit for 20 minutes.
- Let chicken rest for 5-10 minutes and ensure its internal temperature reaches 165 degrees Fahrenheit.
Notes
- Proper Seasoning: Seasoning the chicken generously with your favorite dry rub or seasonings is key to imparting flavor throughout the meat. Don't forget to season both the exterior and interior of the chicken for a well-balanced taste.
- Moisture Enhancement: Placing crushed garlic cloves and hot water in the Ninja Foodi pot helps infuse the chicken with moisture and flavor during the pressure cooking process. This step contributes to juicy and succulent meat.
- Crispy Finish: To achieve a crispy and golden-brown exterior, brushing the chicken with melted butter before air-frying is crucial. This step not only adds richness but also aids in achieving that desired crispiness. Additionally, ensuring the chicken reaches an internal temperature of 165 degrees Fahrenheit guarantees it's fully cooked and safe to eat.
Wayne Morris
My Ninja will easily hold a 7# whole chicken or at least that is the biggest I have tried. So many different ways to cook one, all good. About the same for a 7# turkey breast, that I browned and it looked and tasted awesome. Yes I pressure cooked it before browning. I have cooked cornbread, pork roast, pulled pork, rice, pasta, black beans, soups, baked potatoes, reheated rice, mashed potatoes and more. A 4 cup glass measuring pitcher will fit inside to reheat with pressure-3 minutes.
Autumn
Timing too long. Chicken was dry.
Sara
Hi Autumn, I'm so sorry that your chicken turned out dry. That could have happened because you air crisped it too long. In the first few minutes into air crisping you should always take the temperature of the chicken. Chances are yours was ready to remove. All machines are different so experimenting is really important when cooking something the first time. I hope you try again. I promise you, I have made this chicken over and over again and it is always flavorful and juicy!
John
The natural release for meat is so it doesn't suck all the juices out of it. But all the recipes for a whole chicken always say quick release, so after a little bit of research apparently it doesn't matter for chicken? I'm going to have to try them both and see