Want to Save This Recipe?
Has a piece of clothing ever inspired you to bake? No?
I can't imagine why not {giggle}.
Nothing like that ever happened to me either until just the other day. I purchased a pretty awesome ombre shirt a few weeks ago that I absolutely love. I've worn it about three times already. So, to let you in on a little secret, I'm pretty much in love with ombre anything. Is ombre still in? It is, right?
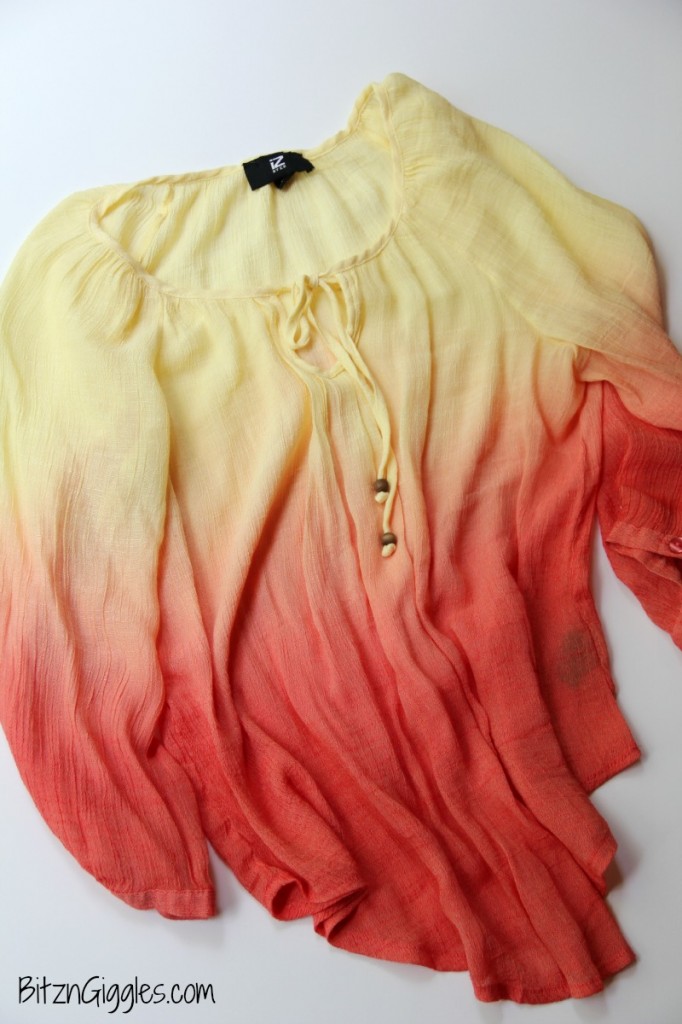
When I got the idea to make ombre cupcakes, I was wearing my shirt - and that's the first question I asked myself. Then I thought, well, if I just purchased this shirt a couple weeks ago, then of course, ombre must still be "in." At this point, I guess it doesn't matter if it's in or out. To me, variations of the same color fading from dark to light is the coolest thing ever. I'm not going to lie, my idea didn't work out so well the first time. My creation turned into more of a tie-dye effect. Still pretty, but not exactly what I was looking for. I studied my cupcakes while my son, Dane, watched me.
Dane: "Mom, why are you looking at those cupcakes?"
Me: "I screwed them up, Honey."
Dane: "Hmmm, well can I eat one?"
Me: "Sure."
Dane: "Why aren't these frosted yet?"
There was silence. He sat there eating his unfrosted cupcake while I peered into the inside of it. Ahhh Ha! I knew what I had done wrong.
Me: "I got it. I know what I'm going to do next time around."
Dane: "Frost them?"
Oh, my children. How I love them so. You bet I frosted the next batch because they DID turn out! And here's the method that I used:
Evenly divide your cake batter into three separate bowls. Got that part? Easy peasy.
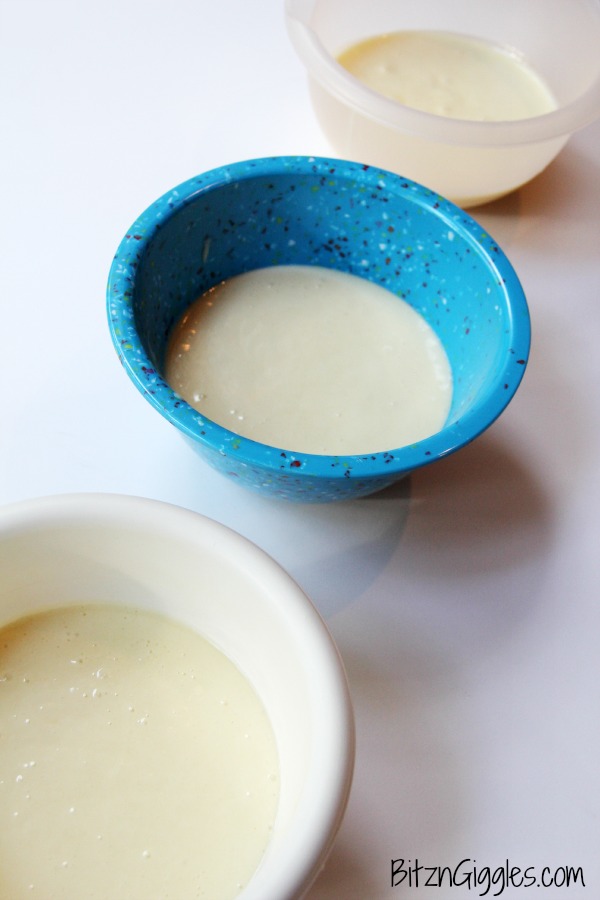
Here's where you run and get some food coloring. I used blue because it's my favorite color AND I thought it would be the perfect touch to the special cupcakes I was making. Here's how you'll want to add the food coloring:
- Add 1-2 drops in the first bowl to make the lightest batter
- Add 3-4 drops in the second bowl
- And Add 5-7 drops in the third bowl to make the darkest batter
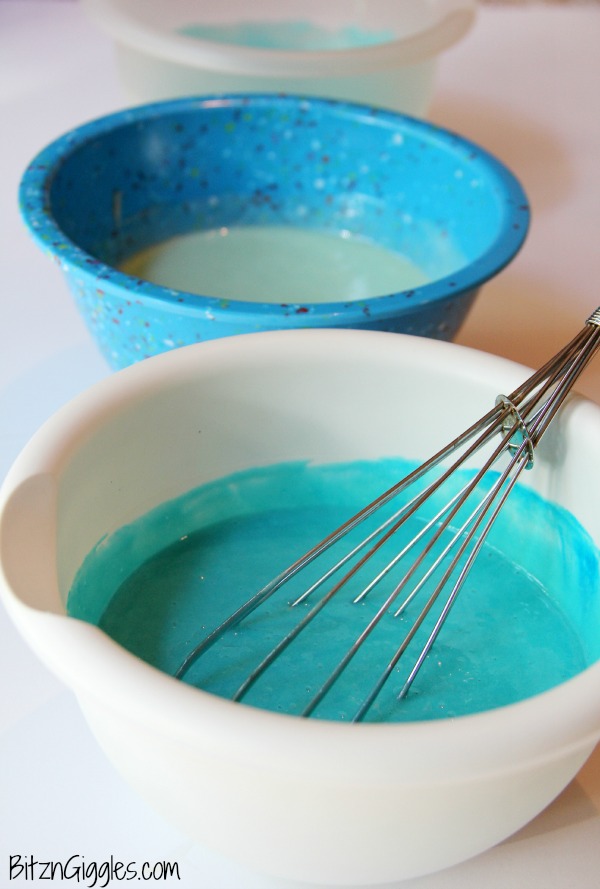
Once you have the colors whisked together in each of the bowls, get your cupcake pan ready. Once you have the liners in and you've sprayed them with nonstick baking spray, start adding the batter, one color at a time. Start with your darkest color batter for the bottom of the cupcake. Scoop about 1 tablespoon of the dark batter into each of the liners.
HERE'S THE SECRET. . .after each layer, use the back side of your spoon to smooth out the batter layer, making sure to spread the layer all the way to the edges of the liner. Do that for each layer working your way from dark to light. If you DON'T do the spoon step you'll end up with more of the tie-dye effect I was talking about.
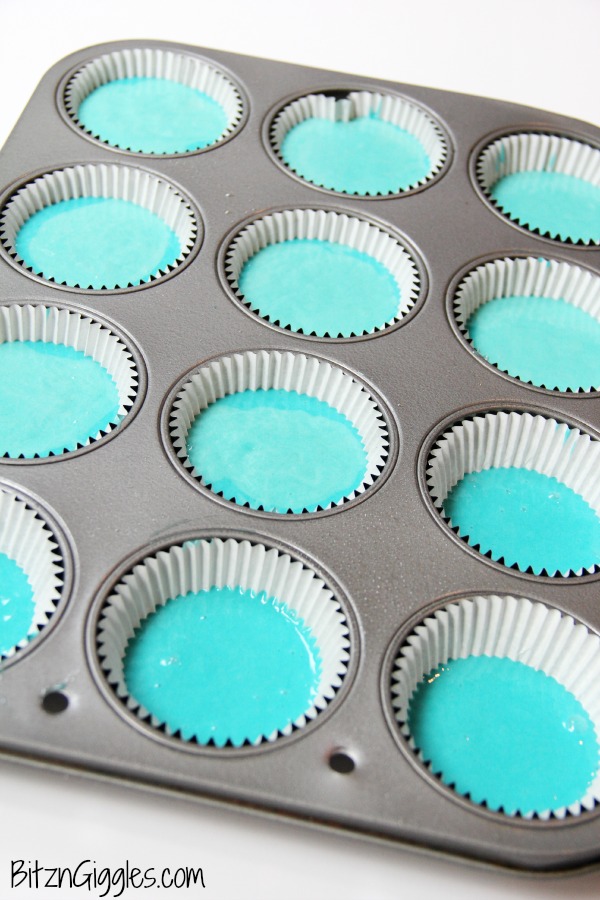
In the above photo, the liners closest to the bottom of the photo have just the dark layer, and as you move to the top of the photo, you'll see that I added the middle layer at this step. Be careful how much batter you add. The liners should be about ⅔ full.
In the cupcakes I screwed up, I put too much batter in the cups for the first two layers and didn't have enough room for the lightest layer - but I pushed it, and ended up with honkin' big cupcakes that looked a bit like they had exploded.
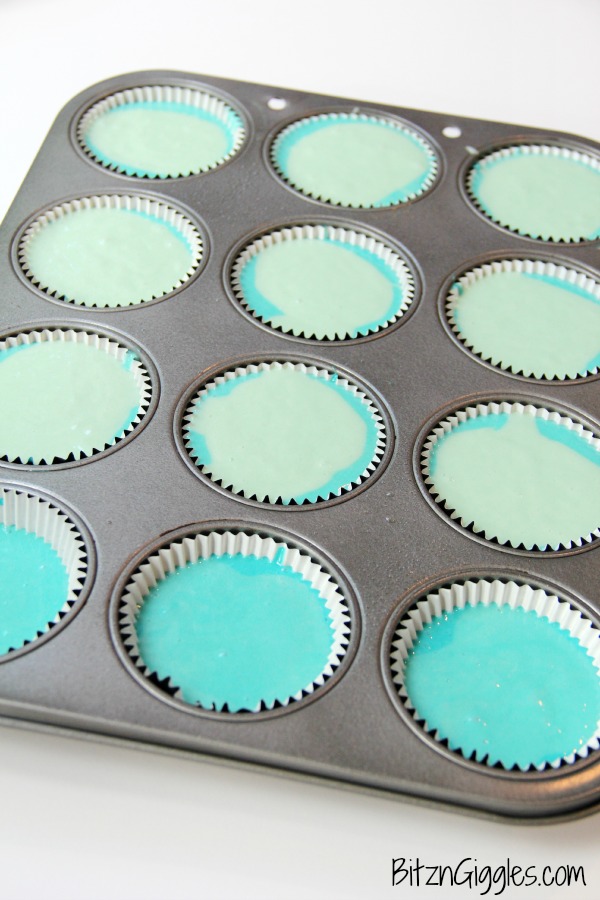
So, the photo above shows what NOT to do. If you look at the very top of the photo you'll see that I had started adding the final light layer just kind of letting it spread out on it's own. NOT a good idea if you're going for the ombre effect. Also, NOT a good idea to fill the cups so full. I knew I was going to run into problems when I was placing these into the oven, but didn't think they would come out looking like the mini atomic bombs, they did.
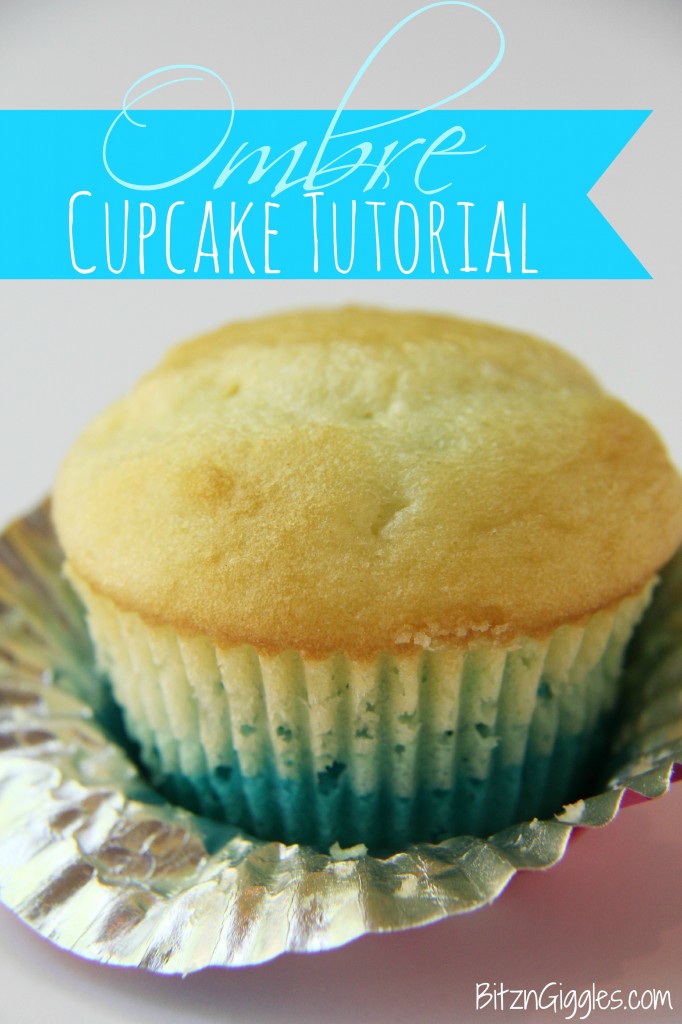
In my second batch I also lightened the top layer quite a bit. In fact, I didn't add any food coloring at all to the top layer in the second batch because I wanted to ensure an ombre effect. Please Jesus, give me an ombre effect, give me an ombre effect.
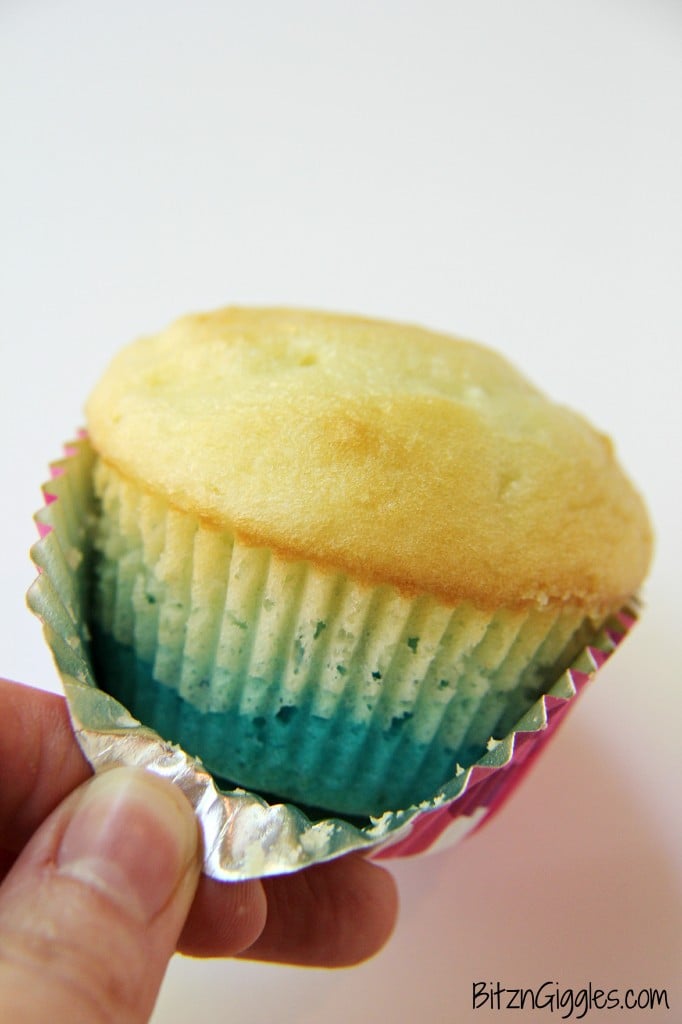
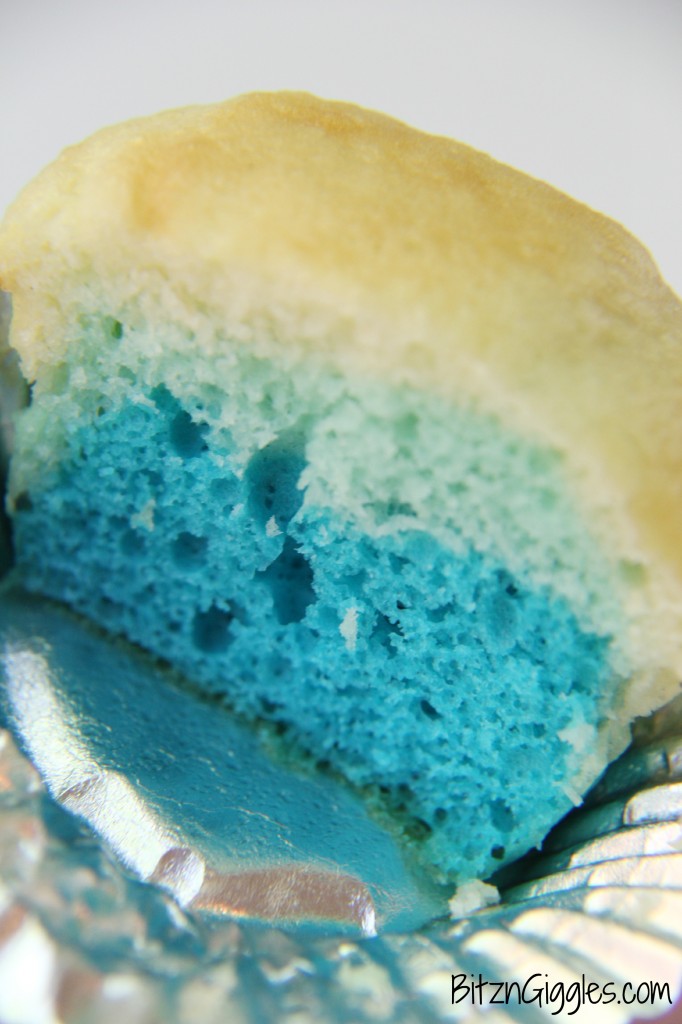
And there it was. How beautiful and fun is that?
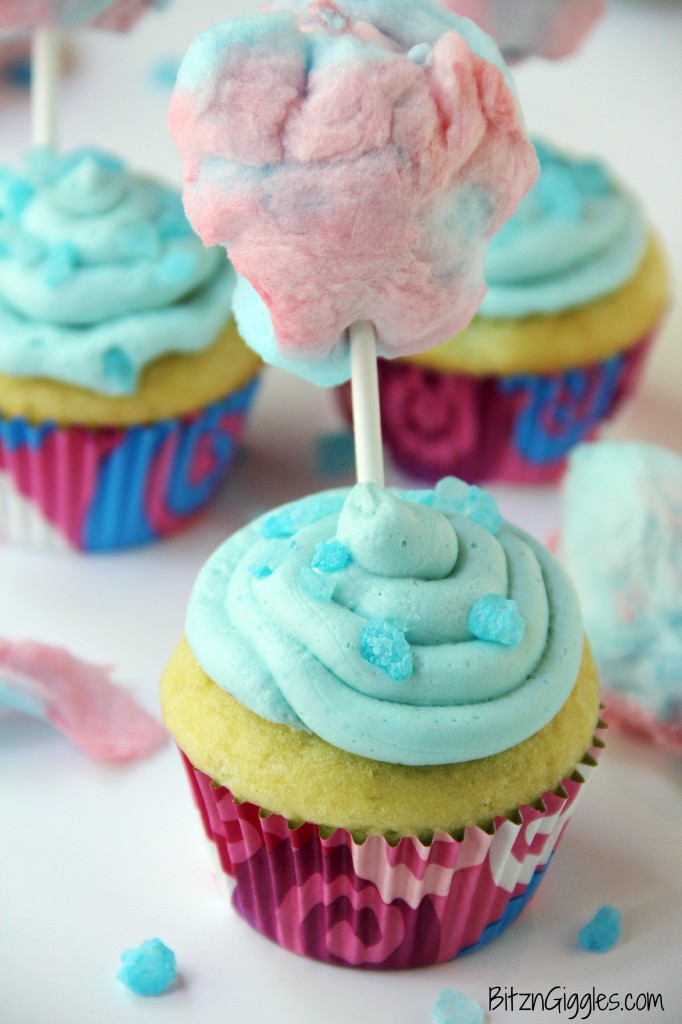
Want to see what I did with the cupcakes after this - why were they so special? Well, because I was making them for Dana and her readers over at This Silly Girl's Life! I really decked them out and sweetened them to the max - adding some cotton candy frosting, rock candy crystals and a fluff of real cotton candy at the top! Cotton candy overload?
Are you kidding? In my opinion, you can NEVER have too much cotton candy! Head on over to This Silly Girl's Life and check out these Cotton Candy Cupcakes. They were definitely worth the effort!

Ombre Cupcake Tutorial
Ingredients
- Your favorite cupcake recipe
- 2 drops Food coloring
- 3 Frosting
Instructions
- Follow directions to make your cupcake batter and divide into 3 bowls.
- Add 1-2 drops in the first bowl to make the lightest batter
- Add 3-4 drops in the second bowl
- And Add 5-7 drops in the third bowl to make the darkest batter
- Prepare your cupcake pan with liners.
- Start with your darkest color batter for the bottom of the cupcake. Scoop about 1 tablespoon of the dark batter into each of the liners.
- After each layer, use the back side of your spoon to smooth out the batter layer, making sure to spread the layer all the way to the edges of the liner.
- Finish each layer working your way from dark to light.
- Bake according to directions, then cool and frost.
Notes
- Consistency and Gradation: Ensure that the batter consistency remains consistent across all three bowls to achieve uniform cupcakes. Adjust the amount of food coloring added to each bowl to create a smooth gradient from the darkest to the lightest batter. Start with a minimal amount of food coloring for the lightest batter and gradually increase the amount for the darker shades, ensuring a seamless transition between colors.
- Layering Technique: Use a systematic approach to layering the batter in the cupcake liners to achieve the ombre effect. Start by adding the darkest batter to the bottom of each liner, followed by the medium and then the lightest batter on top. Use a spoon to carefully spread each layer evenly and ensure that it reaches the edges of the liner. This technique creates distinct color bands within the cupcake, enhancing the visual appeal of the ombre effect.
- Precision and Attention to Detail: Pay attention to detail when layering the batter to create clean and defined color transitions in the finished cupcakes. Take your time to spread each layer evenly and smooth out any uneven areas to achieve a professional-looking result. Additionally, be mindful of baking times to prevent over or undercooking the cupcakes, as this can affect the appearance and texture of the final product.
Michelle from Weekend Craft
That is so cool! I am going to have to try this! Thanks so much for linking up at the Creative Sparks Link Party. We are live again today so stop by and link up! http://bit.ly/1pEMI5A
Kristy gd
Such a cool effect! I'm extra excited that you figured out how to make it work the way you wanted instead of giving up the first time. And I agree with Dane. All cupcakes need frosting. He's a smart one. Thanks for linking up with Creative Spark!
Sara
I think it's so important to share some fails, too. I'm glad I tried a second time as well. I finally got it right! And yes, frosting is mandatory when it comes to cupcakes!
Meaghan
These look so fun! I love that you shared a fail! It makes us all feel better. I can't wait to try these with pink!
~Meaghan from DIYfaerie
Sara
Meaghan, they'd look awesome with pink! Fails are just a day in a blogger's life. Some of us share more than others! LOL I think it's so important to be REAL! Have a great weekend!
aprila
my kids would love these and so would I. Thanks for linking up at Tell Me About It Tuesday. We hope you hop over and share with us again next week.
Stretchingittotravel
These are so cute! Stopping over from Silly Sarah...
Serene @ House of Yumm
So fun!! What a great tutorial! Love your son, frosting makes everything better 🙂
Sara
He's totally right isn't he, Serene? My daughter will lick the frosting off of everything. . .the rest stays on the plate.