
Ninja Foodi Mac and Cheese - Classic Homemade Mac and Cheese made with pasta, a creamy cheese sauce and cheesy bread crumb topping, all baked to perfection in the Ninja Foodi.
Want to Save This Recipe?
This post may include affiliate links. Please see my disclosure.
What's up with this weather lately? Last weekend it was feeling like spring, this week it cooled down again and we got more snow and rain and this weekend it's supposed to be in the low 30s and cloudy. Boooo!
So, what do you do when it's still not quite spring but you can tell it's just around the corner? Make A LOT of comfort food! I mean, we have to fit in as much as we can before this snow is gone completely, am I right?
Today, we're making homemade mac and cheese in the Ninja Foodi! If you've never heard of the Ninja Foodi, it's a slow cooker, pressure cooker, steamer, air fryer, dehydrator (some models) and can bake, roast and broil too. All. In. One.
The Instant Pot just came out with their Duo Crisp which is now a competitor to the Foodi, but in my opinion, the Foodi still comes out ahead.😉
Alright, let's make some mac & cheese!
HOW TO MAKE NINJA FOODI MAC AND CHEESE
To make this mac & cheese, you'll need:
- Elbow pasta
- Evaporated milk
- Salt & pepper
- Garlic powder
- Onion powder
- Water
- Butter
- Velveeta cheese
- Heavy cream
- Cheddar cheese
- Breadcrumbs
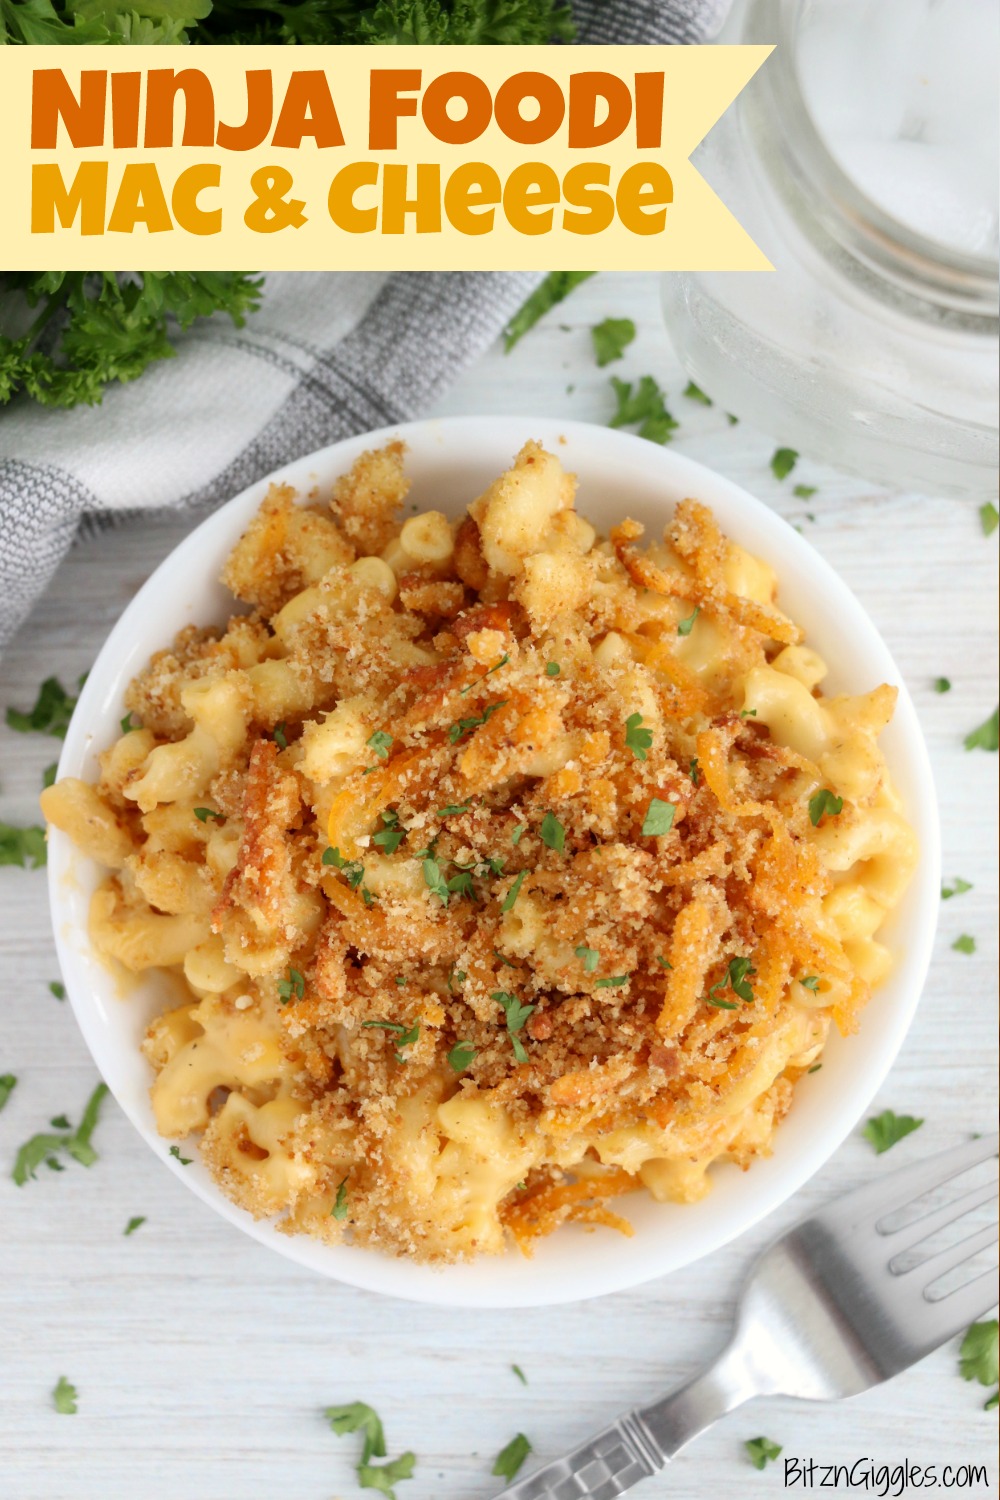
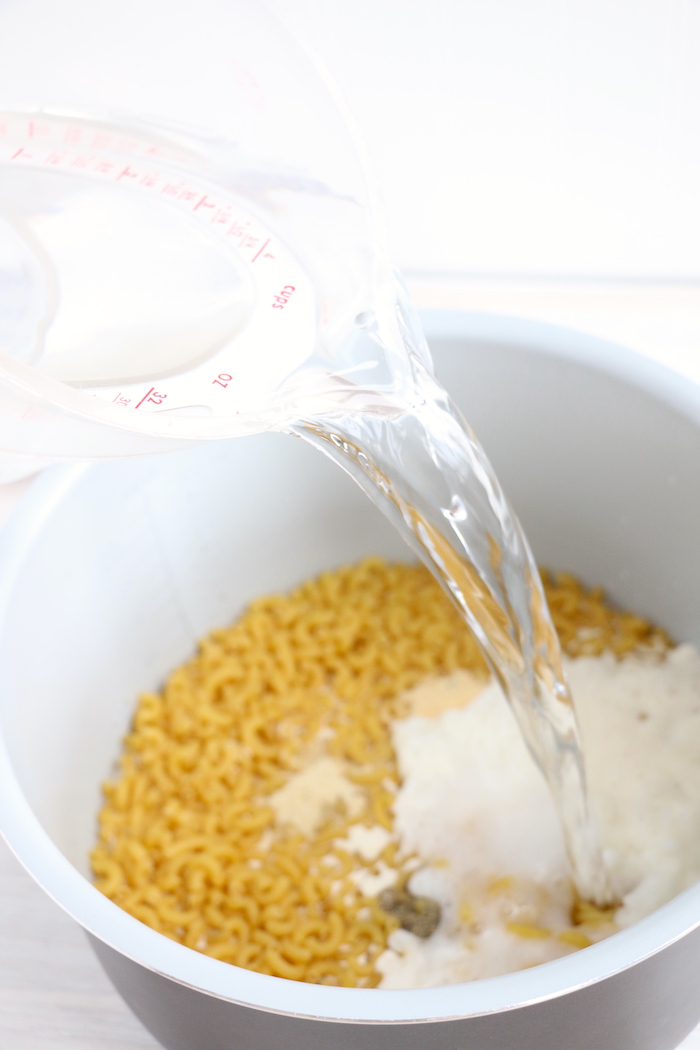
Start by adding the pasta to the cooking pot.
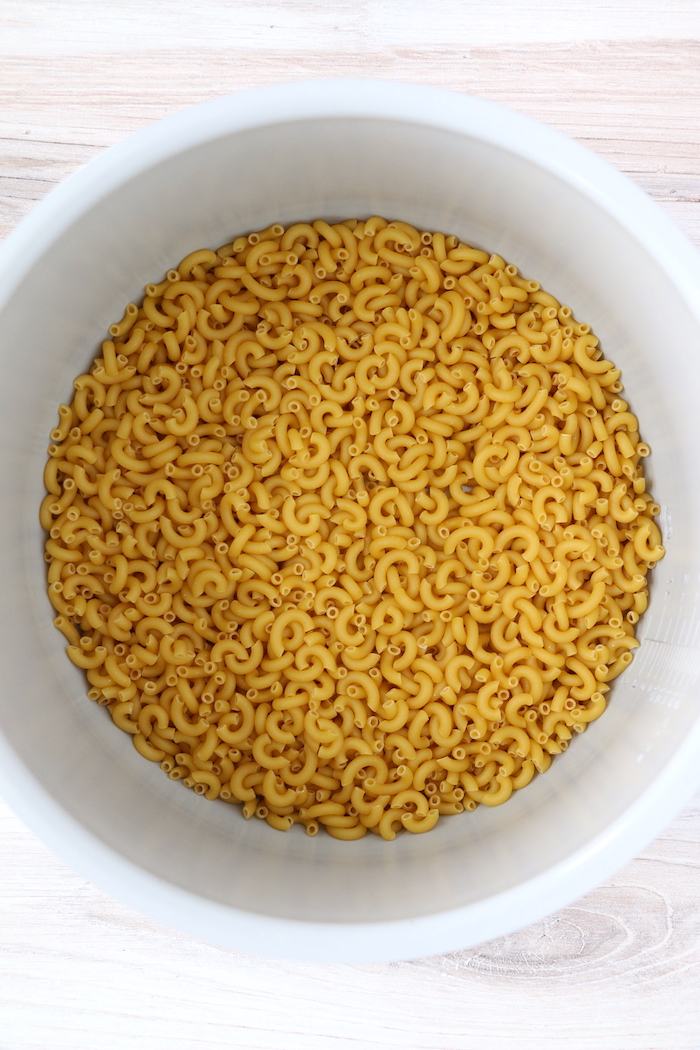
Pour in the evaporated milk.
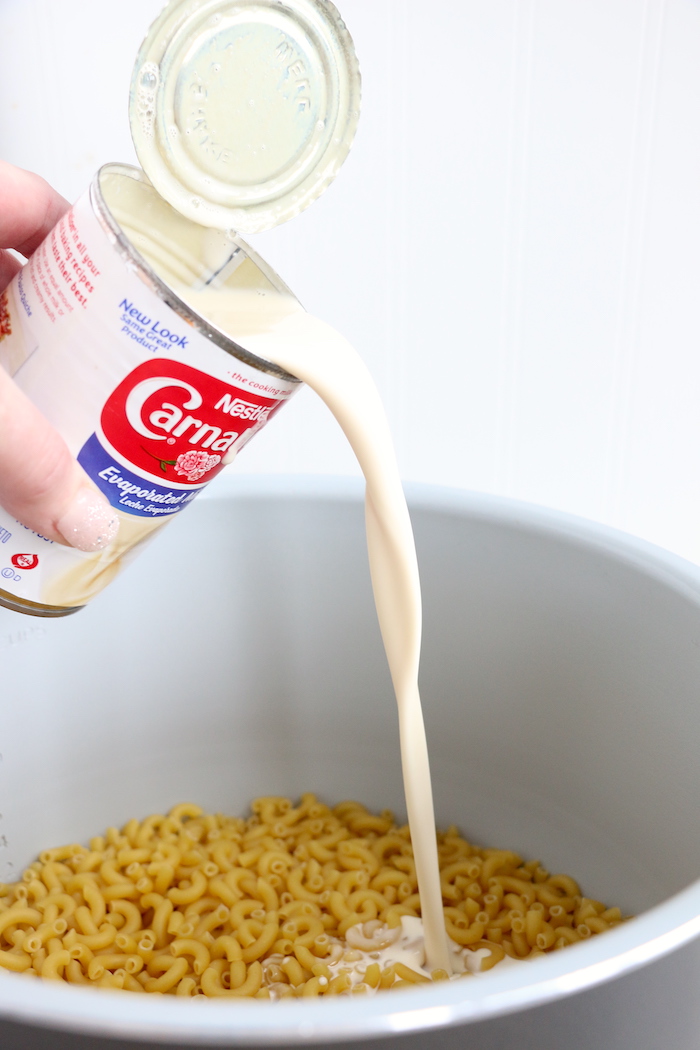
Add in seasonings.
And then the water and stir until mixed well.
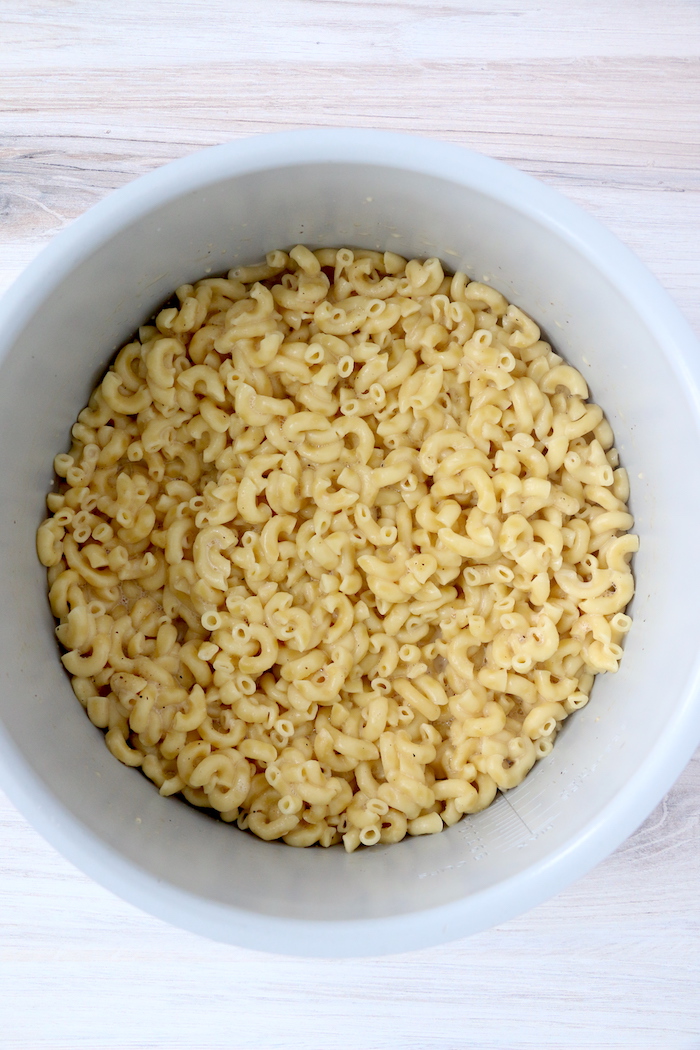
Set the Foodi to LOW PRESSURE for 2 minutes. NATURAL RELEASE for 10 minutes and then QUICK RELEASE.
Here's what your pasta should look like after cooking.
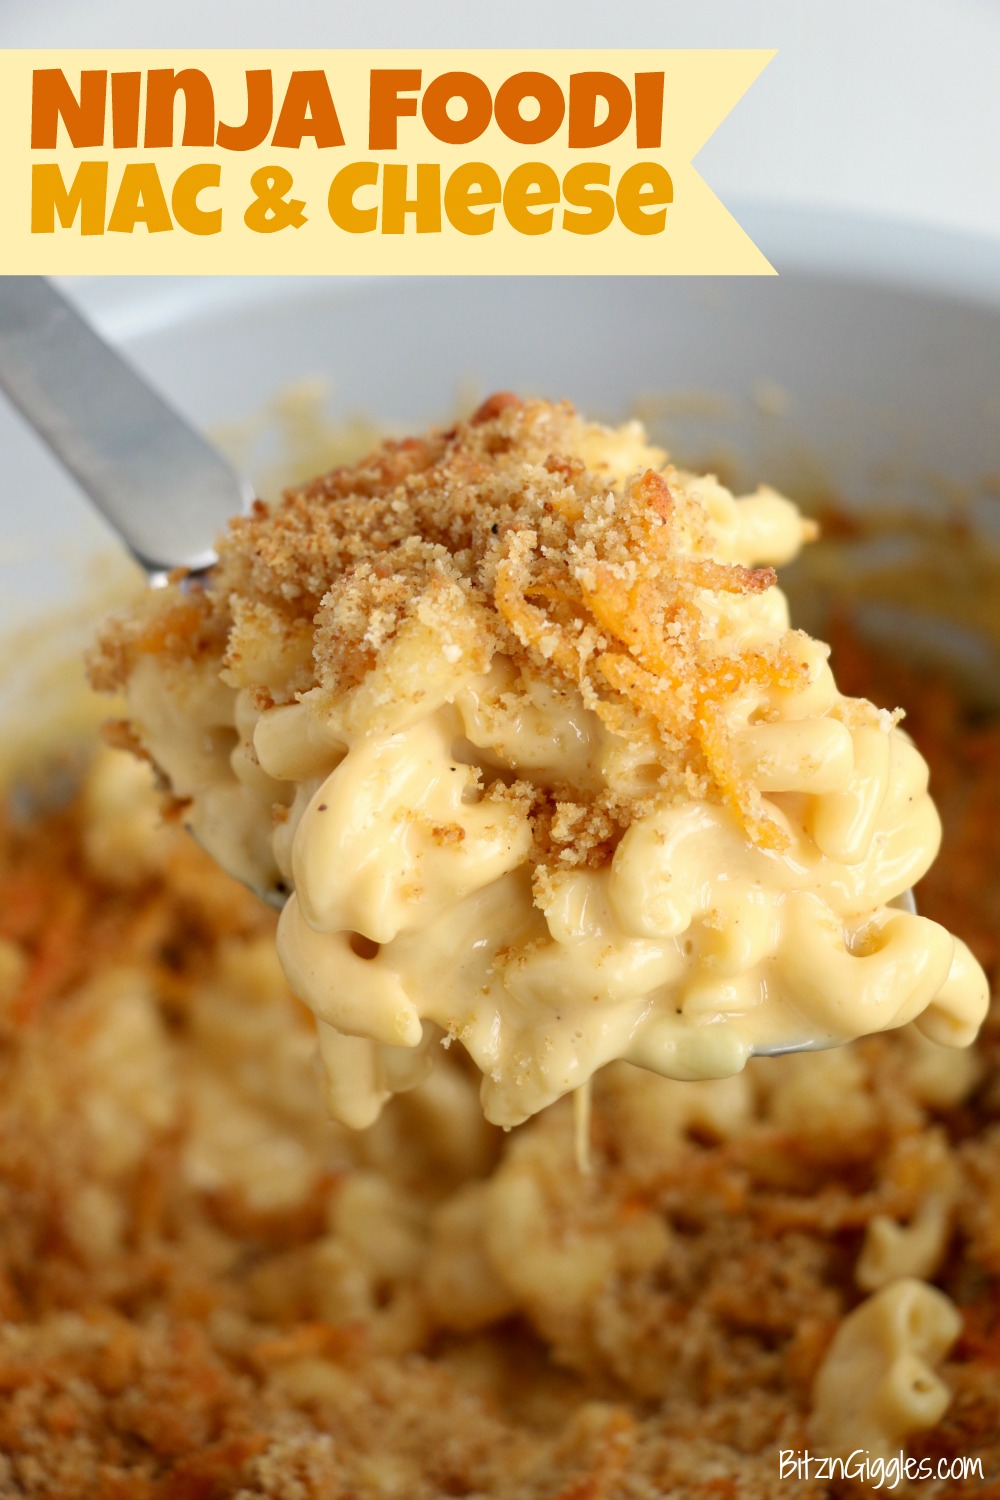
Add the butter, Velveeta, heavy cream and shredded cheese to the warm pasta.
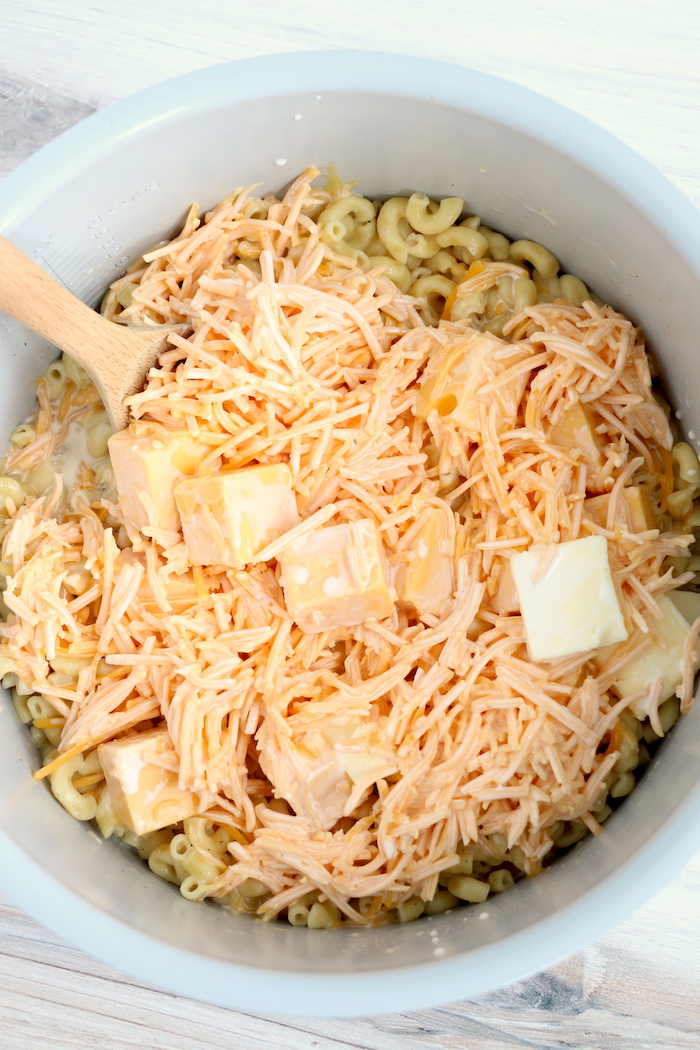
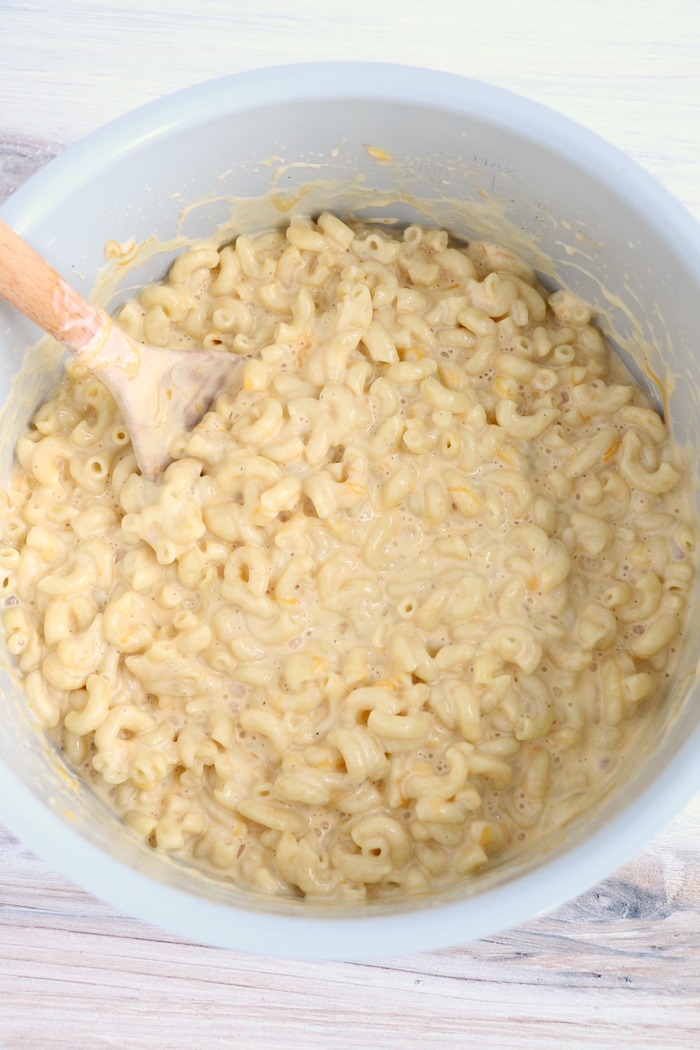
Stir until everything is melted and mixed well.
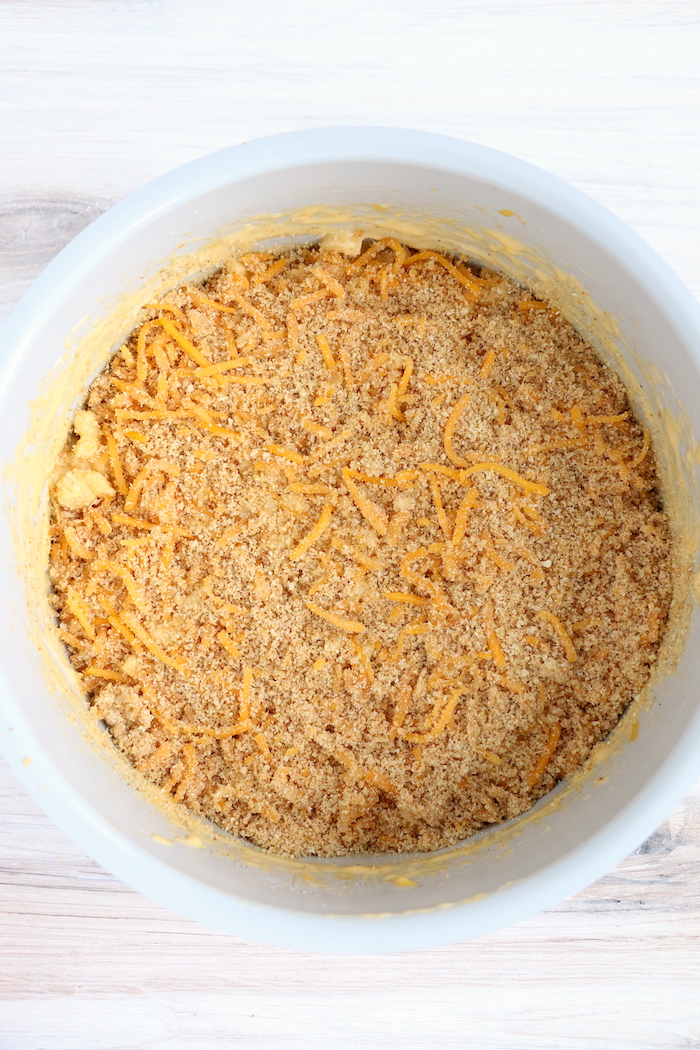
In a separate bowl, combine the melted butter, bread crumbs and shredded cheese.

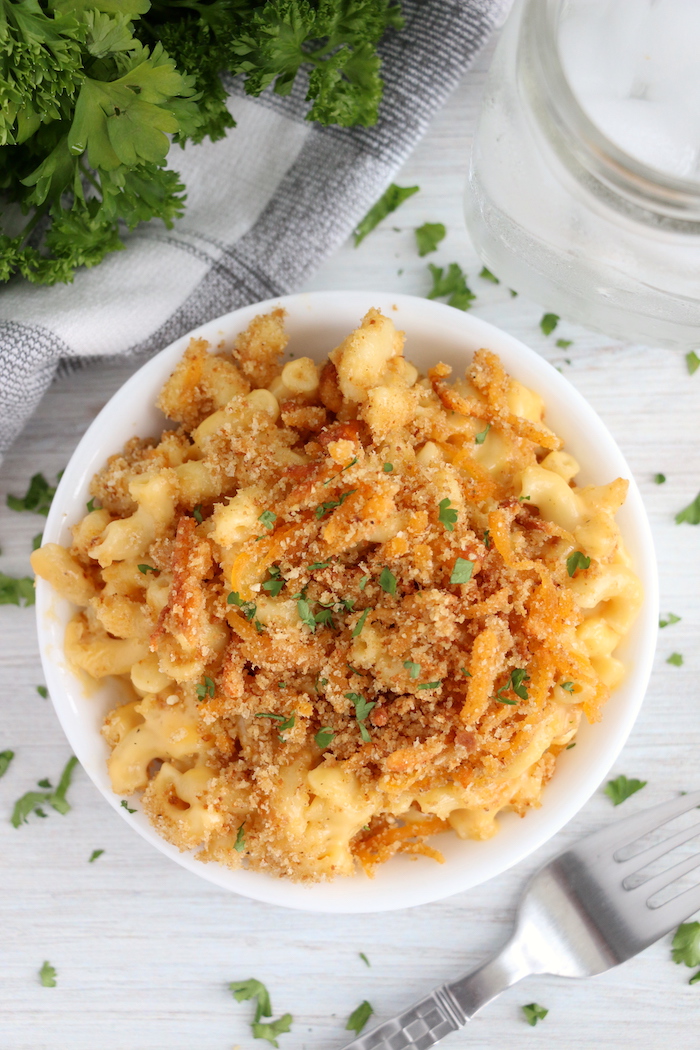
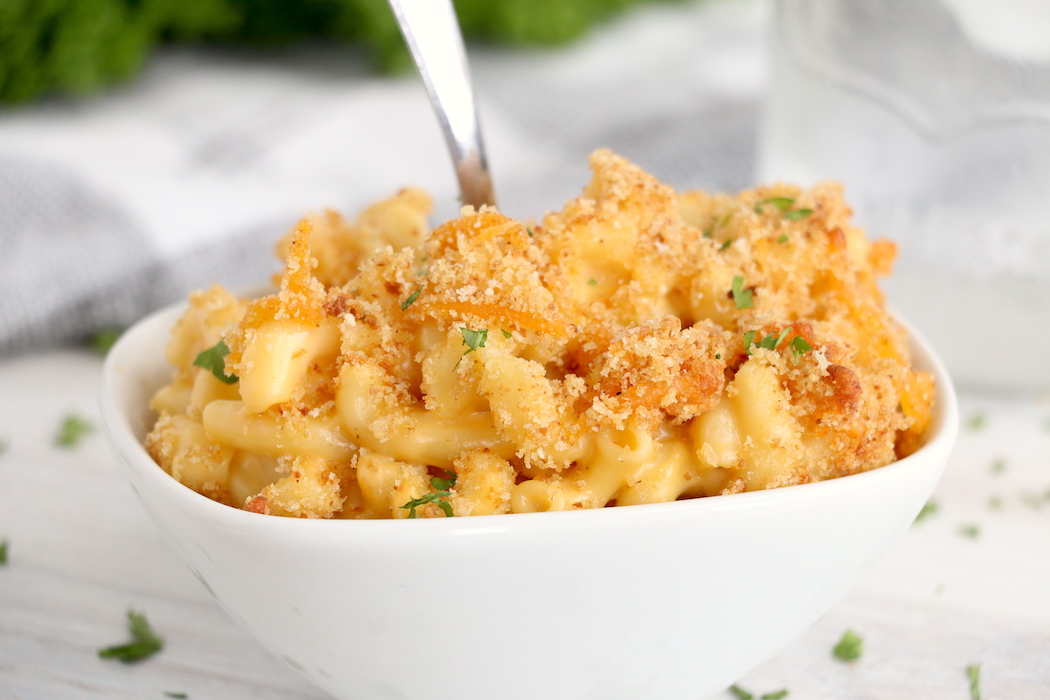
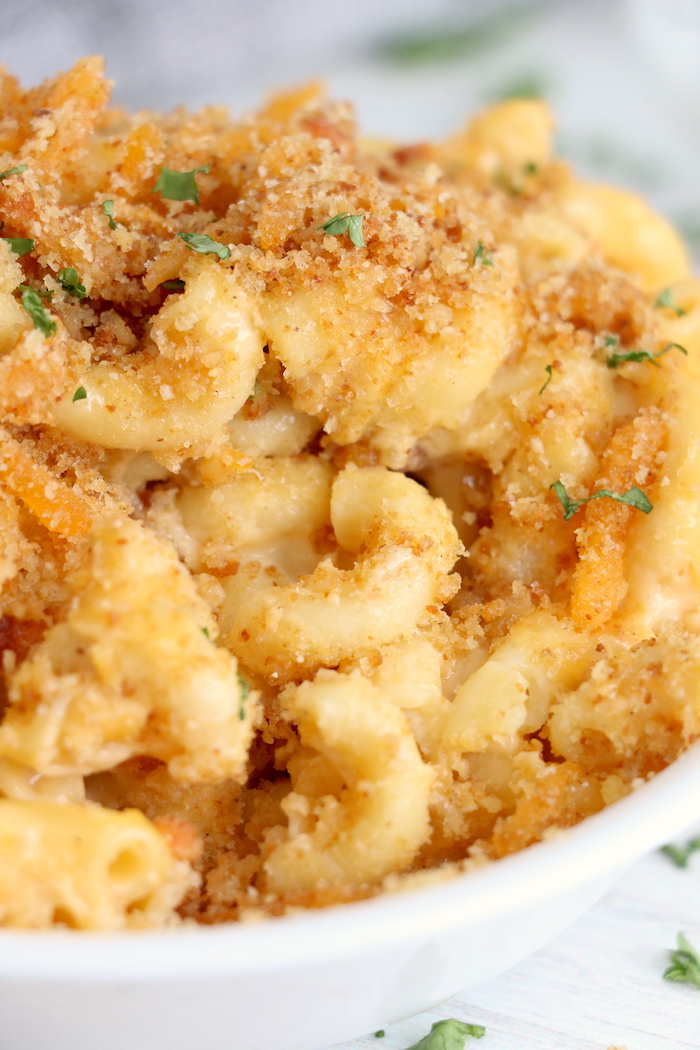
Spread the mixture over the top of the cheesy noodles.
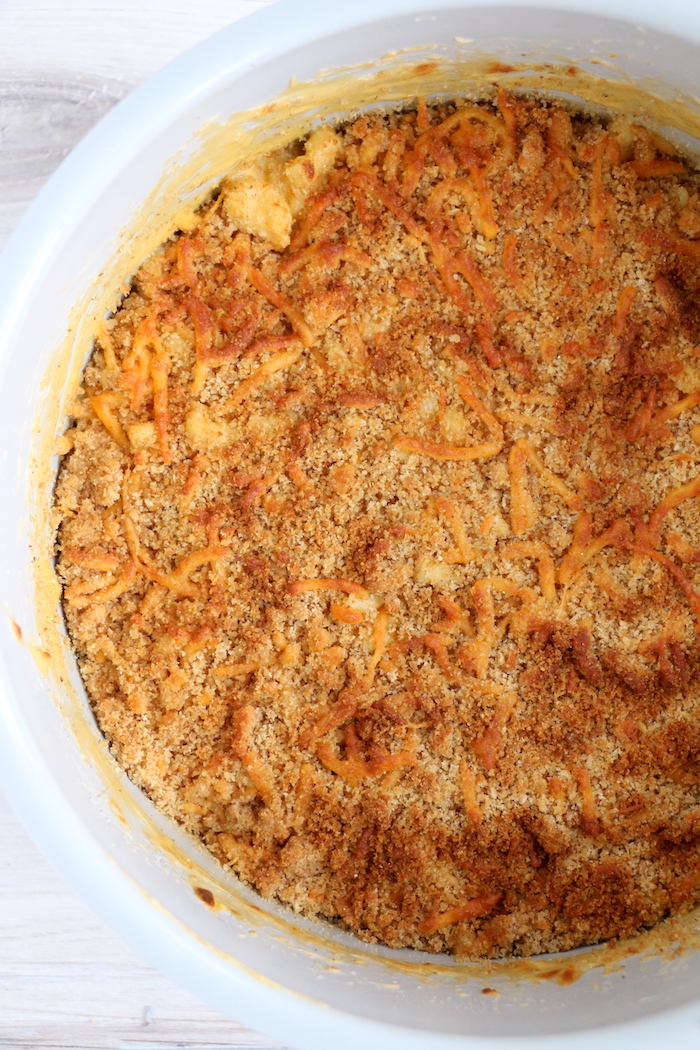
Now AIR CRISP it at 375º Fahrenheit for 5-7 minutes or until the breadcrumbs begin to brown.
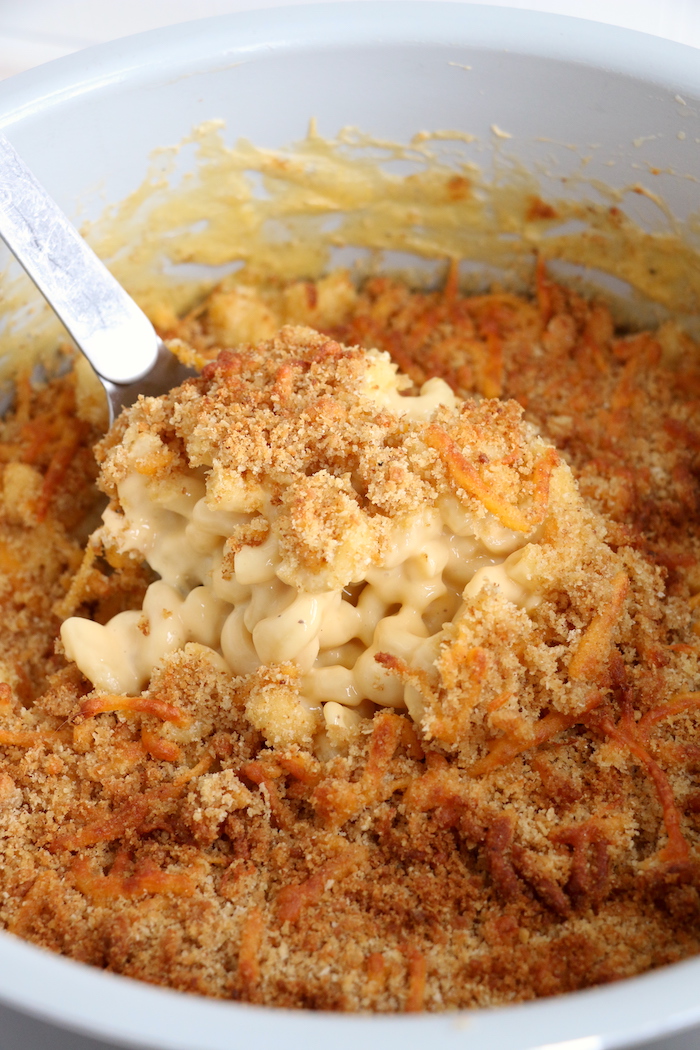
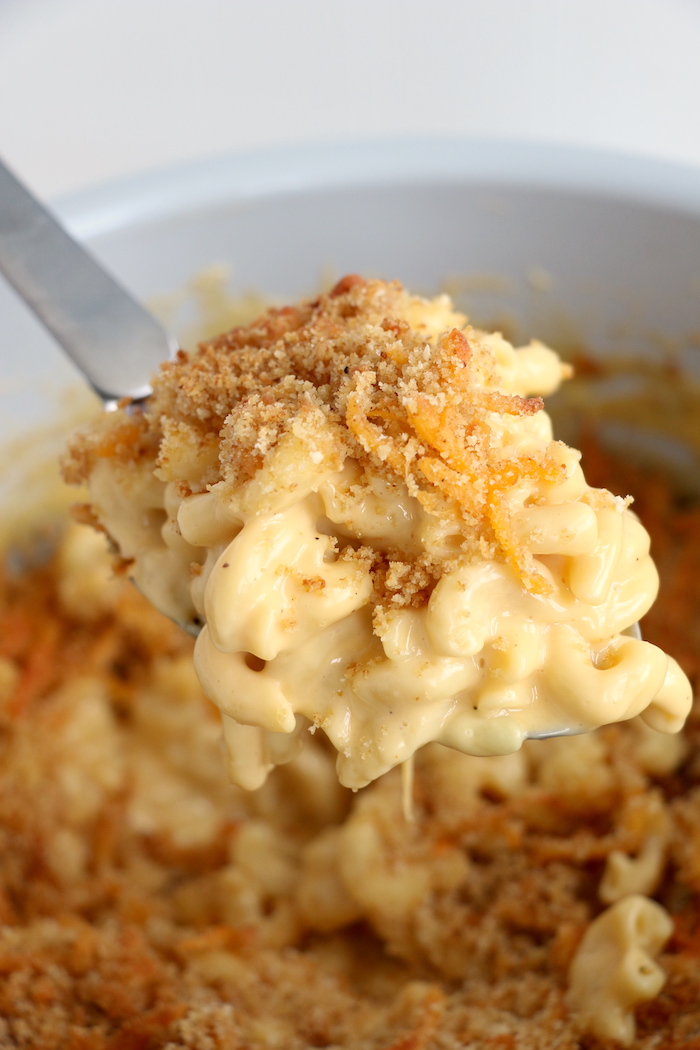
Ready to dig in?
WHAT OTHER CHEESES CAN BE USED IN MAC & CHEESE?
I used cheddar cheese for this recipe. If you like a bit more cheesy flavor, try a medium or sharp cheddar.
Any cheese that melts well is worth a shot! You could try mozzarella, parmesan, white cheddar, gruyere, muenster, fontina, gorgonzola or gouda.
CAN YOU FREEZE MAC & CHEESE?
Yes, you can! I just wouldn't add the breadcrumb mixture if the mac and cheese is going straight to the freezer.
Allow the mac and cheese to cool completely, then transfer to a tightly-sealed, freezer safe container. Your mac and cheese should keep well for up to 3 months in the freezer.
HOW DO YOU REHEAT FROZEN MAC & CHEESE IN THE FOODI?
I normally allow the frozen mac and cheese to thaw first. Transfer the mac and cheese to the Foodi cooking pot, pour a ¼ cup of milk over the mac and cheese, cover with a sheet of aluminum foil and ROAST/BAKE at 350º Fahrenheit for 20 minutes. Stir halfway through cook time.
WHAT ELSE COULD I ADD TO THE MAC & CHEESE?
If you want more texture, or to add a little protein to your mac and cheese, try throwing in some chicken, ham, bacon or even broccoli!
When you are saving macaroni and cheese to have leftovers, the starches in the macaroni noodles will suck up some of the moisture in the dish. The longer your macaroni and cheese sits, the dryer it will become!
HOW DO I REHEAT LEFTOVER MAC & CHEESE?
The longer you allow your macaroni and cheese to sit in the fridge, the drier it will become. Unfortunately reheated mac and cheese will never taste as good as it does when just freshly made.
While, I love to use my Foodi for most things, when you're reheating leftover mac and cheese, I recommend just using the microwave.
Add about two tablespoons of milk per cup of mac and cheese you're heating up and heat in 30-second intervals, stopping and stirring occasionally.
LOOKING FOR MORE NINJA FOODI & AIR FRYER RECIPES?
- Ninja Foodi Roast Chicken
- Ninja Foodi Lobster Tails
- Pot Roast (Air Fryer)
- Air Fryer Oreos
- Air Fryer French Fries
Ninja Foodi Mac and Cheese
Ingredients
- 16 ounces elbow pasta (uncooked)
- 12 ounces evaporated milk
- 1 teaspoon salt
- ½ teaspoon pepper
- 1 teaspoon garlic powder
- ½ teaspoon onion powder
- 4 cups water
- ½ cup butter (divided)
- 8 ounces Velveeta cheese (cut into cubes)
- ½ pint heavy cream
- 3 cups shredded cheddar cheese (divided)
- 1 cup breadcrumbs
Instructions
- Place pasta, evaporated milk, salt, pepper, garlic powder, onion powder, and water into cooking pot. Stir until mixed well.
- Select LOW PRESSURE for 2 minutes. NATURAL RELEASE for 10 minutes, then QUICK RELEASE.
- Remove pressure cooking lid.
- Add ¼ cup butter, Velveeta, heavy cream, and 2 cups shredded cheese to pasta.
- Stir until everything is melted and mixed well.
- In a separate bowl, combine ¼ cup melted butter, bread crumbs and 1 cup shredded cheese.
- Spread mixture over top of cheesy pasta.
- AIR CRISP at 375º Fahrenheit for 5-7 minutes or until bread crumbs begin to brown.
Notes
- You can use cheeses like cheddar, mozzarella, white cheddar, gruyere, muenster, or gouda in your mac and cheese.
- This is a great recipe to freeze - I just wouldn't add the breadcrumbs!
- You can add ingredients like chicken, ham, bacon, or broccoli for a fun twist on this recipe.
Thomas
I won't give it a rating just yet. I tried it out today and found it a bit too sweet. I did notice the comment about using unsweetened condensed milk, so I might try that next time.
Everything else seemed spot on.
Sara
I'm looking forward to hearing how the mac & cheese works when you make the change with the condensed milk. Thanks for the comment!
Paige
This was the BEST and easiest Mac and cheese! I added some tumeric and cayenne pepper.
Colby
Can this be doubled in the same batch?
Sara
As long as you have the large Foodi, it should work!
Abby
I’ve never seen a low pressure in pasta recipes. Just want to make sure that’s correct. Making this tonight. Thanks!
Sara
Yes, that's correct! If you'd like to use high pressure you'll want to cut the cook time by at least half!
Kara
Can you add other cheeses to this?
Sara
Absolutely!!
Chris
Made this tonight. A word of advice, condensed milk comes sweetened and unsweetened. You don’t want the sweetened. Ask me how I know. Otherwise good recipe, good cheesy. Reminds me of the Friends episode with the trifle and shepherds pie. If only Joey tribbiani were real
Jessica
Excited to try this! Would fat free evap milk and milk versus cream be okay?
Sara
Hi Jessica! I've never tried that combo but you could definitely experiment a little and see what happens!
Thomas Johnston
Hey. I live in a small town in Canada. Couldnt find valveta blocks. Honestly never seen them in a store but goulda was a reccomended alternative. I tried your recipe and its really runny. I think it's the conversion. Theres no way for me, without a scale, to measure ounces of evaporated milk into millilitre. Almost every liquid is measured by volume not weight. It's kind of the same with noodles. The packages show the weight but we we mostly measure in volume. Cups or litres. Could you possibly convert to volume for the evaporated milk, noodles and cream instead of ounces? I'm not picky Cups tablespoons milliliters or or liters work. It taste amazing but its runny and want to trie it again.
Sara
Hi Thomas, if you try the recipe again, just search Google for conversion charts. It will literally take seconds and your next try should be more successful. Good luck to you!
Bonnie
My family loved this! Thank you!
Sara
I'm so glad you all enjoyed it, Bonnie!
Sandy
Delicious! So easy to make and the taste is awesome! I didn't use Velveeta, I used a bag of mixed Italian cheese I had in the fridge. I also used a bag of Mac n Cheese cheese mixture and some sharp cheese I had. I have a Ninja Foodi and the directions were spot on! This recipe makes a lot! Next time I am going to cut in half if just making for two of us!!
Jane Rautmann
I see in the ingredients list it says 4cups water. I never see what you do with the water
in the recipe. that might be why the others have said it was epic fail or very watery
Sara
Hi Jane, check out the recipe card. The water is added in the first step of the instructions!
Samantha
I made this for a family party over the summer and got SO MANY compliments on it. My dad said it tasted better than a restaurant, and my mother in law has been begging me to make it again. This will definitely be a go to recipe.
Sara
I'm so glad you all enjoyed it!!
Talei
I just made this last night, it was so yummy! Thank you! 😊
Sara
I'm so glad you enjoyed it!
Sammy
Oh wow this is amazing! I love my Ninja Foodi and I am always looking for new recipes, do you have a place where I can find all of your recipes?
Sara
Hi Sammy! Under the recipes tab there is a tab for Ninja Foodi recipes. You can also check out my air fryer recipes. Those will work in your Foodi as well!
Debra Stansfield
Did not work for me AT ALL. EPIC FAIL. It was SO watery. I took PC lid off and it was practically all liquid! And, when I added the Velveeta nd other ingredients, the Velveeta wouldn't melt all the way.
Followed recipe precisely.
Jon
I was hesitant to try this recipe because it had no reviews, but I am happy to be the first to give it 5 stars! Great recipe!
Sara
So glad you enjoyed it! It's one of my newer recipes so I thank YOU for leaving the first review!