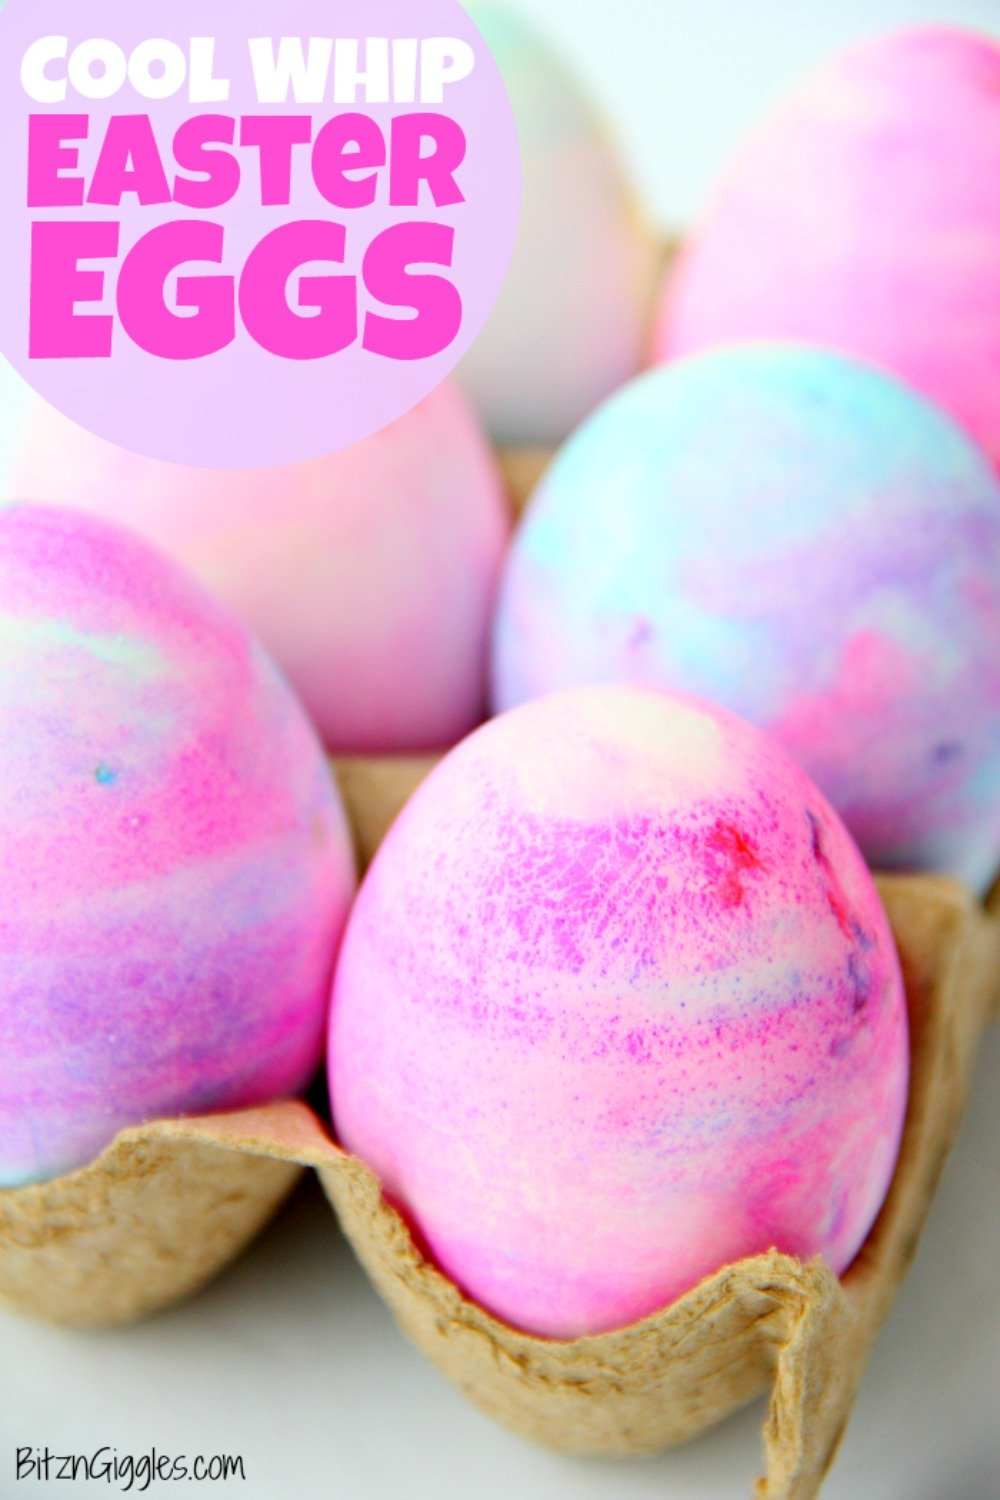
Cool Whip Easter Eggs - Cool Whip helps produce swirls of gorgeous color in this family-friendly DIY easter egg dyeing method!
Want to Save This Recipe?
This post may include affiliate links. Please see my disclosure.
We're starting to prepare for Easter around here, and I absolutely love this time of year. The promise of flip flops and warm summer nights is just around the corner (minus the freak April snowstorm we just experienced yesterday). Just thinking about the next few months has me super excited!
This weekend, my family is getting together at my parents' house for our annual Easter egg dyeing day.
Although the kids are getting older, they still look forward to seeing their grandparents and cousins and creating some gorgeous, colorful eggs.
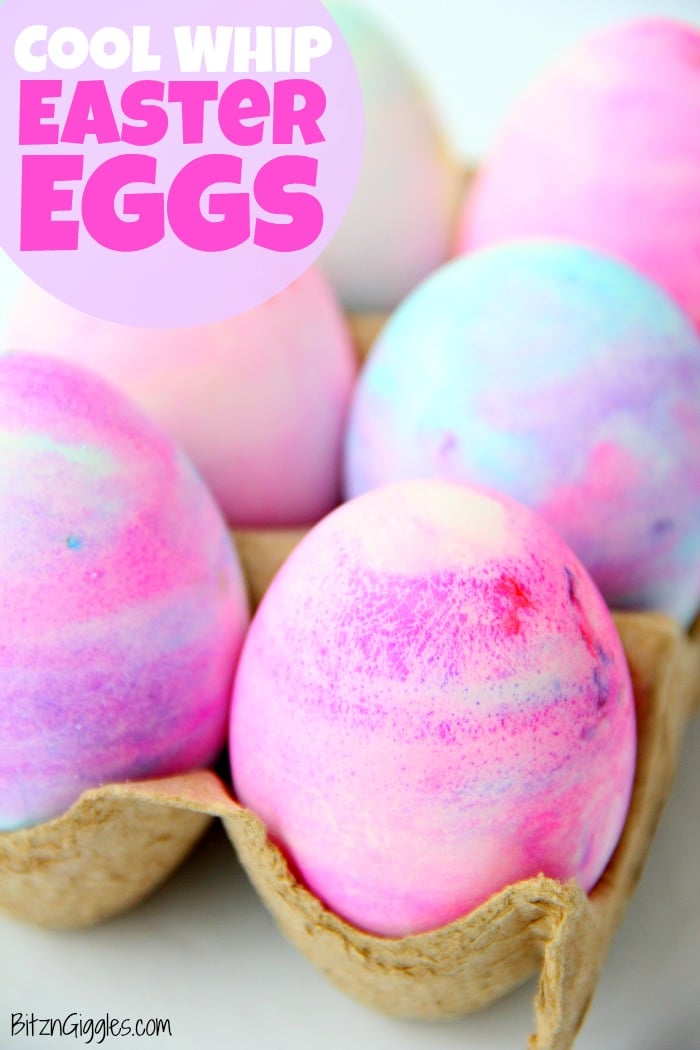
Speaking of gorgeous, colorful eggs, today we're making Cool Whip Easter Eggs. The "Cool Whip dyeing method" is simple, fun and produces pretty swirls of color on the eggs.
Cool Whip vs. Shaving Cream
You may have seen a similar egg dyeing method that uses shaving cream.
Why didn't I use shaving cream? Well, because eggs are porous, and shaving cream isn't anything I want seeping into eggs I'm going to feed to my family.
It's personal preference really, so I'll let you make your own call on what you use. Today, though, we're using Cool Whip.
Ready to get this party hoppin'? See how I did that? ?
How to Dye Easter Eggs With Cool Whip
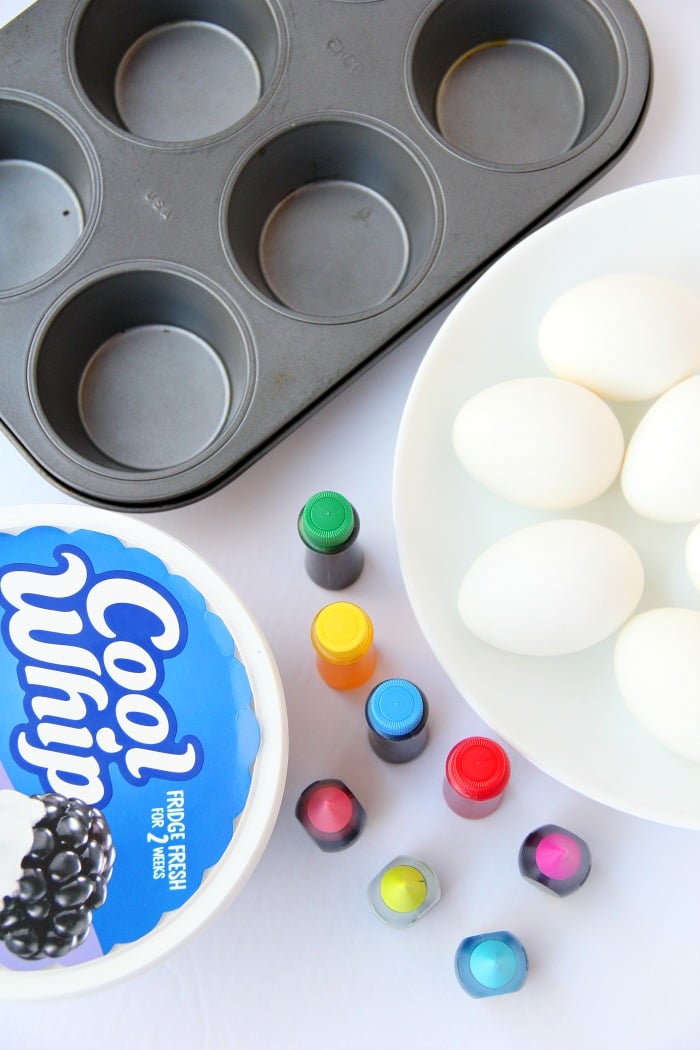
You only need a few items to get started!
Materials
- Cool Whip frozen whipped topping, thawed
- Muffin tin
- Hard-boiled eggs, cooled
- Food coloring
- Spoon (not shown)
- Disposable gloves, optional (not shown)
Start by filling each muffin cup up about ¼ of the way with Cool Whip.
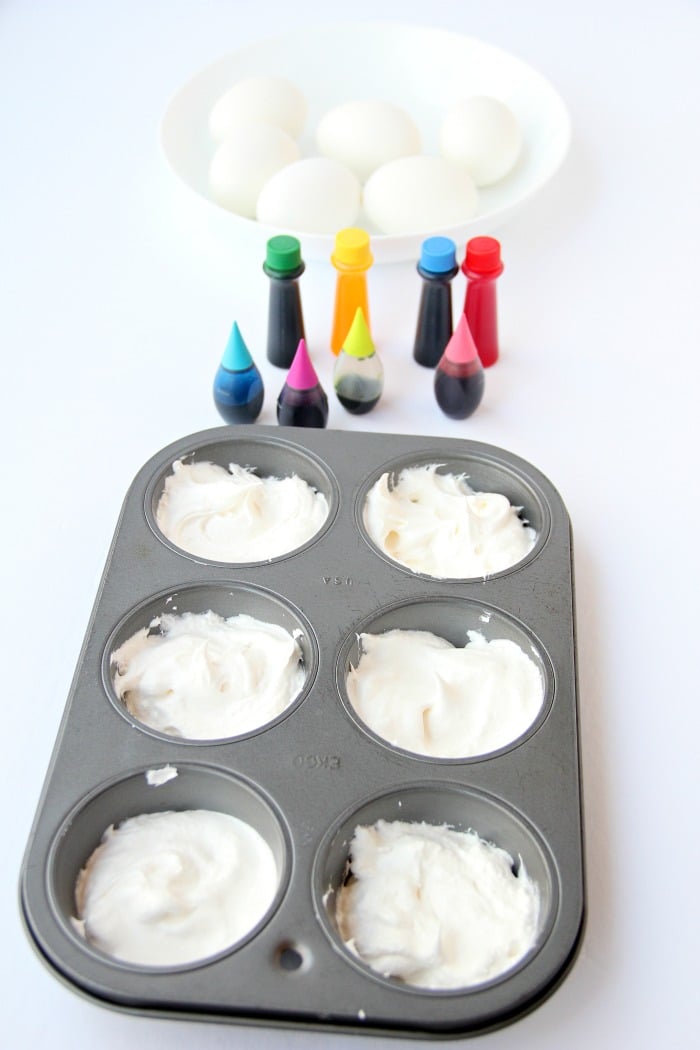
Now add a few drops of food coloring to each of the baking cups. Feel free to get creative and use multiple colors.
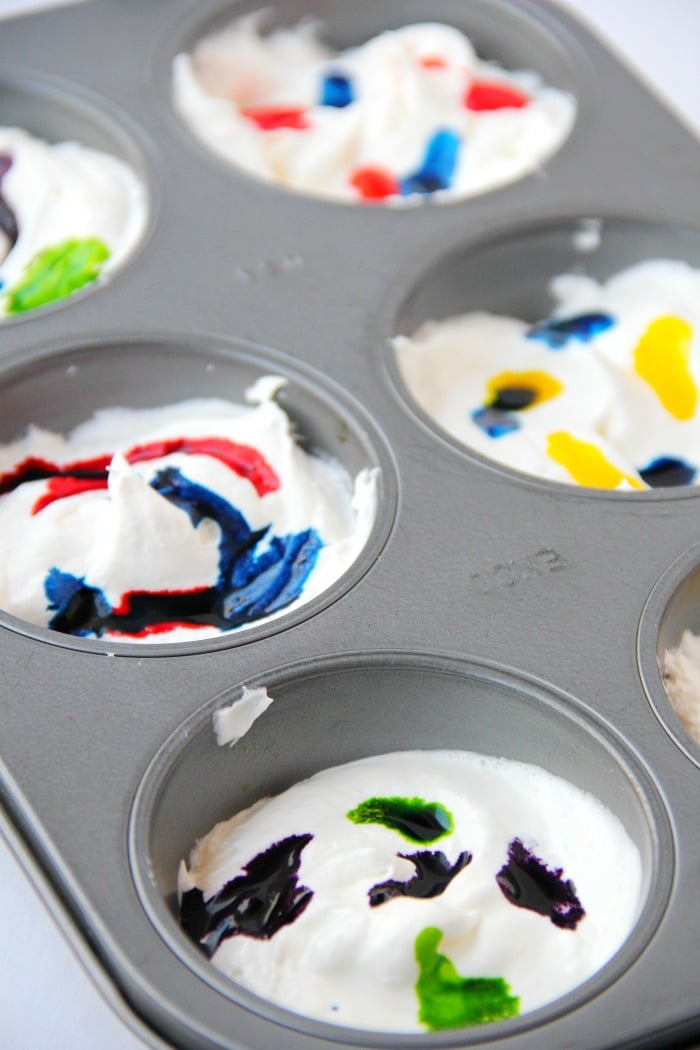
Tip: I tried both gel and regular food coloring. I actually found the regular food coloring produced brighter colors than the gel. I've read others have experienced the opposite. It just goes to show you that it pays to experiment on your own!
Use a spoon to gently swirl the colors in each of the cups. GENTLY. If you over-stir, the colors will just blend together, causing a mess. So, don't do that!?
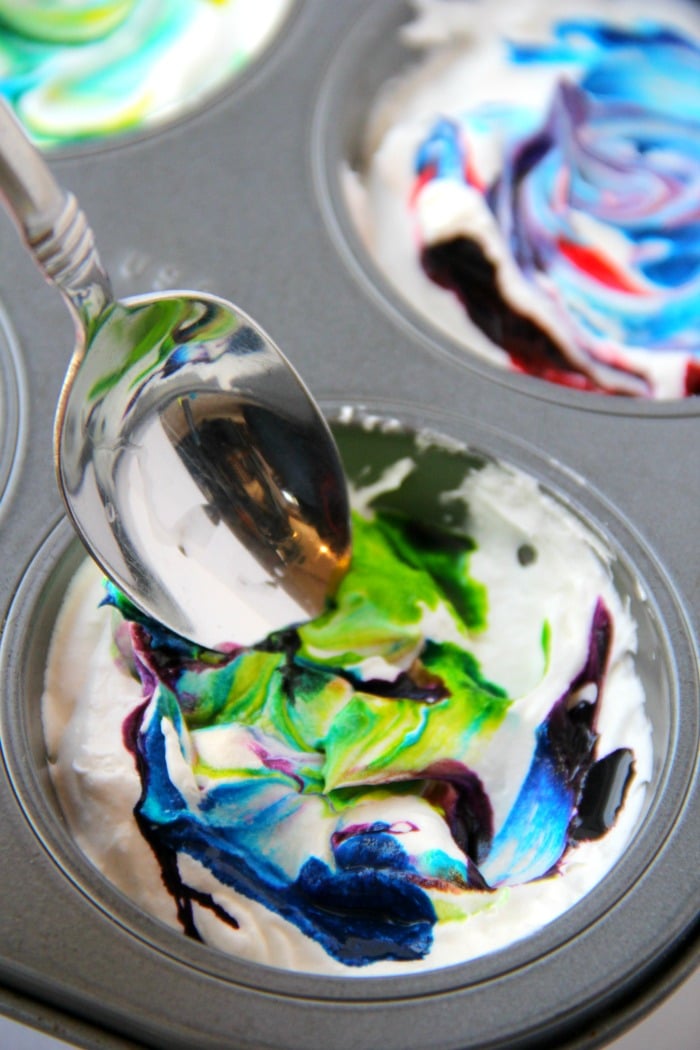
Here's the part where you may want to put plastic gloves on. If you're brave, and don't mind stained fingers, go ahead and forego the gloves. Just know that you've been warned.
Place an egg in each of the baking cups.
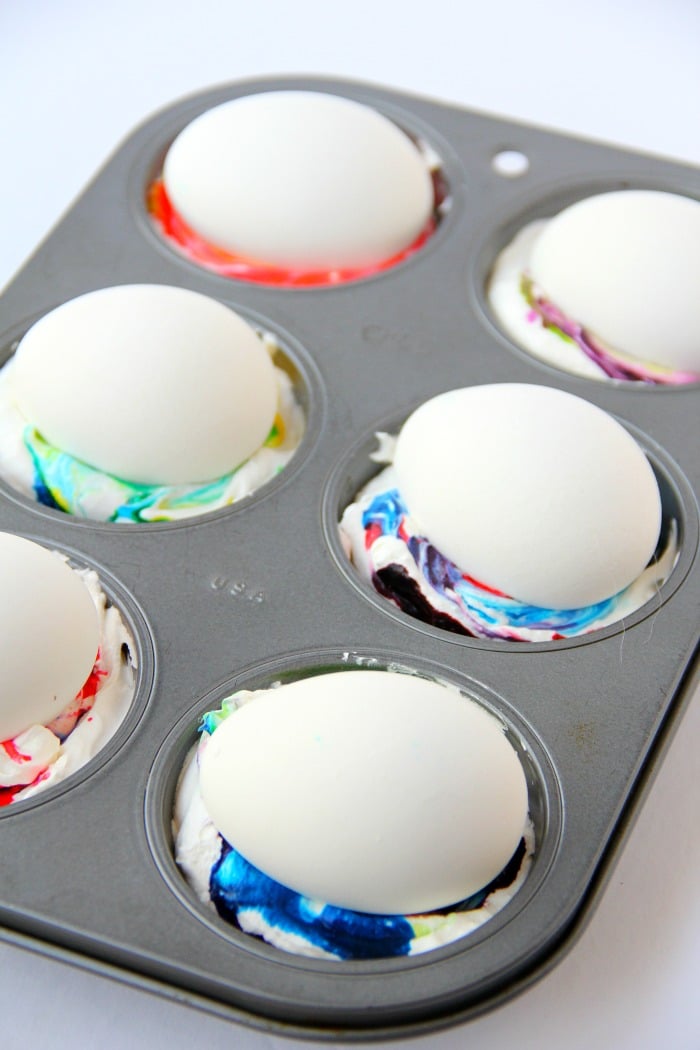
Swirl the eggs around in the cups using either a spoon or your fingers. I just felt I was getting more done by using my fingers, so I went that route.
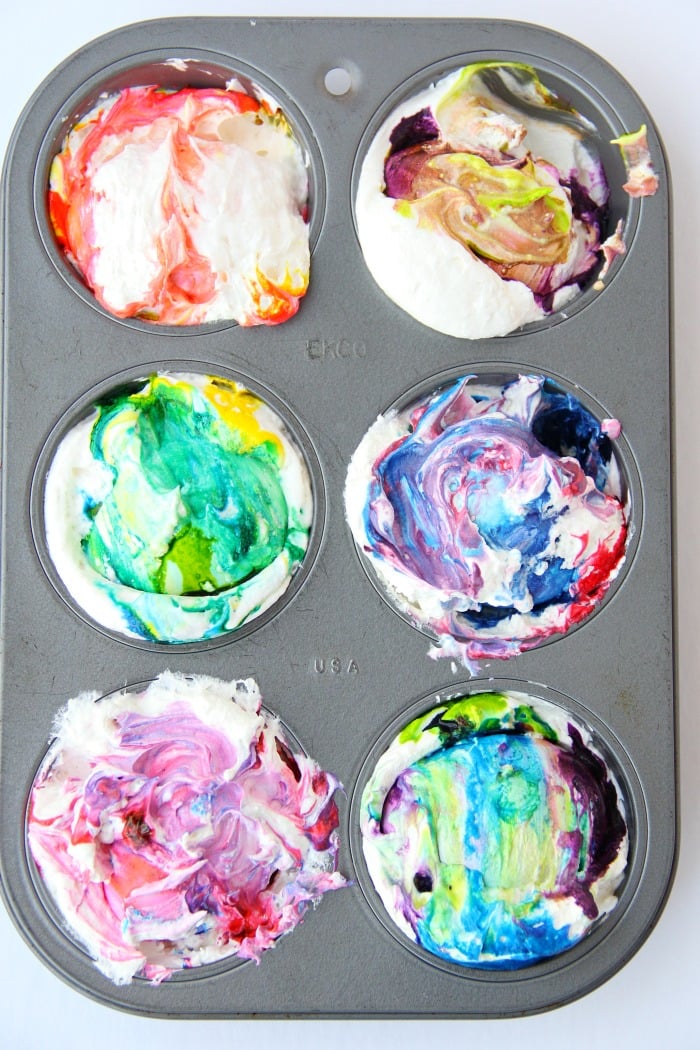
Now. . .leave them in there for about 30 minutes and allow the colors to set. After a half an hour has passed, rinse the eggs off under cool water, and marvel at your creations.
The pink, purple and blue food coloring definitely made more of an impact than the yellow and green.
So, if you're looking for vibrant, colorful eggs, go with pinks, purples and blues and keep a good amount of food coloring on the top of the Cool Whip.
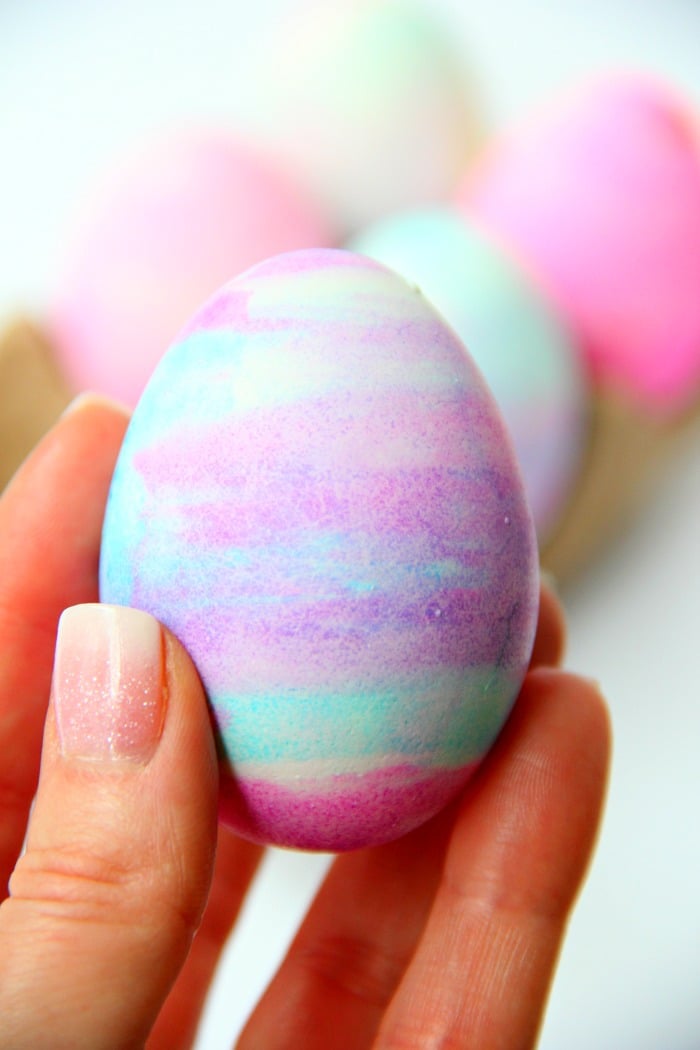
If it's more "pastel" colored eggs you're after, mix the color into the Cool Whip a bit more, still taking care not to over-mix.
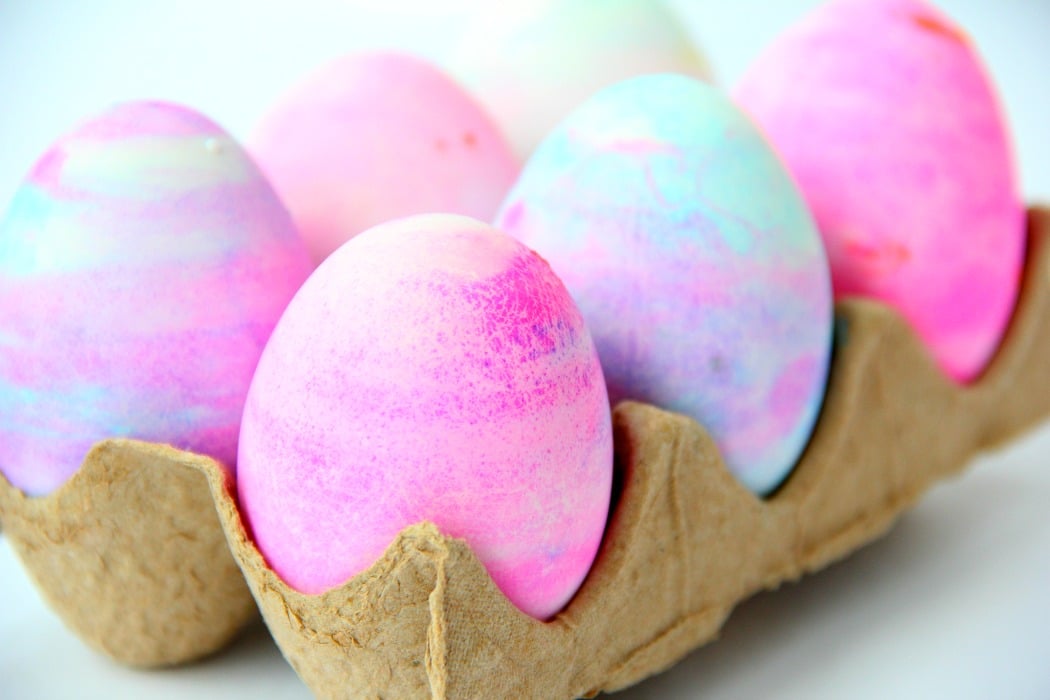
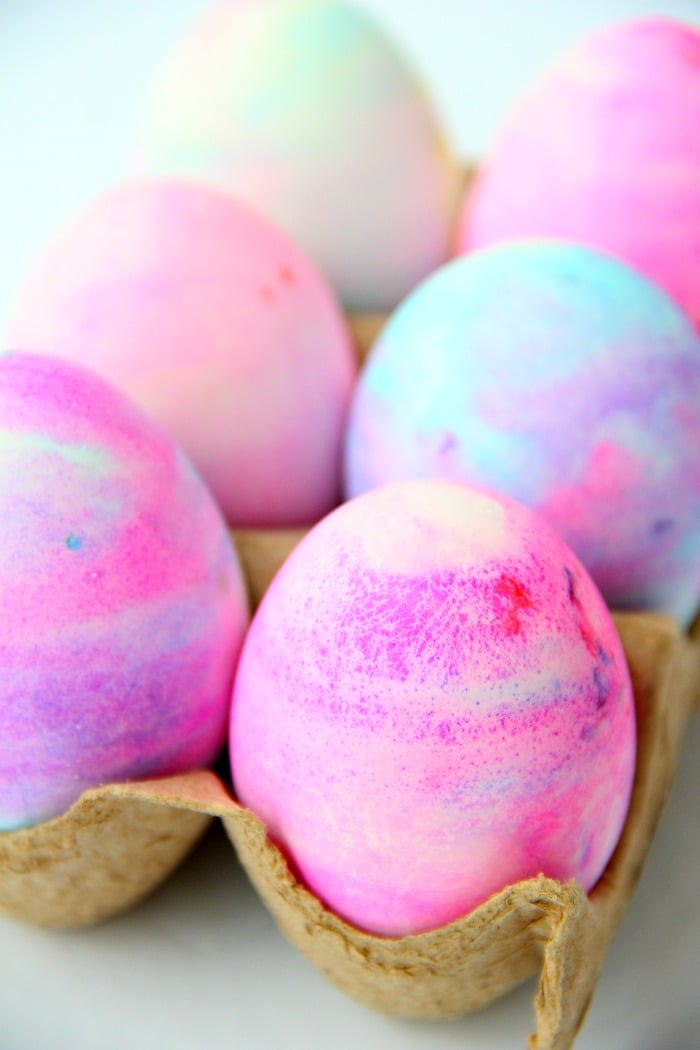
I'm pretty happy with how the eggs turned out. They all had different patterns and swirls.
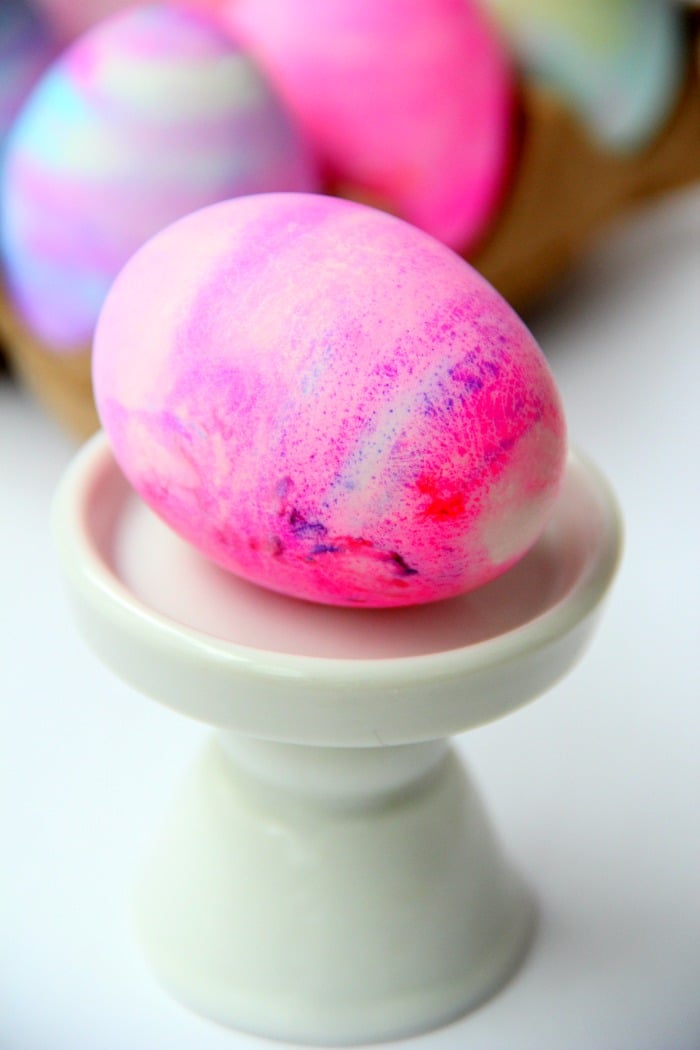
This was one of my favorites. The bottom of the egg was a vibrant pink and purple and pink swirls enveloped the rest of the egg. So pretty.
Round up the family and have a blast decorating your Easter eggs.
 Share your creations!
Tag @bitzngiggles on Instagram and hashtag it #bitzngiggles
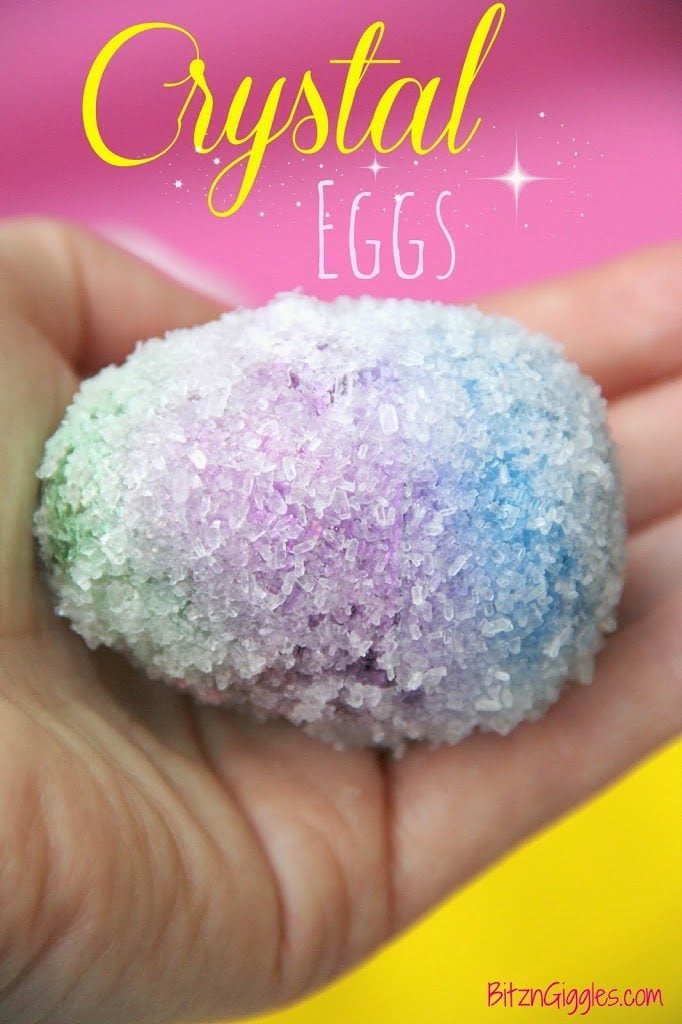
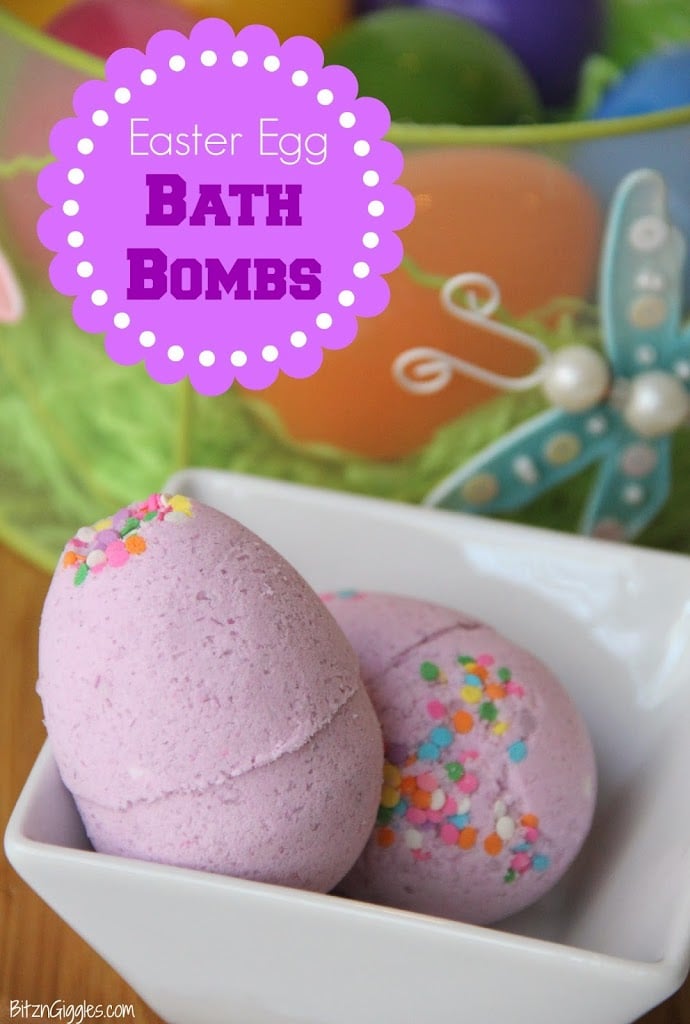
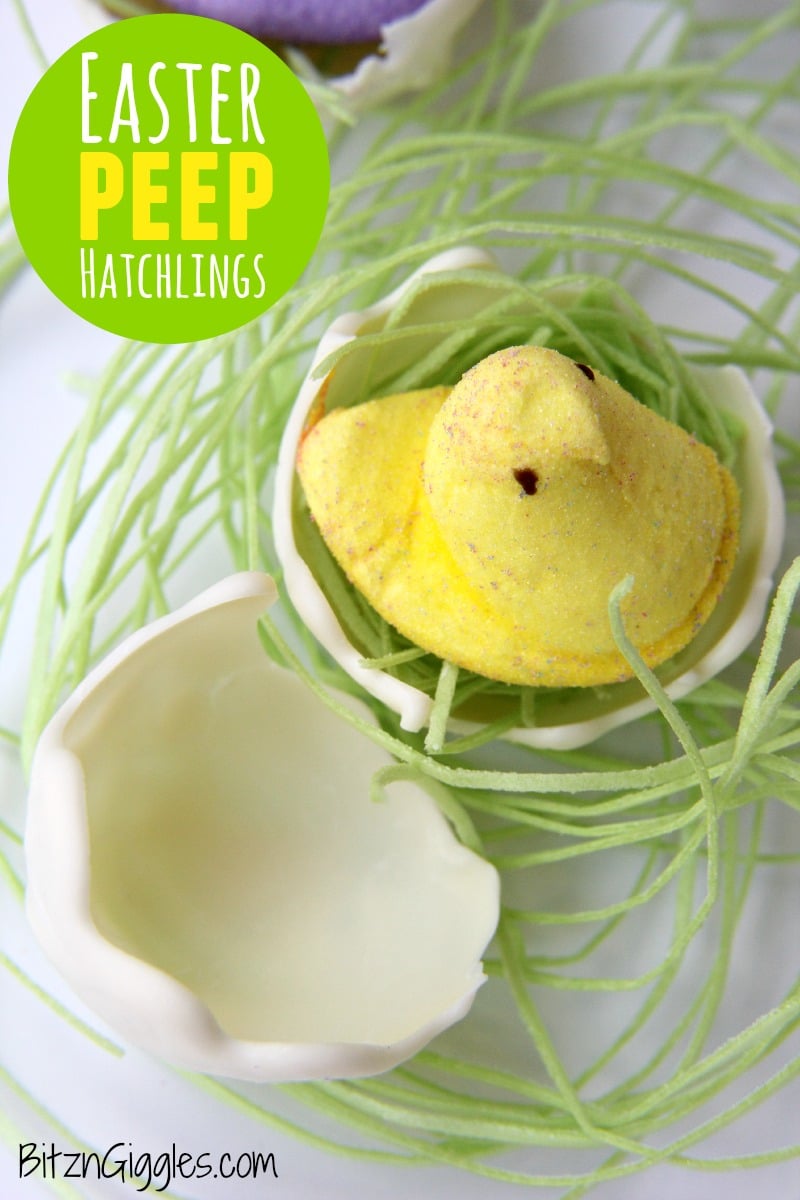
Looking For More Easter Inspiration?

Cool Whip Easter Eggs
Materials
- Cool Whip frozen whipped topping thawed
- Muffin tin
- Hard-boiled eggs cooled
- Food coloring
- Spoon
- Disposable gloves optional
Instructions
- Start by filling each muffin cup up about ¼ of the way with Cool Whip.
- Now add a few drops of food coloring to each of the baking cups. Feel free to get creative and use multiple colors.
- Use a spoon to gently swirl the colors in each of the cups. GENTLY. If you over-stir, the colors will just blend together, causing a mess.
- Place an egg in each of the baking cups.
- Swirl the eggs around in the cups using either a spoon or your fingers. I just felt I was getting more done by using my fingers, so I went that route.
- Now. . .leave them in there for about 30 minutes and allow the colors to set. After a half an hour has passed, rinse the eggs off under cool water, and marvel at your creations.
Notes
- Mindful Swirling: When swirling the food coloring into the Cool Whip, use a gentle hand to create vibrant and distinct patterns. Avoid over-stirring, as this can result in the colors blending together and producing a less defined marbled effect on the eggs.
- Get Creative: Experiment with different color combinations and swirling techniques to personalize your Cool Whip Easter eggs. Try layering colors or using contrasting hues for a visually stunning result that will delight both children and adults.
- Patience is Key: Allow the eggs to sit in the colored Cool Whip for at least 30 minutes to ensure the colors set properly. This waiting period allows the dye to penetrate the eggshell and create vibrant designs. Rinse the eggs gently under cool water to reveal the beautifully marbled patterns before displaying or serving them.
Leave a Reply