Want to Save This Recipe?
Did everyone enjoy Mother's Day weekend? I sure did! Our weekend was filled with long days in the sun, four-wheeler rides, family meals, bike-riding and bubbles. I know I've been complaining about the weather the past couple months, but this weekend was absolutely beautiful. Now that spring has finally arrived, the entire family is eager to spend every possible second. . . outside.
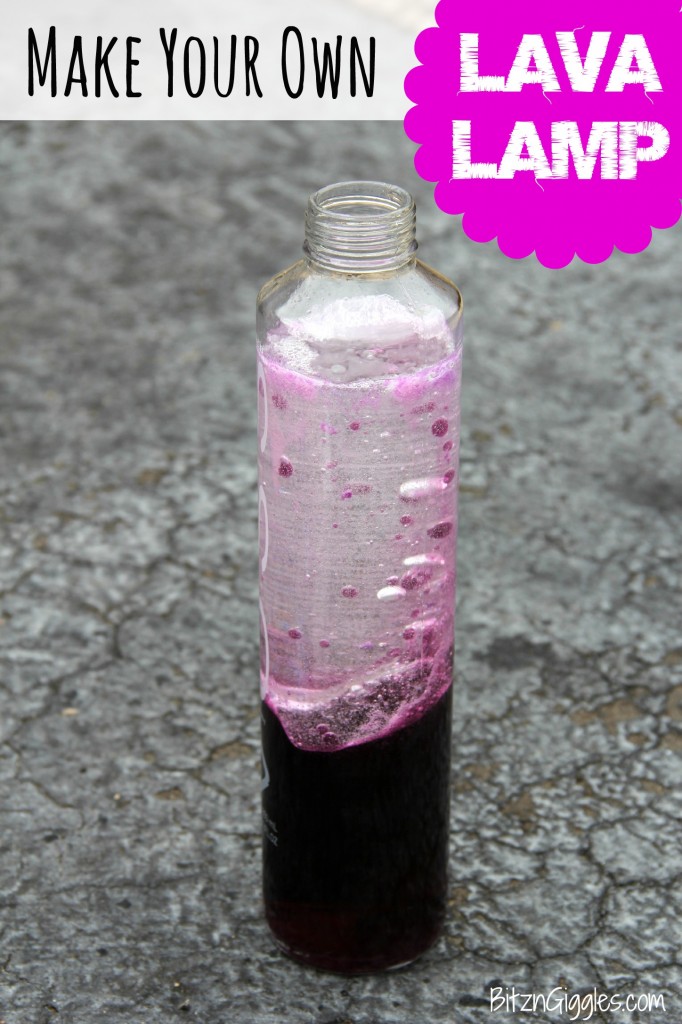
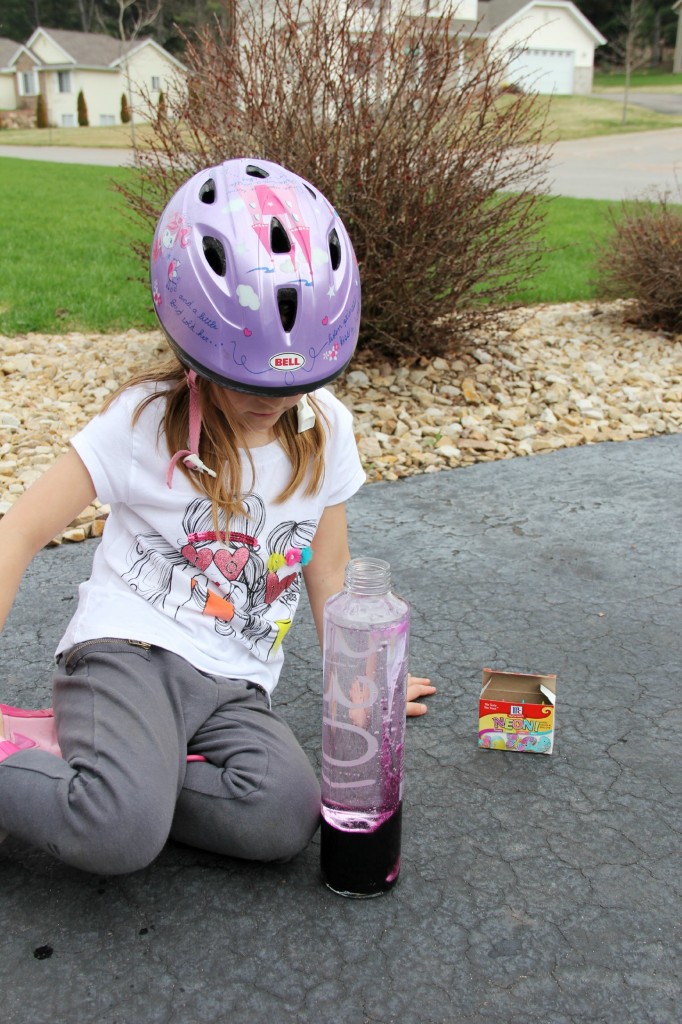
Today I'm going to show you how to make your own Lava Lamp! This is a great outside project and one the kids are sure to enjoy. I ran across this post from S.L. Smith Photography and knew this was something I had to try with the kids. I changed the project up just slightly and used baby oil in place of vegetable oil so the lamps remained clear instead of yellow. Here's what you'll need to make your own:
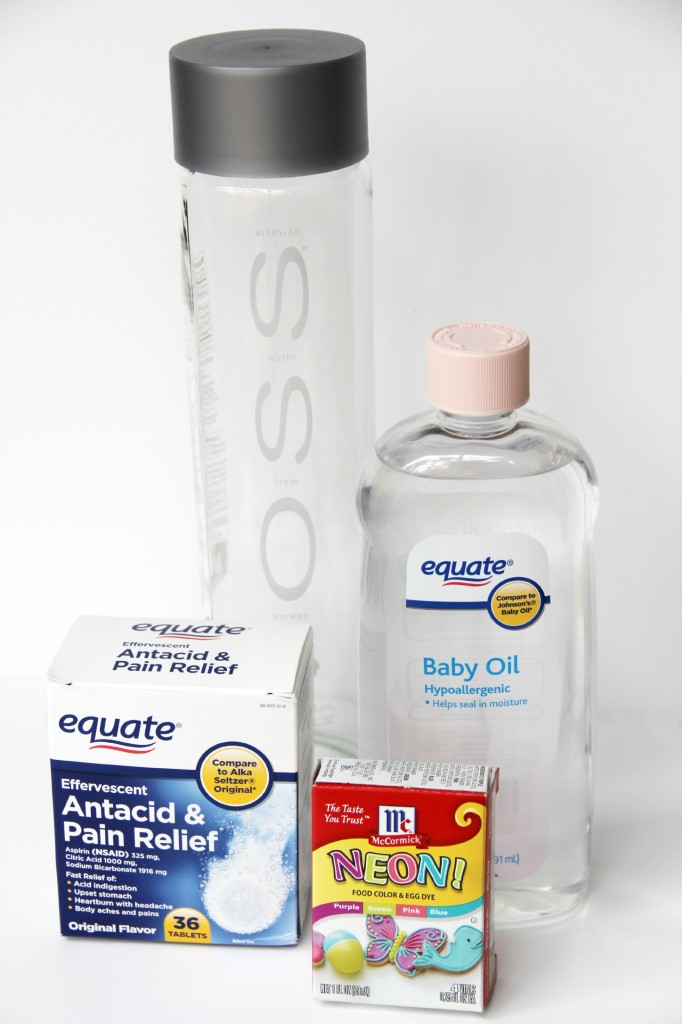
Materials:
- Water bottle (I used a glass Voss water bottle I found at Walmart)
- Baby oil or Vegetable oil
- Water
- Food coloring (10 drops)
- Antacid tablets (I used the generic form of Alka Seltzer)
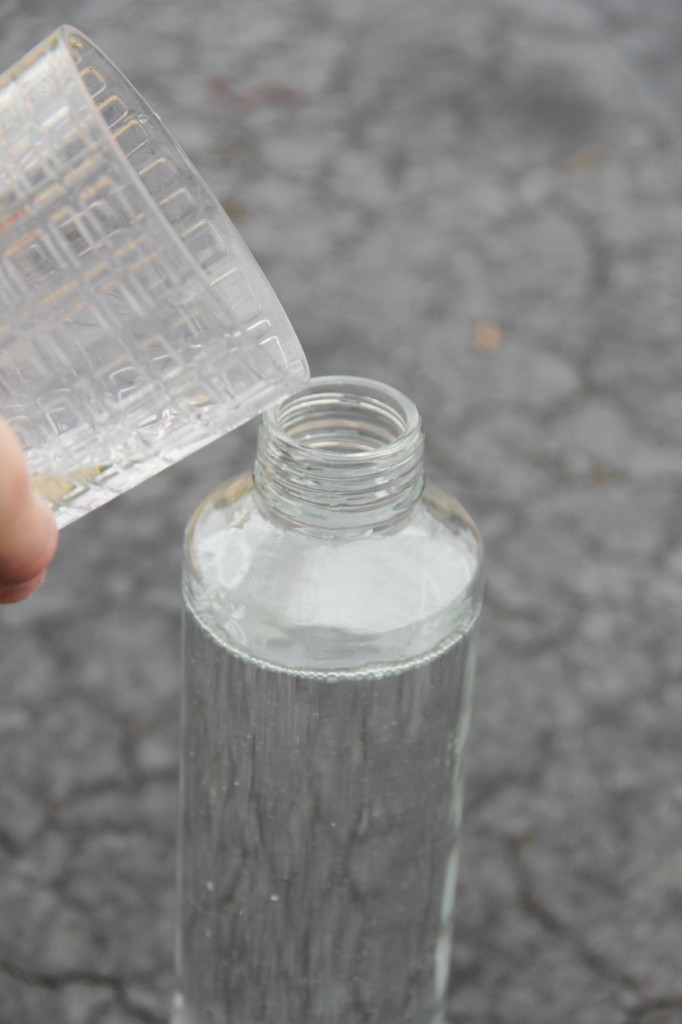
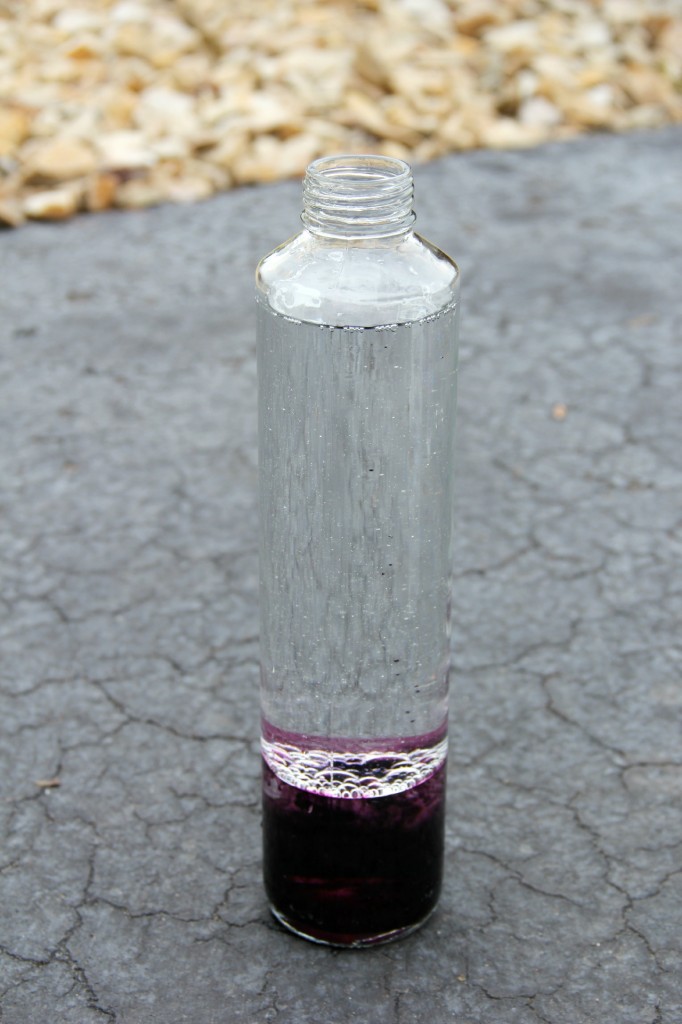
You want to begin with the empty water bottle and fill it ¾ full with baby oil or vegetable oil.
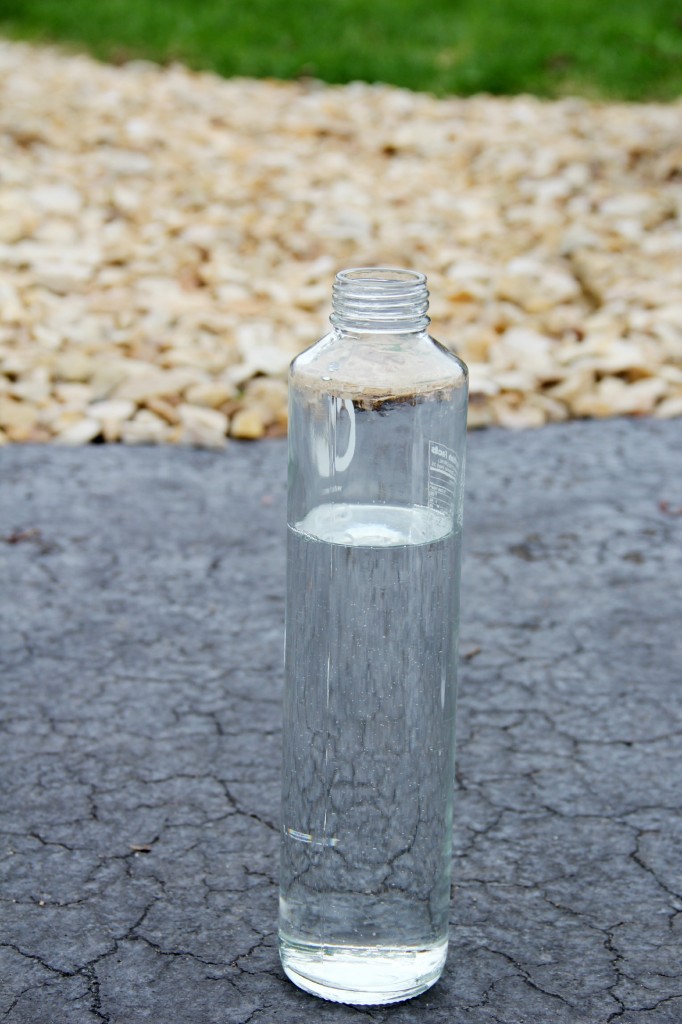
Then take some water and fill it up the rest of the way - leaving about an inch at the top.
Here's the fun part! Add your food coloring. We used neon because we love the bright colors.
Break one of the antacid tablets into quarters.
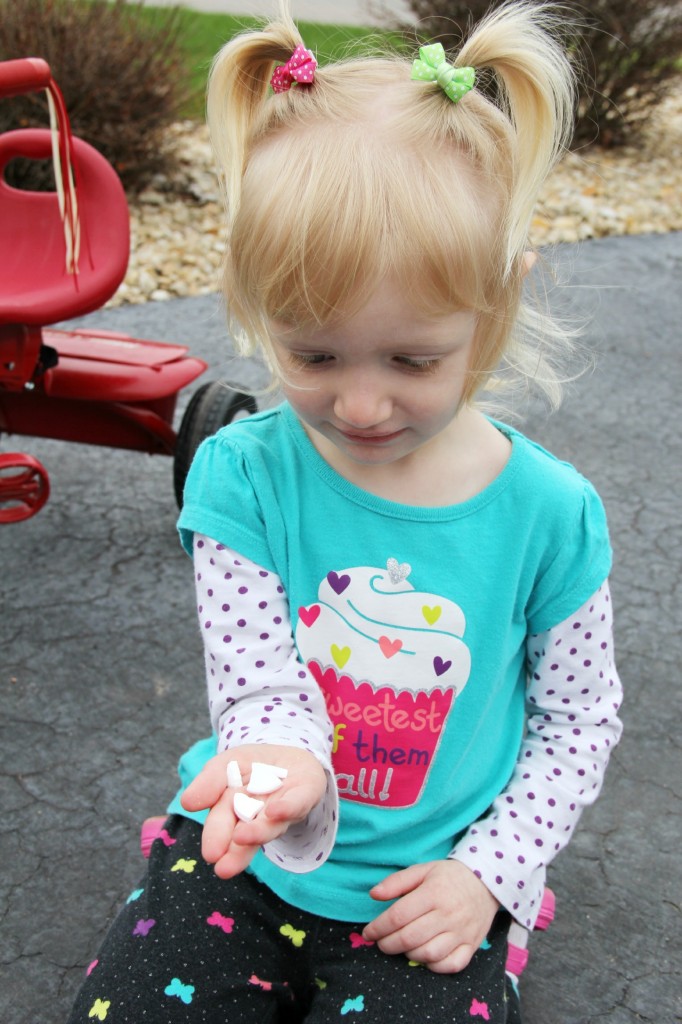
Here's where the big brother comes and takes the tablets to try the project out first. Will they ever learn the concept of sharing and taking turns? Of course they will, but it's still a bit rough right now. We're working through it!
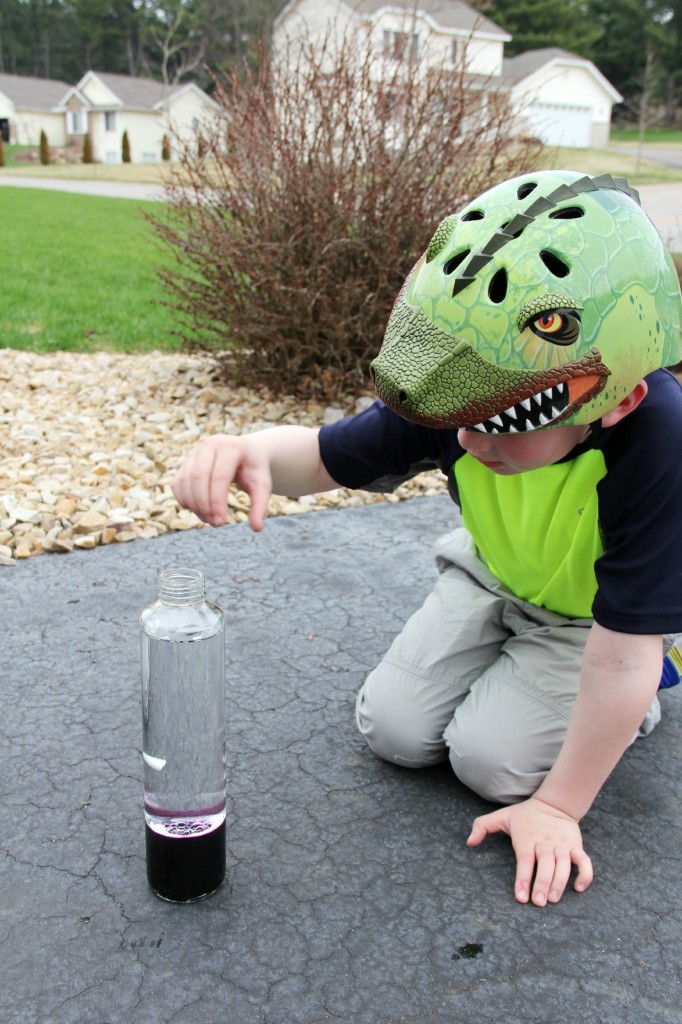
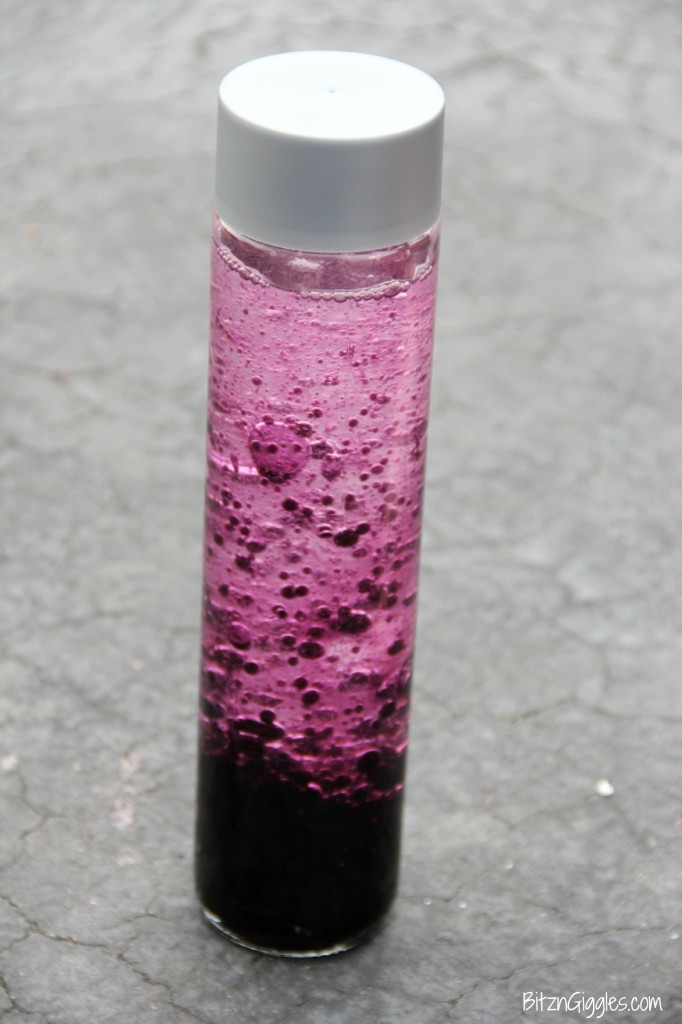
Drop one of the pieces of the tablet into the bottle. Only drop one at a time or the water will get very cloudy and you will be at risk for an eruption. When children are around, this is bound to happen so as I said before - this is a great OUTDOOR project. Be ready for your lava lamp to turn into a volcano in the blink of an eye.
Here it comes!
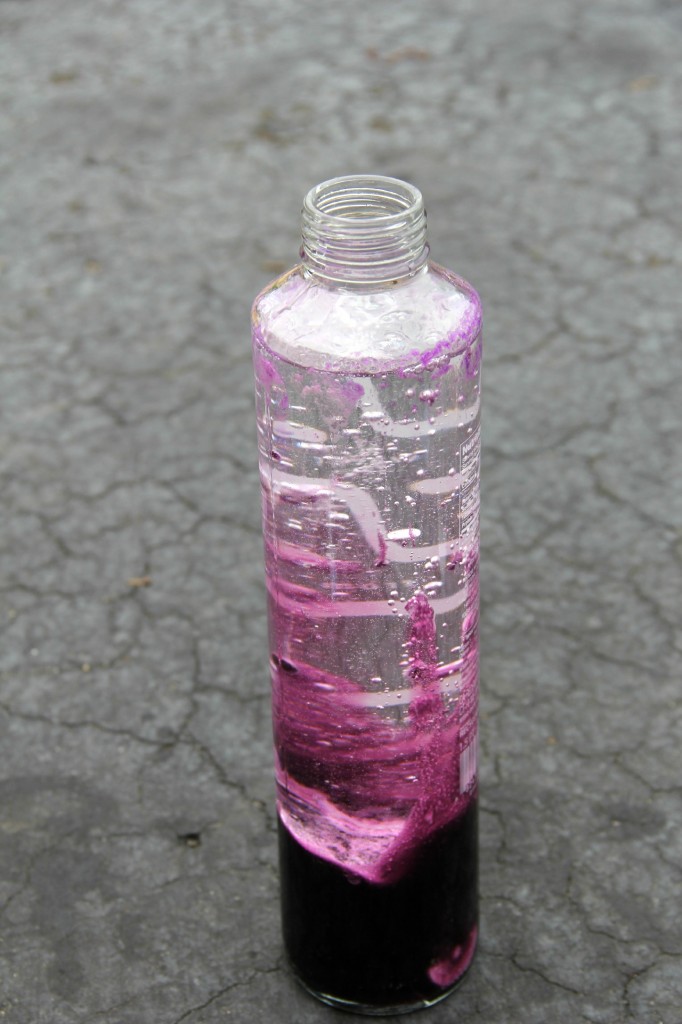
All the commotion got the attention of the neighbor girls and they needed to try it too!
Whenever you're dropping the tablets into the bottle, keep the cover off - otherwise the pressure inside the bottle won't have anywhere to escape and the bottle could burst. Not a good idea. I would recommend supervision during the project especially with smaller children.
If you're wondering how many times you can keep dropping tablets in, we had to have dropped at least 10 or so, and the oil mixture continued to return to its original clarity.
Once you're done with the tablets, you can put the cover back on and play with it more by tipping it upside down and then right-side up again to watch the bubbles suspended in the liquid slowly drop to the bottom. Have fun trying this out on your own!

Make Your Own Lava Lamp
Materials
- Water bottle
- Baby oil or Vegetable oil
- Water
- 10 drops Food coloring
- Antacid tablets
Instructions
- You want to begin with the empty water bottle and fill it ¾ full with baby oil or vegetable oil.
- Then take some water and fill it up the rest of the way - leaving about an inch at the top.
- Here's the fun part! Add your food coloring. We used neon because we love the bright colors.
- Break one of the antacid tablets into quarters.
- Drop one of the pieces of the tablet into the bottle. Only drop one at a time, or the water will get very cloudy and you will be at risk for an eruption.
Notes
- Choosing the Right Oil: When making your own lava lamp, opt for baby oil or vegetable oil as they are both denser than water, creating the necessary density contrast for the lava lamp effect. Baby oil typically produces clearer results compared to vegetable oil, but either option works well for this project. Ensure that the water bottle is filled about ¾ full with the chosen oil before proceeding to the next step.
- Experiment with Food Coloring: Get creative with the colors of your lava lamp by using different shades of food coloring. Bright and vibrant colors, such as neon hues, can create striking visual effects that enhance the overall appeal of the lava lamp. Add about 10 drops of food coloring to the oil in the water bottle, adjusting the amount based on your preferences for color intensity.
- Controlled Tablet Dropping: Break an antacid tablet into quarters before dropping one piece into the water bottle. Be cautious not to drop multiple pieces at once, as this can cause the water to become cloudy and may result in an overflow or eruption. Add one piece of the tablet at a time to maintain control over the reaction and achieve the desired lava lamp effect. Enjoy watching the mesmerizing bubbles and movement as the tablet reacts with the water and creates a captivating display.
Jeannene
How long do the bubbles last? An hour day, week? I am making sensory bottles for my classroom and I don't want to have to change it very often? How many tablets did you use? If you use less are there less bubbles?
Sara
The bubbles don't last very long. They appear when you drop the pieces of the tablet in. Start with pieces from one tablet only - otherwise it could overflow.
Michelle from Weekend Craft
How fun! I think I have all those materials too!
Thanks for stopping by Creative Sparks Link Party. Make sure to stop back on Wednesday!
Danielle
What a fun activity for this sumer! Thanks for linking up to The Feature Friday Linky Party!
Naush
Looks like a lot of fun ! Have pinned it to my pinerest board 🙂
Sara
Thank you for pinning, Naush!