
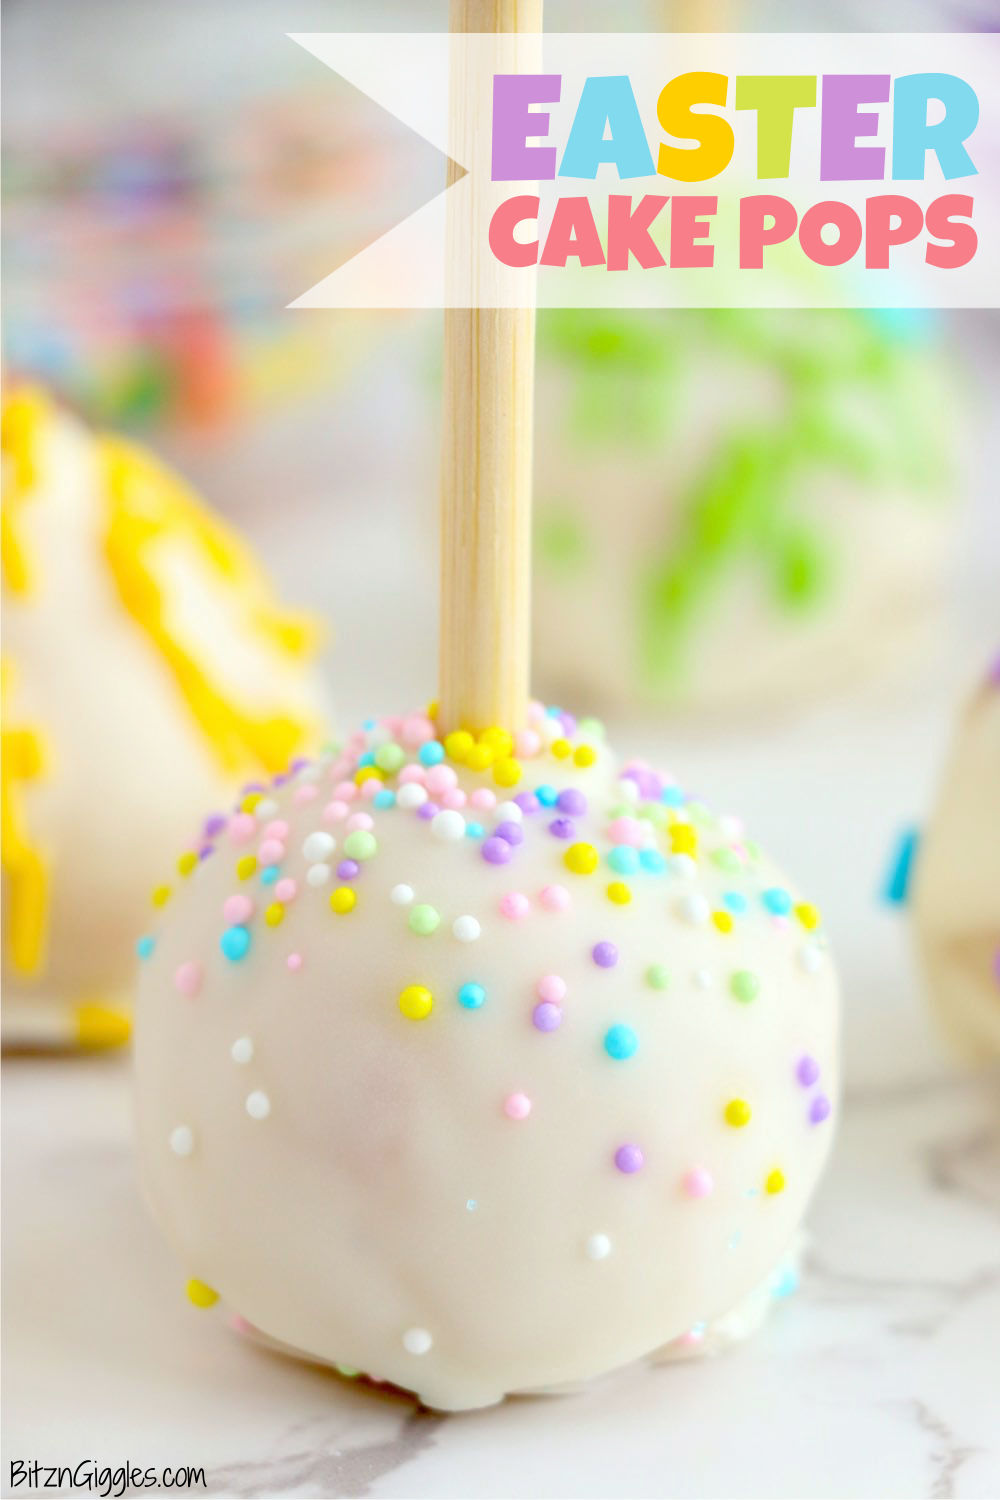
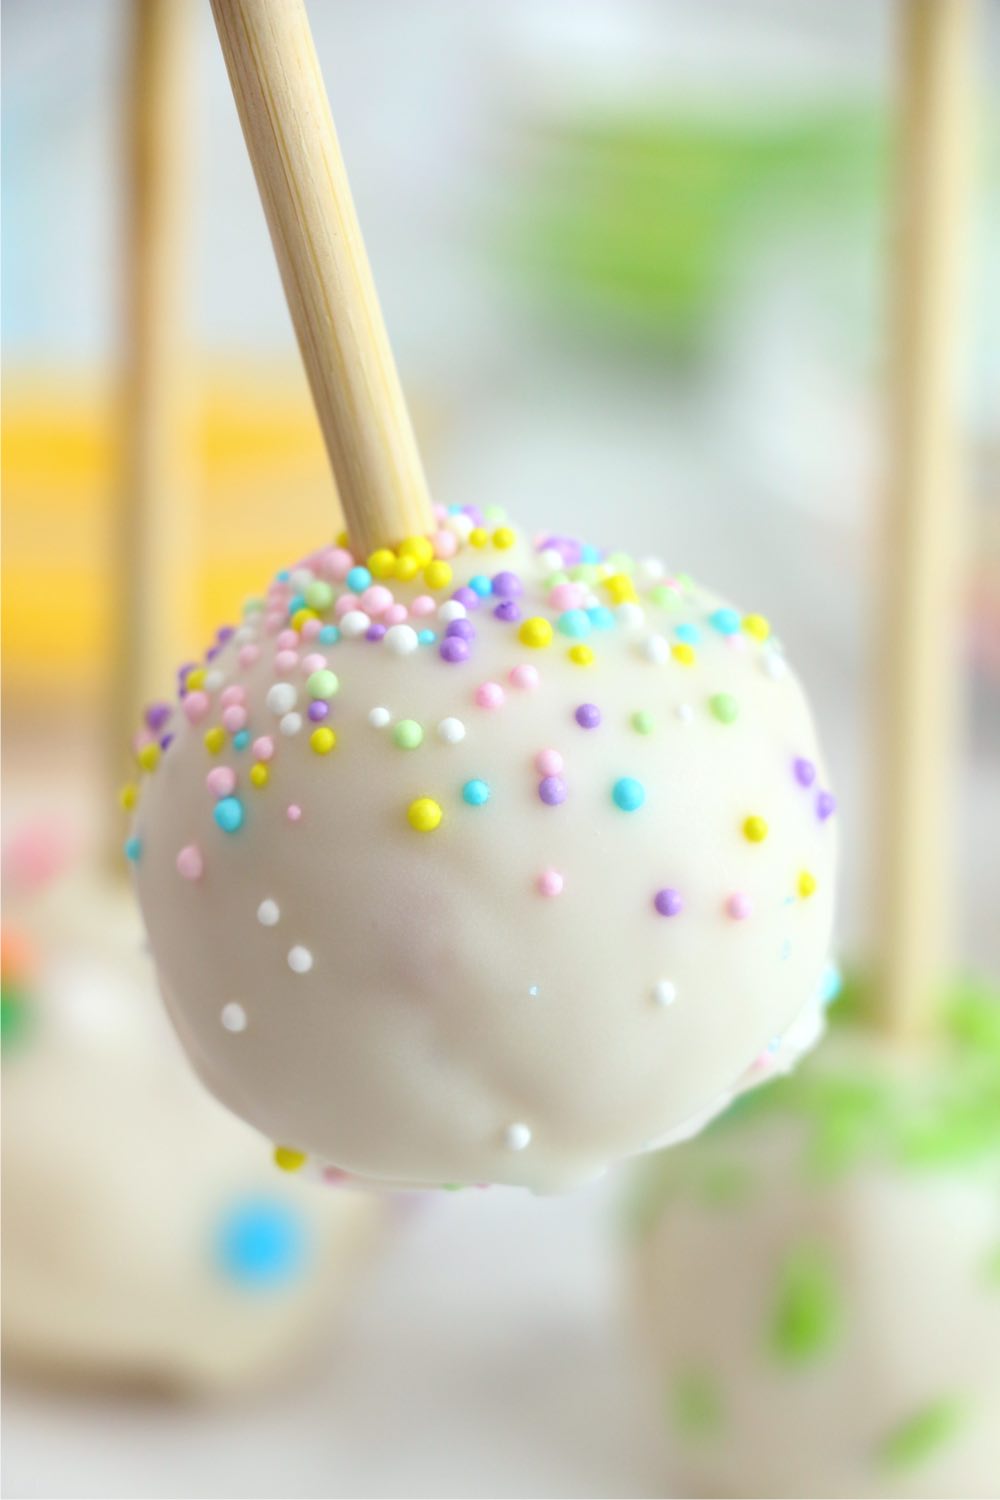
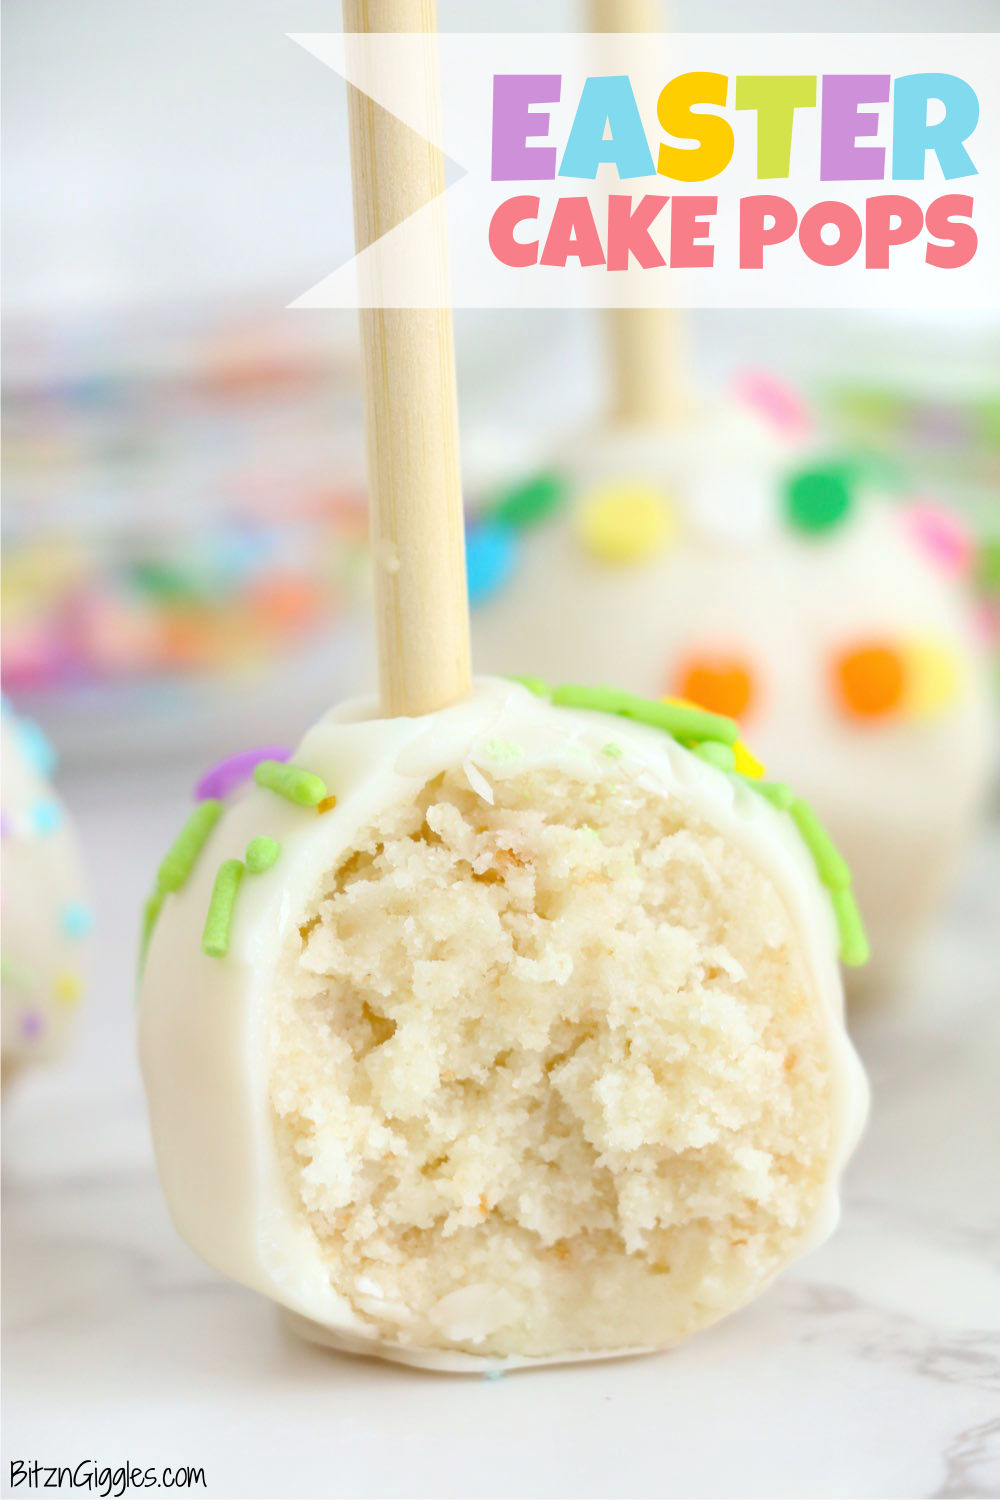
Easter Cake Pops - Moist cake pops dipped in white chocolate and decorated to look like festive Easter eggs!
Want to Save This Recipe?
This post may include affiliate links. Please see my disclosure.
Easter is right around the corner, and it's time to celebrate the end of winter. Making cake pops is a lot of fun, and they always seem to be a hit with everyone. This Easter, why not try making some Easter cake pops? They’re sure to be a hit at your Easter celebration!
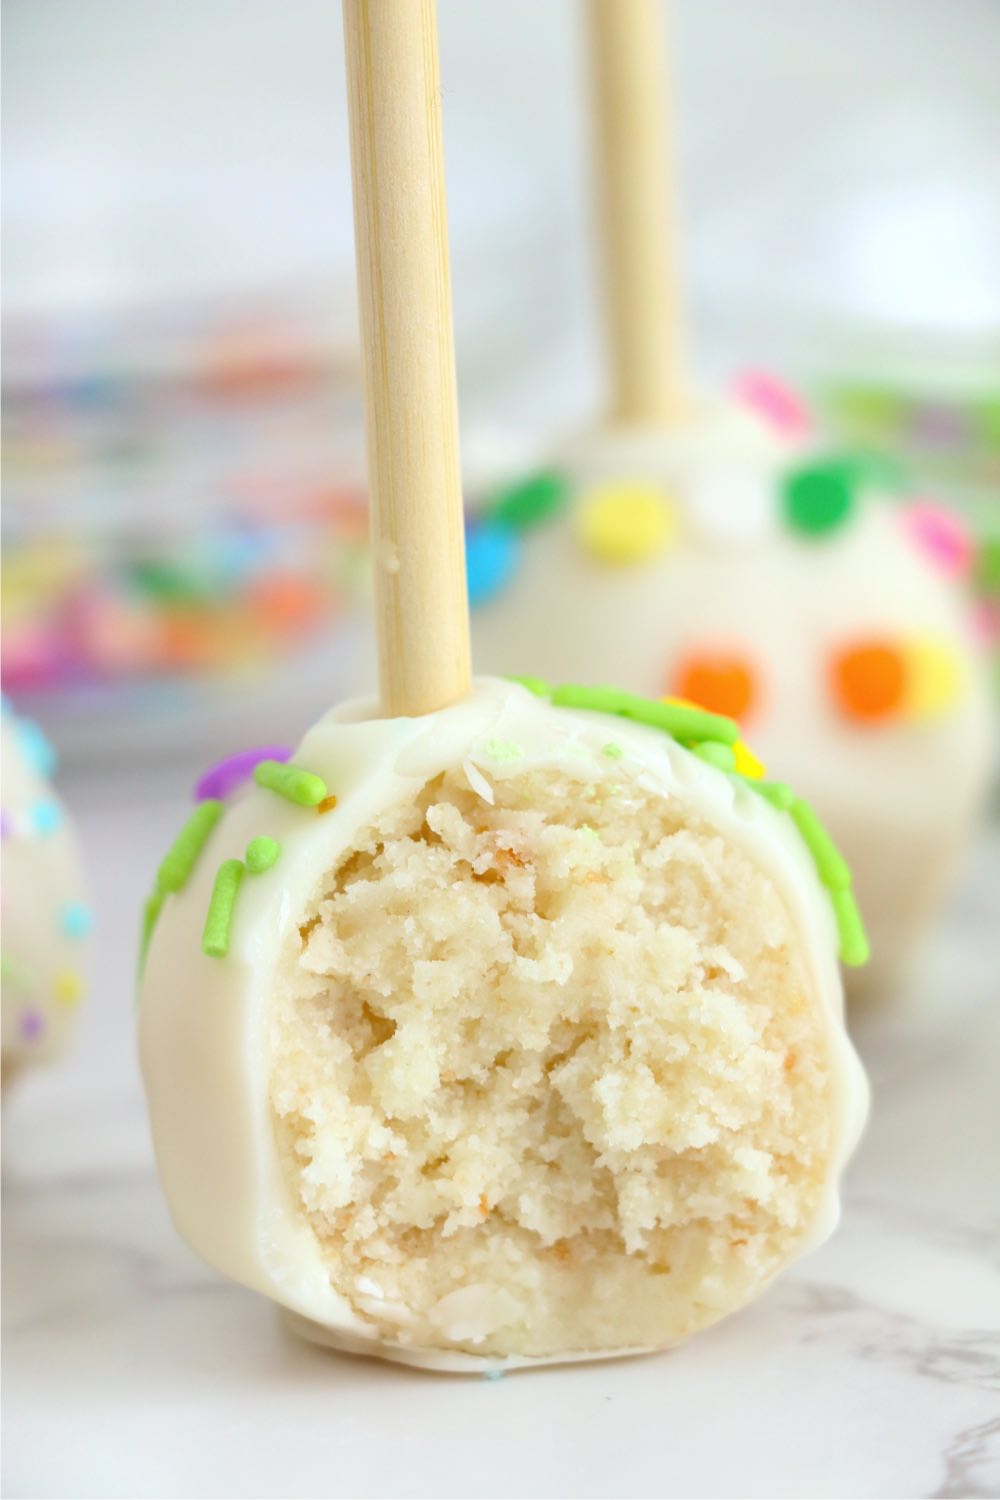
We used a white cake mix, but if you want to stick with the spring theme, use lemon cake. These Easter cake pops are similar to other cake pops except that you make them into an oval shape to resemble Easter eggs. They are a super cute alternative to an Easter cake, and make a fabulous centerpiece if you display them in a basket or on a stand.
HOW TO MAKE EASTER CAKE POPS
To make these Easter egg-decorated cake pops, you'll need:
- Box of white cake mix
- Vanilla frosting
- Spring colored nonpareils and sprinkles
- White chocolate chips
- Cake pop sticks
Do you have all of your ingredients and cake pop sticks ready? If yes, then let's get going!
MAKING THE CAKE BALLS

- Bake your cake according to the instructions on the back of the box.
- Once the cake is done, crumble the entire cake right in the pan.
- Add frosting and work it into the cake crumbs with your hands until it forms a ball.
- Using a cookie scoop and your hands, roll dough into 1-inch balls and place them on a baking sheet lined with parchment paper.
DIPPING THE CAKE BALLS
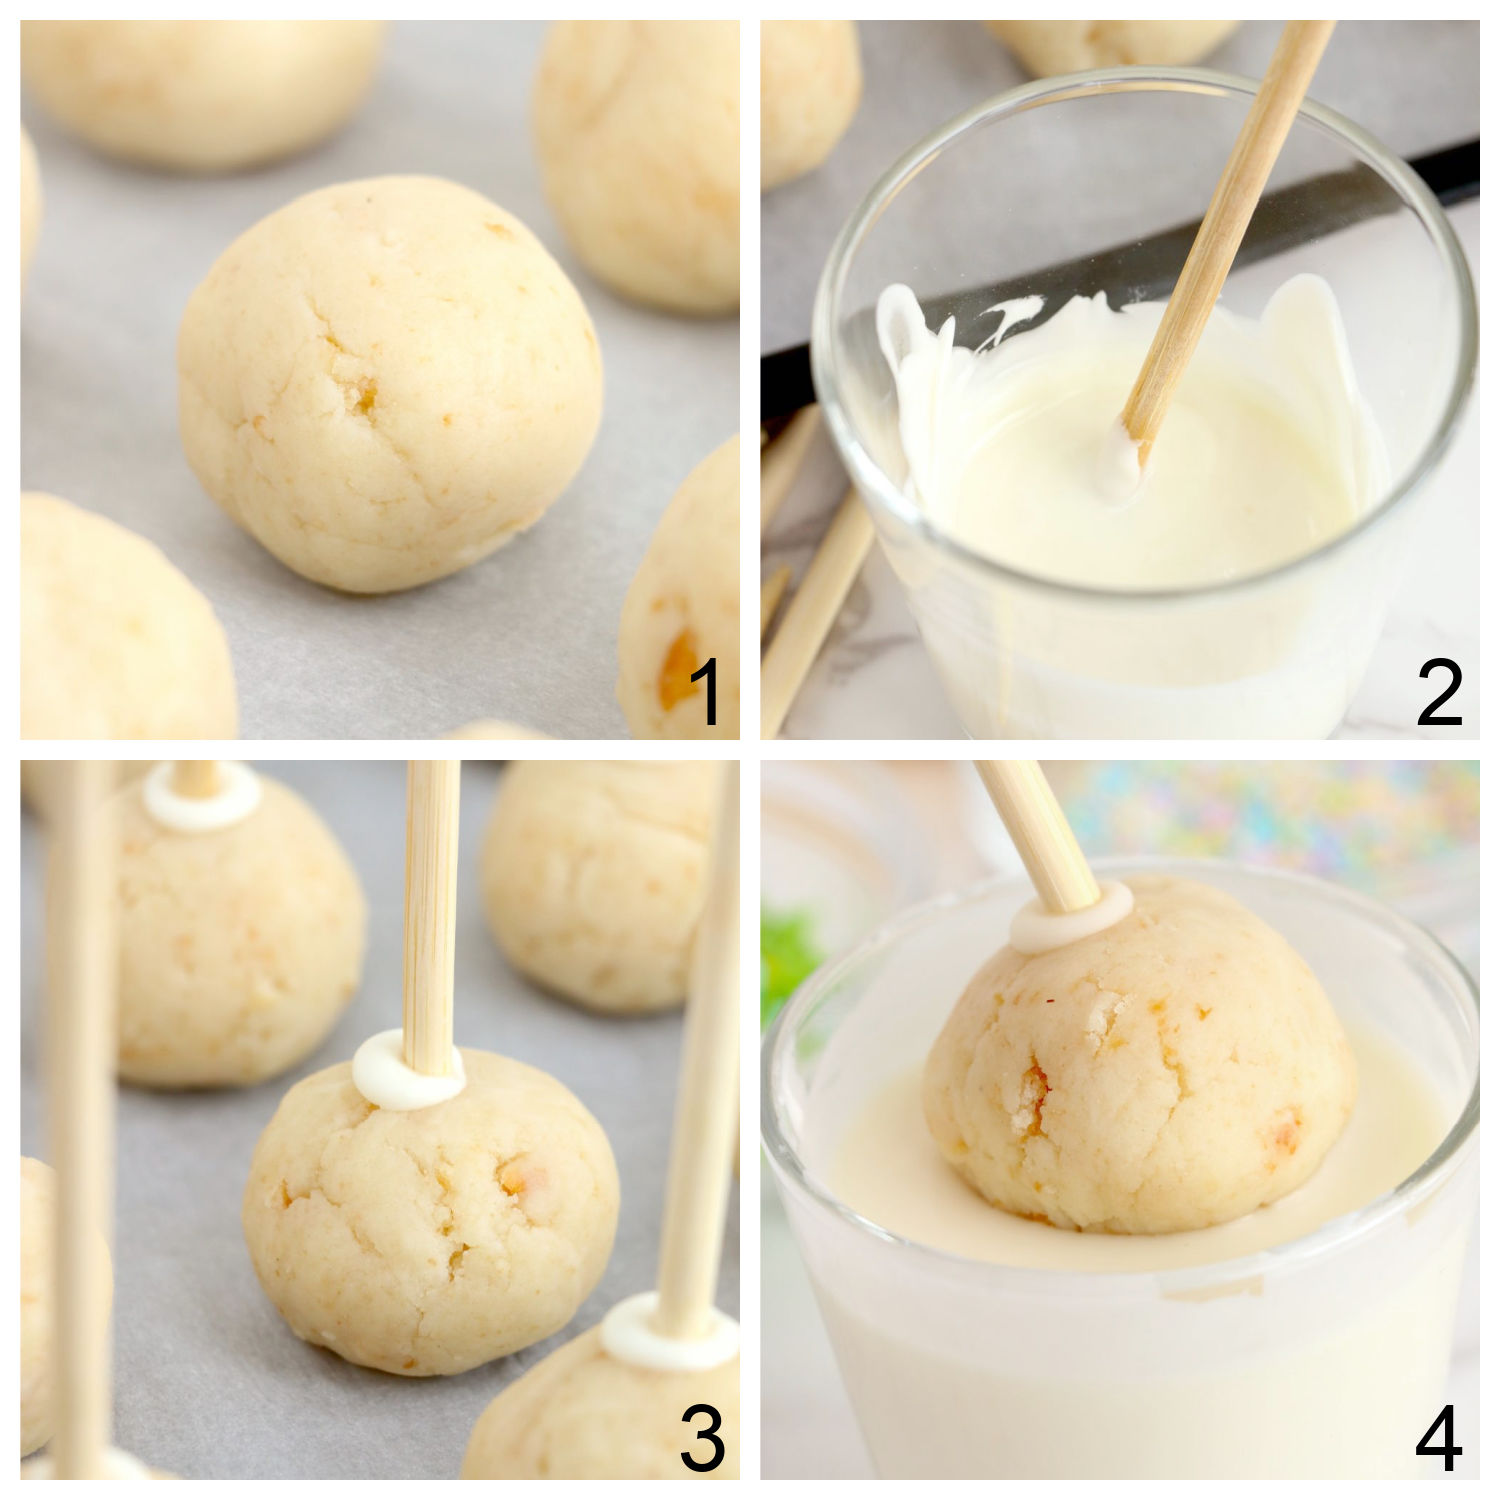
- Place the cake balls on a baking sheet lined with parchment paper.
- Melt a small amount of chocolate chips and dip skewers into melted chocolate.
- Pushed dipped skewers into the cake pops and freeze pops for 1 hour.
- Melt remaining white chocolate chips and roll each cake pop in melted chocolate, allowing excess to drip off.
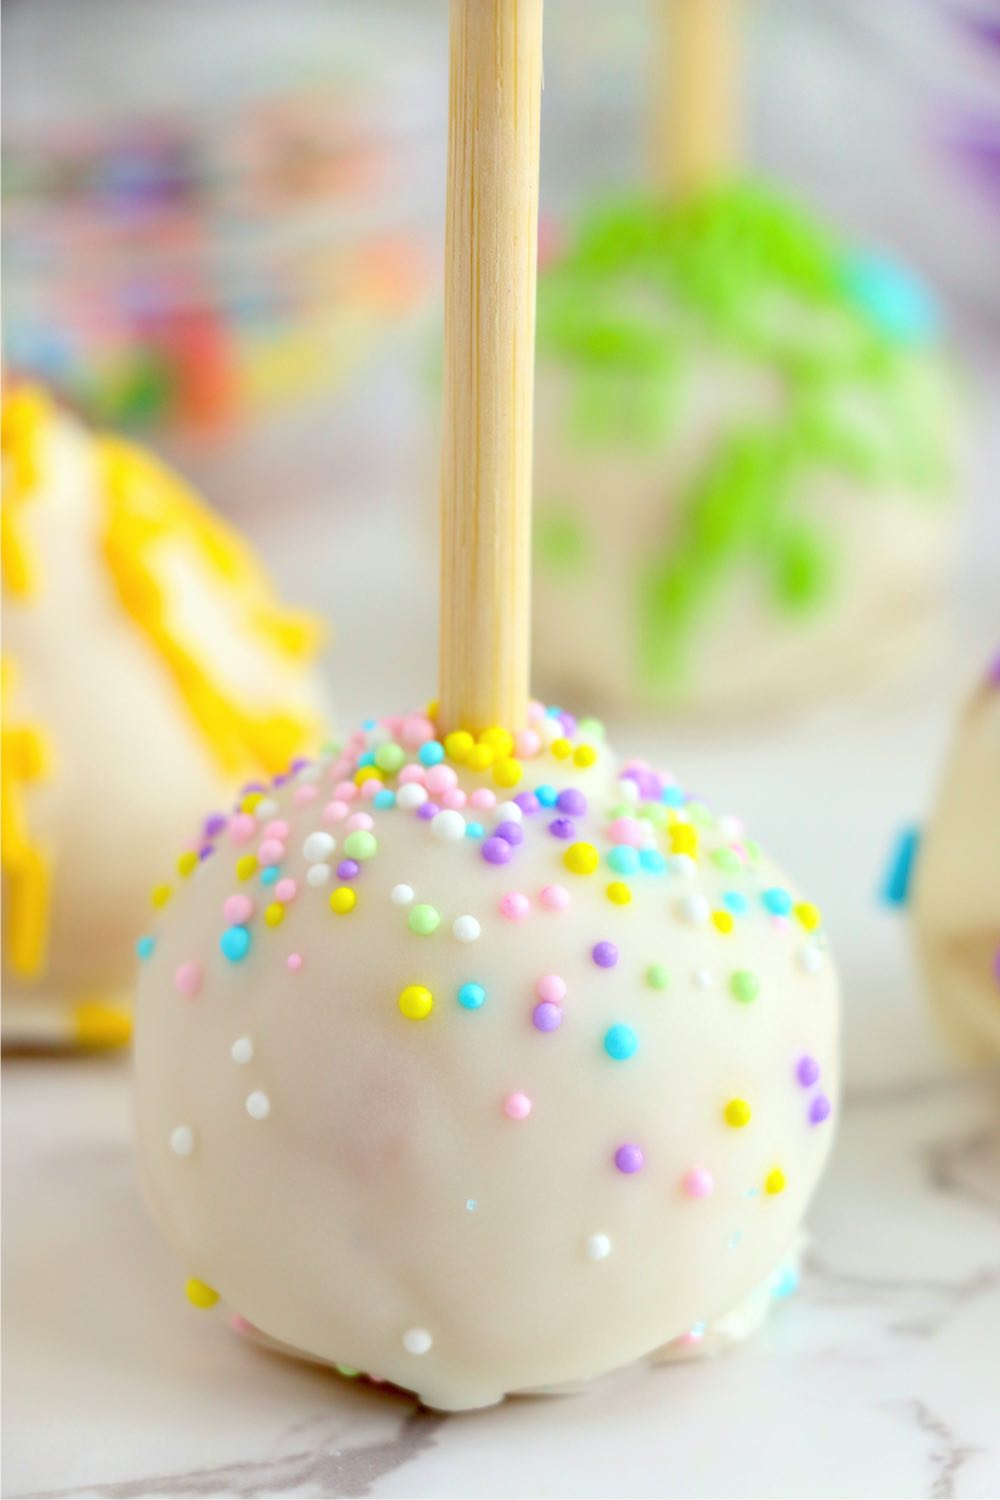
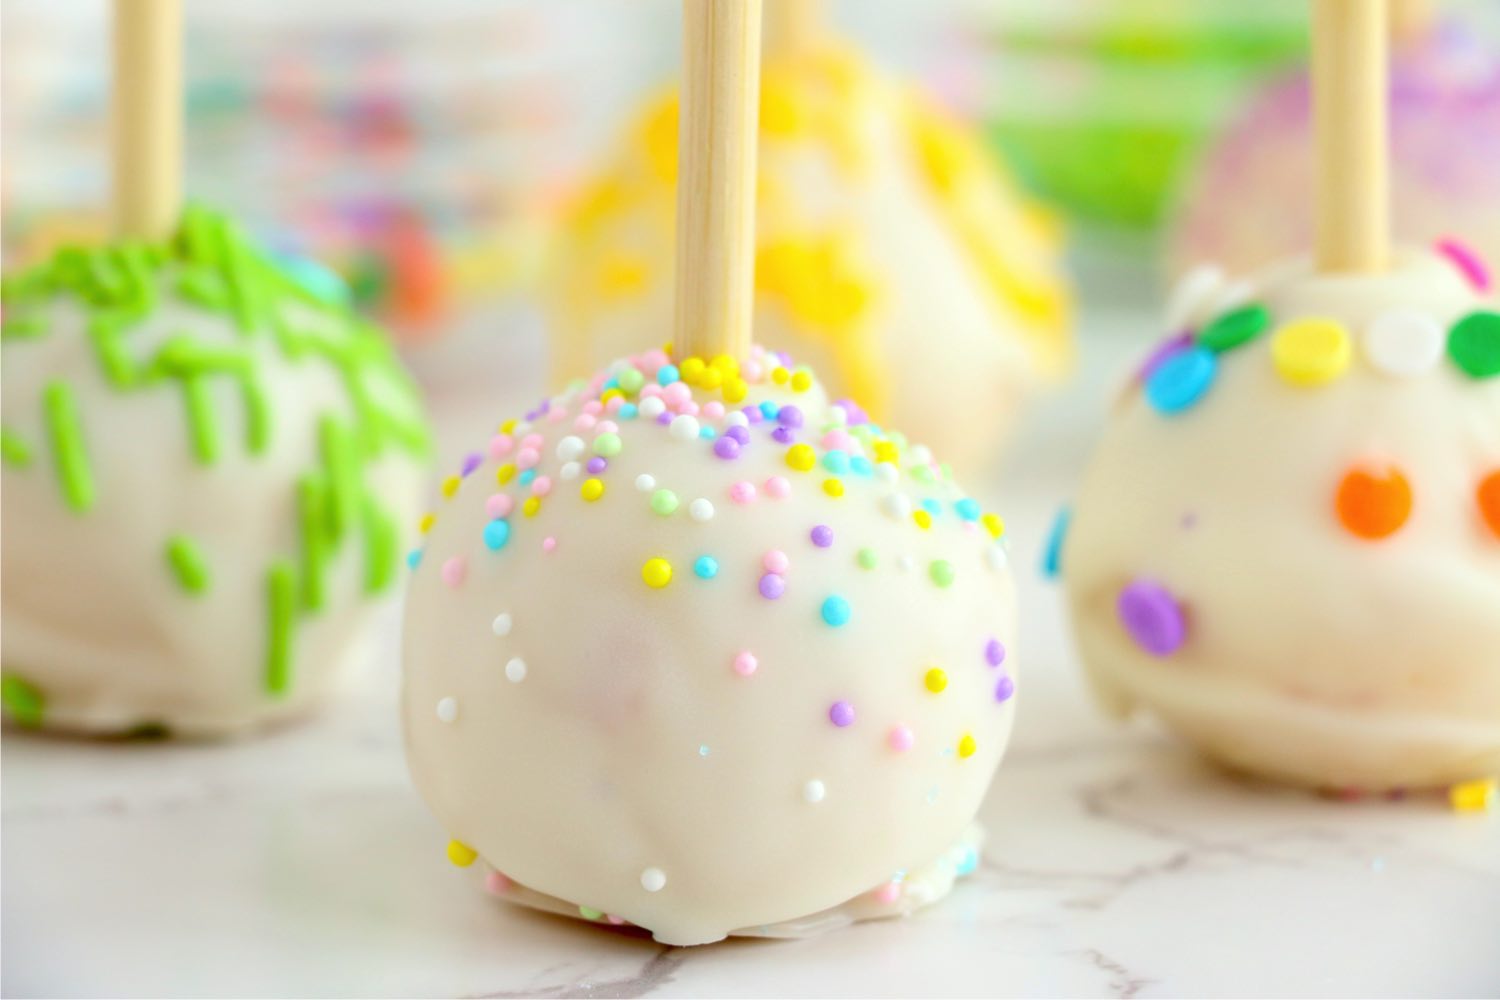
Add some festive Easter nonpareils or sprinkles to the eggs before the chocolate hardens and chill until ready to enjoy!
CAKE POP TIPS & TRICKS
- Use a cake pop stand- A cake pop stand will make it easier to decorate the eggs. Additionally, it's great for displaying your Easter egg cake pops. If you need to serve them individually, try these bags or boxes.
- Don’t skip "freezing" the cake balls- If you don’t freeze the cake balls for an hour, they will be too soft and fall apart.
- Make the cake balls ahead of time- To save on time, make the cake balls and place them in the refrigerator the night before. Decorate the next day.
IS IT ABSOLUTELY NECESSARY TO REFRIGERATE THE CAKE BALLS AFTER DIPPING?
No, you don’t need to refrigerate them after dipping them in chocolate. They do have the best flavor and texture when left on the countertop. However, placing them in the refrigerator for about 10 minutes will help the chocolate harden quicker.
HOW LONG CAN YOU STORE CAKE POPS?
Once the cake pops are completely chilled and hardened, you can enjoy them the same day, or you can store them for up to 2 weeks at room temperature. Simply place them in a plastic storage bag
MORE EASTER TREATS YOU'LL LOVE
- Peanut Butter Bird's Nest Cookies
- Easter Peanut Butter Eggs
- Bunny Butt Funfetti Easter Cheese Ball
- Easter Trifle Dessert
- Peeps Cake With Marshmallow Frosting
- Sweet Bunny Bites
Easter Cake Pops
Ingredients
- Boxed white cake mix (Prepared according to box directions)
- 2-3 tablespoons vanilla frosting
- 12 ounces white chocolate chips (divided)
- Spring colored nonpareils and sprinkles
- 24 cake pop sticks
Instructions
- Allow cake to cool after baking according to box directions.
- Crumble entire cake in its baking pan with a fork.
- Add frosting and work it into the cake crumbs with your hands until it forms a ball.
- Using a cookie scoop and your hands, roll dough into 1-inch balls and place them on a baking sheet lined with parchment paper.
- Melt a small amount of chocolate chips.
- Dip skewers into melted chocolate and then push them into the cake pops.
- Freeze for 1 hour.
- Melt remaining white chocolate chips.
- Roll each cake pop in melted chocolate, allowing excess to drip off.
- Add sprinkles quickly before chocolate hardens.
- Chill before serving.
Notes
- Don’t forget to freeze your cake balls so that they don’t fall apart.
- Make your cake balls the night before and decorate the next day.
- To make your cake pops easier to decorate, use a cake pop stand.
Leave a Reply