
Want to Save This Recipe?
Summer is in full swing, and like many of you, my family and I have been enjoying it to its fullest! The warm summer months are short-lived here in Wisconsin, so I've always tried to make the most of this beautiful season. Even as a child, my friends and I would play hard all day, every day - riding our bikes, building forts, catching crawfish in the creek and staying out as long as our parents would allow.
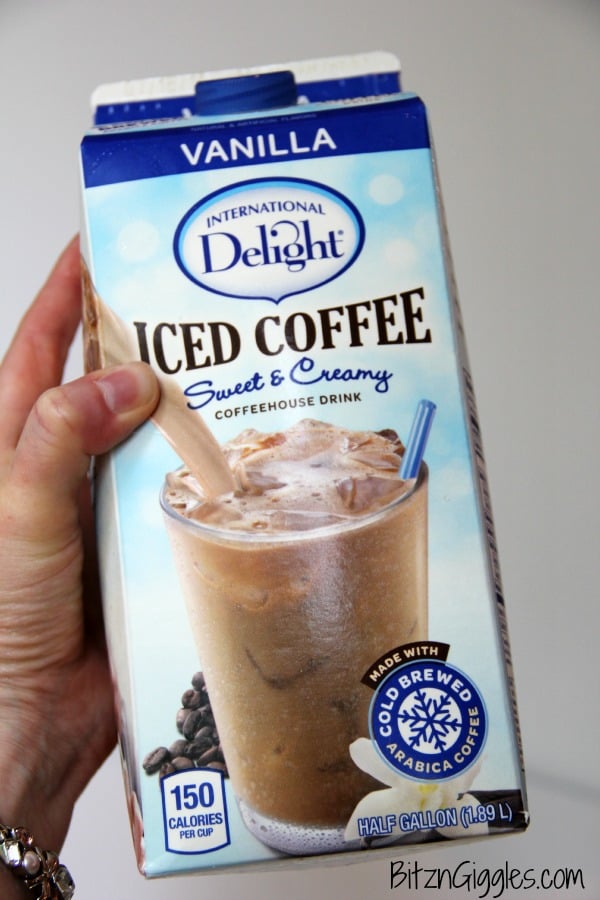
One summer, my best friend's mom served up a sundae cone cake, kind of like the one I'm sharing today. She used regular vanilla ice cream rather than making her own, but it was one of the coolest things I had ever seen back then and still gets ooohs and ahhhs when I make it today. However, this time I'm putting more of an "adult" spin on a childhood favorite. . .I added International Delight Vanilla Iced Coffee!
This Iced Coffee Sundae Cone Cake is a perfect dessert for a hot summer day. The vanilla iced coffee taste is subtle and delicious for friends and family who drink coffee, and even those who don't!
Setting up the cake is simple:
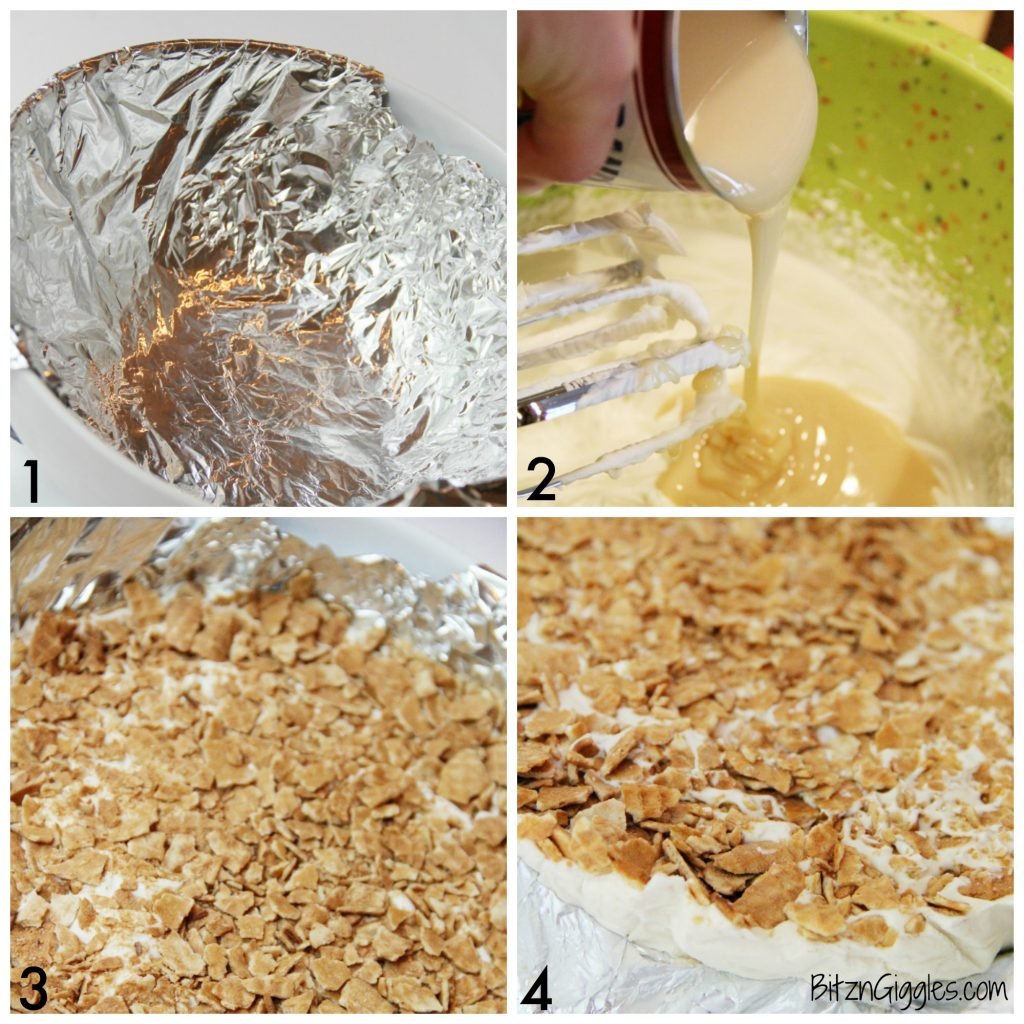
- Line a bowl with aluminum foil.
- Mix together the heavy whipping cream, sweetened condensed milk and iced coffee.
- Pour the mixture into the bowl and add crushed sugar cones to the top.
- Freeze for 4-5 hours or until firm and then peel away the aluminum foil. Flip the cake over and place on a serving platter.
Here's where the fun really begins!
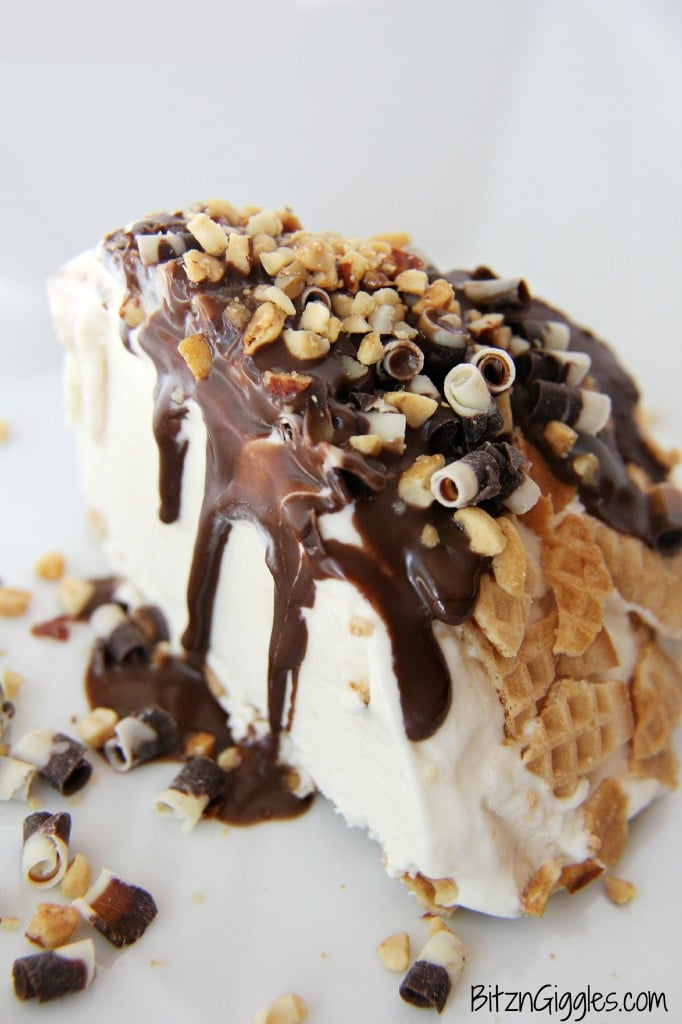
Add some more crushed sugar cones to the side of the cake and then drizzle some homemade magic shell topping over the cake and garnish with chocolate curls and nut topping.
You have to admit, this is turning into quite the decadent dessert. Not only is it decadent, it will certainly remind your family and friends of one of their favorite childhood desserts.
If this doesn't scream summer I'm not sure what does. The crunch of the cone, the creamy ice cream, the decadent chocolate, the cool iced coffee flavor. . .
It's really a little slice of heaven. It's a reminder of my childhood summers in grown-up form.
What's your favorite way to enjoy iced coffee? If you've never thought about using it in an ice cream cake, you should. It's guaranteed to become a summer favorite, and those you share it with will ask for it again and again.
For more fun with International Delights Iced Coffee, head over to their Facebook page and enter to win an International Delights Iced Coffee tumbler through the end of August! 100 tumblers will be awarded each week!

Iced Coffee Sundae Cone Cake
Ingredients
For the cake
- 16 ounces heavy whipping cream
- 14 ounces sweetened condensed milk
- 4-5 tablespoons International Delights Vanilla Iced Coffee
- 10 crushed sugar cones (divided)
- Chocolate curls and nut ice cream topping for garnish
For the magic shell
- 1 cup chocolate chips
- 2 tablespoon coconut oil
Instructions
For the cake
- Line a 1 ½ quart bowl with aluminum foil.
- Mix the heavy whipping cream with a hand mixer until it forms stiff peaks.
- Add the sweetened condensed milk and iced coffee and continue to mix with the hand mixer until combined.
- Pour the mixture into the foil-lined bowl and top with 5 crushed sugar cones - pressing the cones onto the top of the cream mixture.
- Freeze for 4-5 hours or until firm.
- Unmold the dessert onto a plate or serving platter and remove the foil.
- Press the remaining crushed cones into the side of the cake.
- Drizzle the chocolate magic shell over the top of the cake and garnish with chocolate curls and nuts.
For the magic shell
- Stir together chocolate chips and coconut oil in a microwave-safe bowl.
- Place in microwave and cook on high for 30 seconds. Remove and stir. Continue microwaving and stirring in 15 second intervals until all of the chocolate is melted.
- Allow the chocolate to reach room temperature.
Notes
- Ensure Proper Freezing: To achieve the desired texture for your iced coffee sundae cone cake, make sure to freeze it for the recommended time. Allowing the cake to freeze for at least 4-5 hours ensures that it sets properly and holds its shape when unmolded. For best results, you can even freeze it overnight to ensure it's completely firm before serving.
- Customize with Toppings: Get creative with your cake toppings to add extra flavor and visual appeal. In addition to chocolate curls and nut ice cream topping, consider adding crushed nuts, sprinkles, caramel sauce, or even a dollop of whipped cream. These toppings not only enhance the taste and texture but also make the cake more visually appealing and indulgent.
- Perfect the Magic Shell: When making the chocolate magic shell, ensure that the chocolate chips and coconut oil are fully melted and well combined. Microwave them in short intervals and stir between each interval to prevent the chocolate from burning or seizing. Once melted, allow the magic shell to cool to room temperature before drizzling it over the cake. This ensures that the chocolate sets properly when it comes into contact with the frozen cake, creating a satisfying crunch when served.
Nutrition
This is a sponsored conversation written by me on behalf of International Delight. The opinions and text are all mine.
Michelle from Weekend Craft
My two favorite things in the world! Ice cream cake and coffee! I need to make this asap! Maybe for my potlock on friday! Thanks so much for linking up at the Creative Sparks Link Party. We are live again today so stop by and link up! http://bit.ly/1pEMI5A
Kristy gd
My goodness! I'm afraid that if I served this, my friends would never leave! It would be party all the time! Thanks for linking up with Creative Spark!
Sara
There's always dessert to go! LOL Thanks for stopping by Kristy!
Michele @ Alwayzbakin
That looks incredible!! Yum! Love how you put the crunchy cones on top.
Sara
Thanks, Michele! It was such a fun cake to make and delicious too!
Lisa Ehrman
Wow! I've never seen anything like this before. It looks amazing, and I've pinned it so I can make one for my kids 🙂 Thanks for sharing on the linky 🙂
Sara
Thanks so much, Lisa! You can leave out the iced coffee when you make it for your kids and it will still taste great! Hope you enjoy!