
Want to Save This Recipe?
Happy Independence Day everyone! I hope you're spending the day with family and friends! We're having a big party up at the lake cabin today with a picnic, swimming, campfire and fireworks at dusk! I thought it was the perfect time to share an awesome project I featured over at Smart School House a few weeks ago!
This Mason Jar Solar Light is a wonderful addition to your outside summer décor. It's great for patios and decks. Make a few of them and line them up for lots of ooohs and ahhhs. You won't believe how bright they are, and the addition of the fun tissue paper gives them a unique design that sets them apart from anything you'd buy at the store!
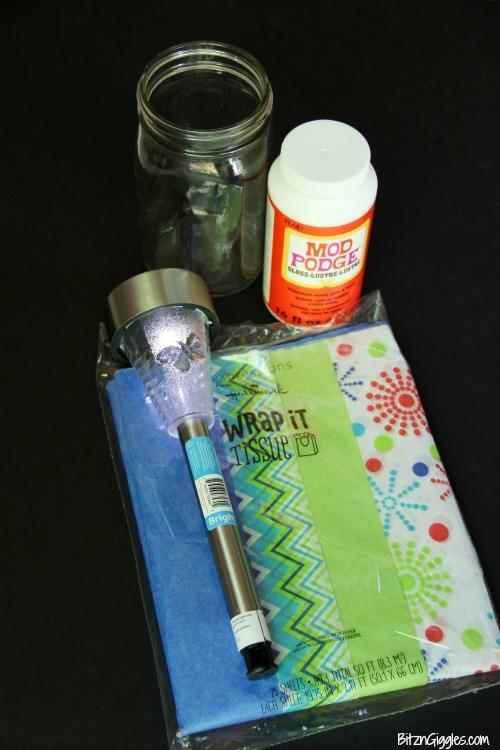
Here's what you'll need to make your own:
Mason Jar Solar Light Materials:
- Wide Mouth Mason Jar (Quart size)
- Tissue paper 1-2 sheets (your choice of design)
- Mod Podge
- Paintbrush
- Outdoor solar light
- Super glue or other heavy-duty, waterproof adhesive that can stand up to the outdoor elements (not pictured)
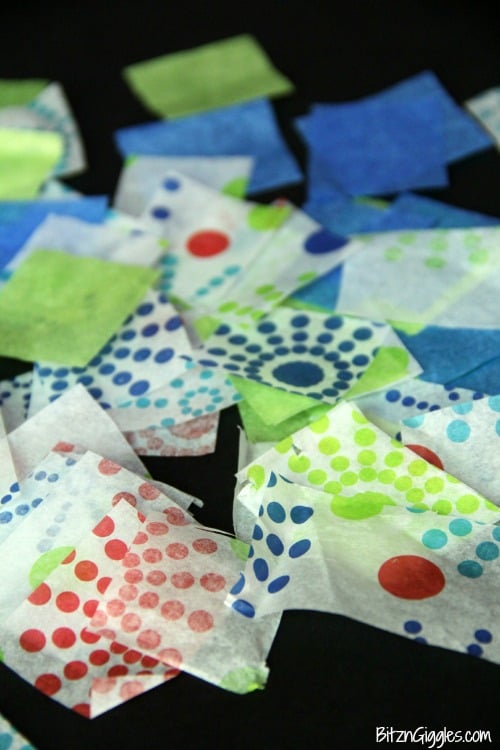
I found some really fun tissue paper at Walmart with bright blues and greens. One of the papers almost looked like it was covered in fireworks and I thought it would be perfect for the summer! Start by cutting your tissue paper into small squares.
Because I wanted my light or lantern to be pretty bright when lit, I chose to cut up more of the pieces with the design on them since the paper was white, and then accented with pieces of the darker blue and green.
Get out your Mod Podge and start painting the inside of the mason jar, working on one area at a time, gluing your tissue paper pieces in place. Get creative! The design can be whatever you'd like it to be!
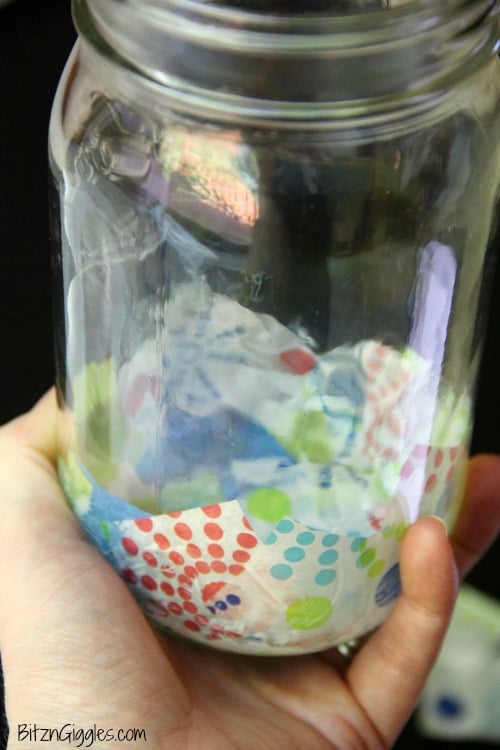
Continue until the entire jar is covered and feel free to pat down any loose tissue pieces with a little more Mod Podge just for good measure! Here's the part where you need to walk away for a bit to let your jar dry. Take the dog for a walk, put some laundry in or take the kids to the park. When you return, your masterpiece should be dry and ready for the next step!

I'm sure a lot of you are wondering at this point what kind and size of solar light to buy. I went and found a wide mouth quart jar while I was at the store, put it in my cart and literally took it with me to the garden center where I knew I'd find the solar lights. I took a couple of the solar lights apart like shown below and placed the top of the light (the round part) into the opening of the jar.
My advice to you is to do the same to ensure a good fit. It's also a good idea to set the solar light outside in the sun to charge it up the day you decide to do the project.
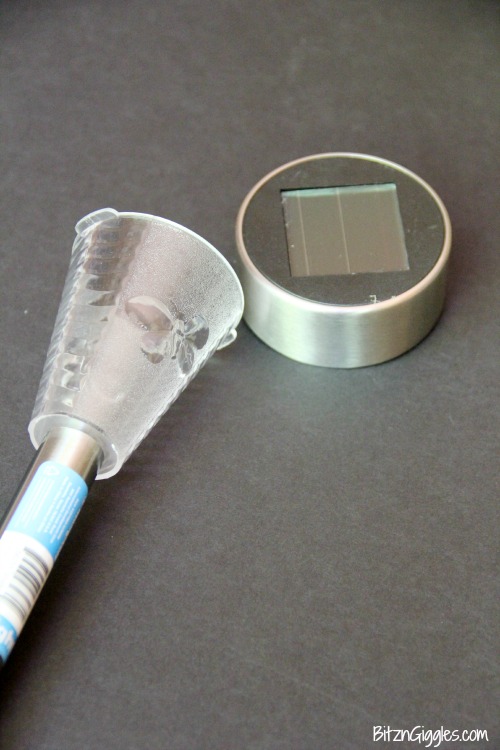
When the inside of your jar is dry, take apart the solar light and fit the top of the light into the opening of the mason jar. Mine actually set in the jar perfectly and stayed on its own without any adhesive. I knew if I wanted it to last, though, I would need to seal it with a waterproof adhesive to keep the rain, etc. out.
I didn't glue the top of the solar light to the top of the jar until I knew everything was working, however. I took the finished jar and the top of the solar light into our bedroom closet (where it was dark) to make sure it was lighting up as it should before I got crazy with the glue. Once you start with the glue, there's no going back. Consider yourself warned. 😉
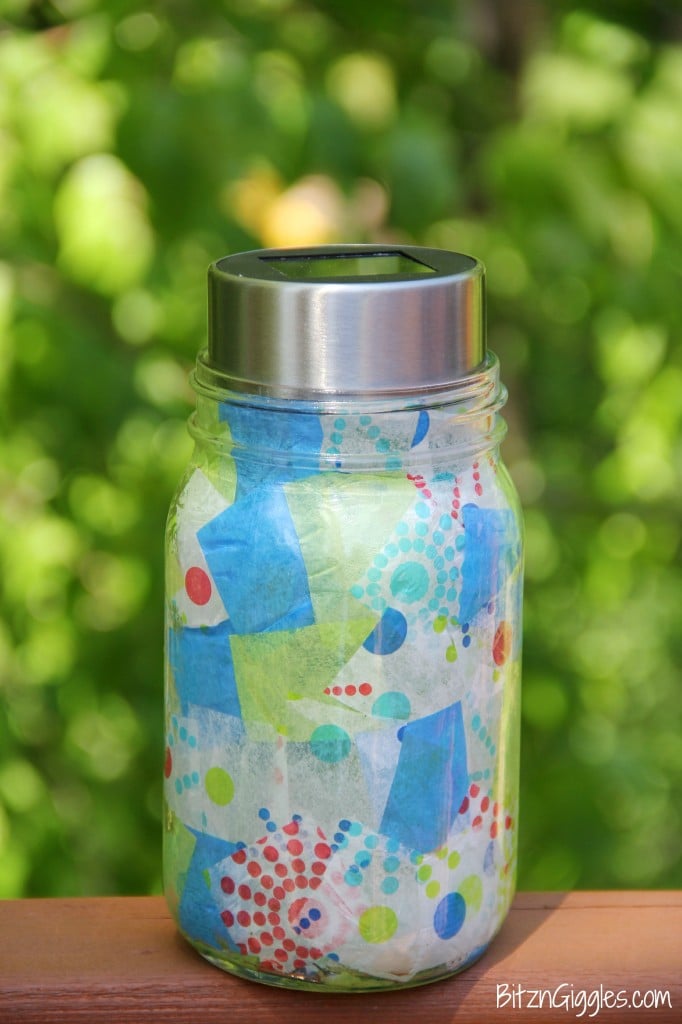
I love the way this mason jar solar light turned out. It looks great during the day and even more awesome at night when it's lit. Such an easy project with awesome results! These would be great to give as gifts or use as decorations for your next outdoor BBQ or deck party. Heck, place one or two next to your flowers in the garden or your front entry. The ideas are endless and I promise you will be delighted with the results!

Mason Jar Solar Light
Materials
- Quart size Wide Mouth Mason Jar
- 1-2 sheets Tissue paper
- Mod Podge
- Paintbrush
- Outdoor solar light
- Super glue or other heavy-duty, waterproof adhesive
Instructions
- Start by cutting your tissue paper into small squares.
- Because I wanted my light or lantern to be pretty bright when lit, I chose to cut up more of the pieces with the design on them since the paper was white, and then accented with pieces of the darker blue and green.
- Get out your Mod Podge and start painting the inside of the mason jar, working on one area at a time, gluing your tissue paper pieces in place. Get creative!
- Continue until the entire jar is covered and feel free to pat down any loose tissue pieces with a little more Mod Podge just for good measure! Here's the part where you need to walk away for a bit to let your jar dry.
- I took a couple of the solar lights apart like shown here and placed the top of the light (the round part) into the opening of the jar.
- When the inside of your jar is dry, take apart the solar light and fit the top of the light into the opening of the mason jar
Notes
- Creative Tissue Paper Selection: Experiment with different colors and patterns of tissue paper to create a unique and personalized design for your Mason jar solar light. Mix and match colors that complement each other, or choose a theme that fits the ambiance you want to create. Cutting up more pieces with designs can enhance brightness when the light is illuminated, adding to the visual appeal of the finished lantern.
- Thorough Application of Mod Podge: Use Mod Podge to adhere the tissue paper squares to the inside of the Mason jar. Apply the Mod Podge with a paintbrush in small sections, working on one area at a time to ensure thorough coverage. Press the tissue paper pieces firmly onto the jar's surface, smoothing out any wrinkles or bubbles as you go. Consider adding an extra layer of Mod Podge over the tissue paper once it's all in place to seal it securely and enhance its durability.
- Secure Solar Light Placement: Disassemble the outdoor solar light and carefully insert the top part (the round section) into the opening of the Mason jar once the Mod Podge has dried completely. Use super glue or another heavy-duty, waterproof adhesive to secure the light in place, ensuring it remains stable and functional. Test the light to make sure it turns on properly before displaying your Mason jar solar light in your outdoor space.
Laura (Lauras Little House Tips)
Really fun and creative. Thank you for linking up to my Favorite Things Link Party!
Jamie
Perfect for summer time! Thank you so much for linking up to Monday Funday!