
Salt Dough Ornaments - Three-ingredient salt dough recipe perfect for making Christmas ornaments!

Want to Save This Recipe?
This post may include affiliate links. Please see my disclosure.
It's beginning to look a lot like Christmas, isn't it? The big day is less than a week away and if you're anything like me, you're making lists to keep all of those last minute items straight.
Our Christmas tree has been up since the beginning of December. The tree is really what marks the beginning of the season for us. I love the soft glow of the lights in the evening and in the early morning. It really is quite magical.
It's so much fun to decorate the tree for Christmas, and I tend to swoon over anything that sparkles, glitters and/or shines.
Today, I'm going to show you how to make some gorgeous salt dough ornaments that can add the perfect, final, sparkly touch to your tree.
Ready to do this? Let's start gathering our materials!
HOW TO MAKE SALT DOUGH ORNAMENTS
To make salt dough ornaments, you’ll need:
- Flour
- Salt
- Warm water
- Drinking straw
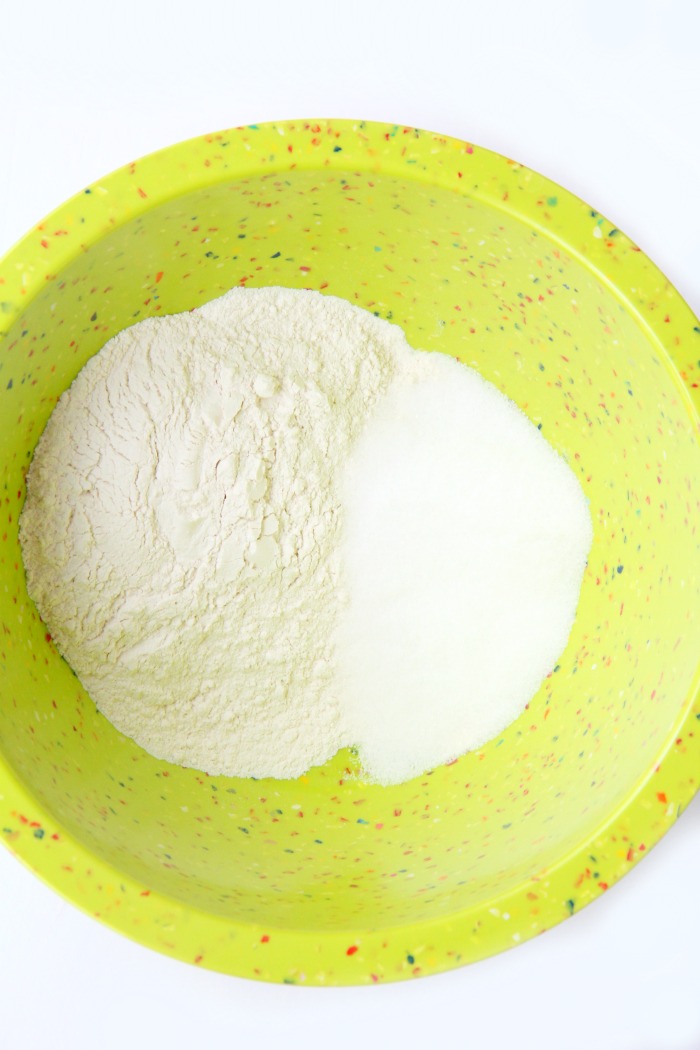
Start by combining your flour and salt in a bowl.
Add the warm water and knead the dough for a good 10-15 minutes. If your dough seems a bit too dry you can add more water - just a little at a time!
You don't want the dough to be too sticky.
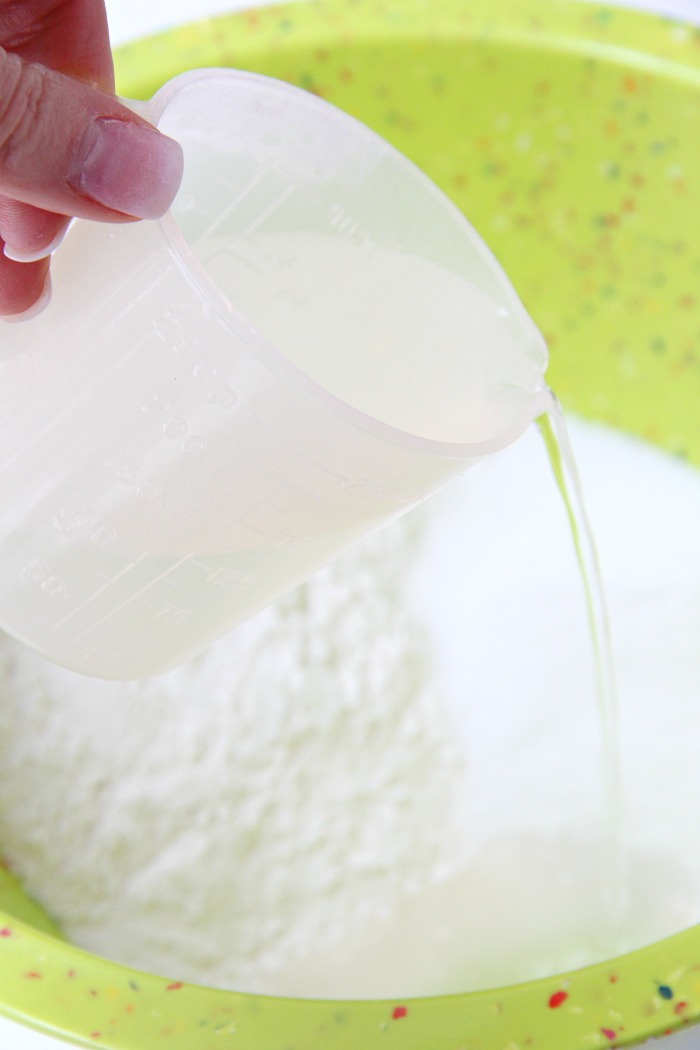
If I can pass the dough back and forth between my hands without any dough sticking to my palms, I know it's the right consistency.

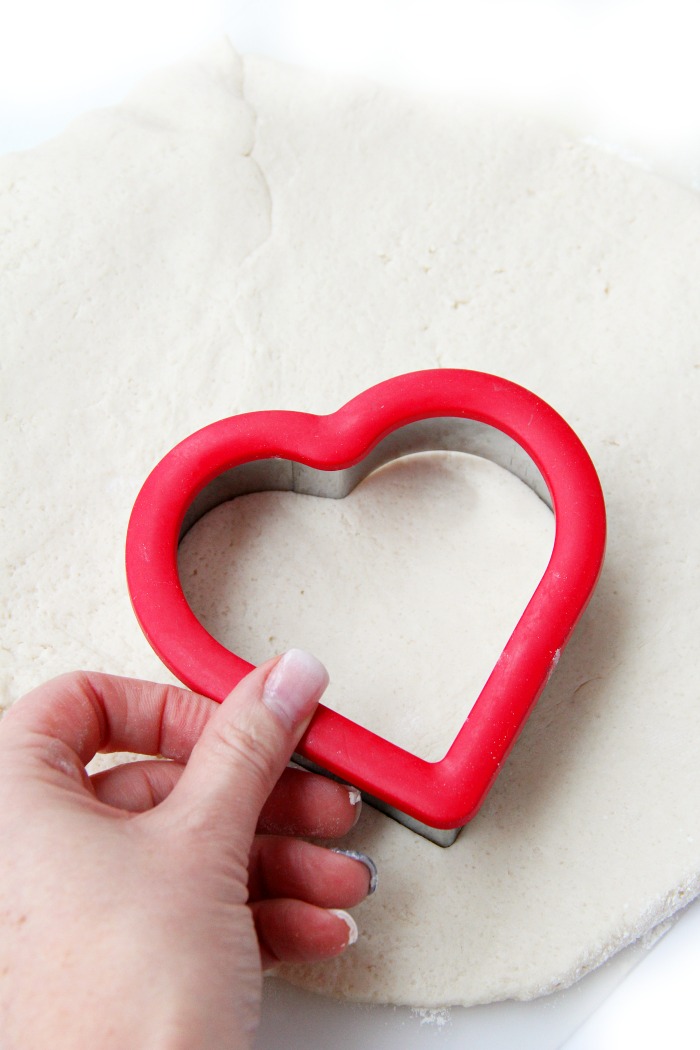
Roll out the dough out to about ¼" thickness. If it's too thin, you won't be able to "lift" your dough out of the cookie cutter molds - too thick and the dough will "puff up" and never harden like you need it to.
I always like to toss out a little extra flour before I begin rolling out the dough. It makes lifting the shapes out of the dough so much easier.
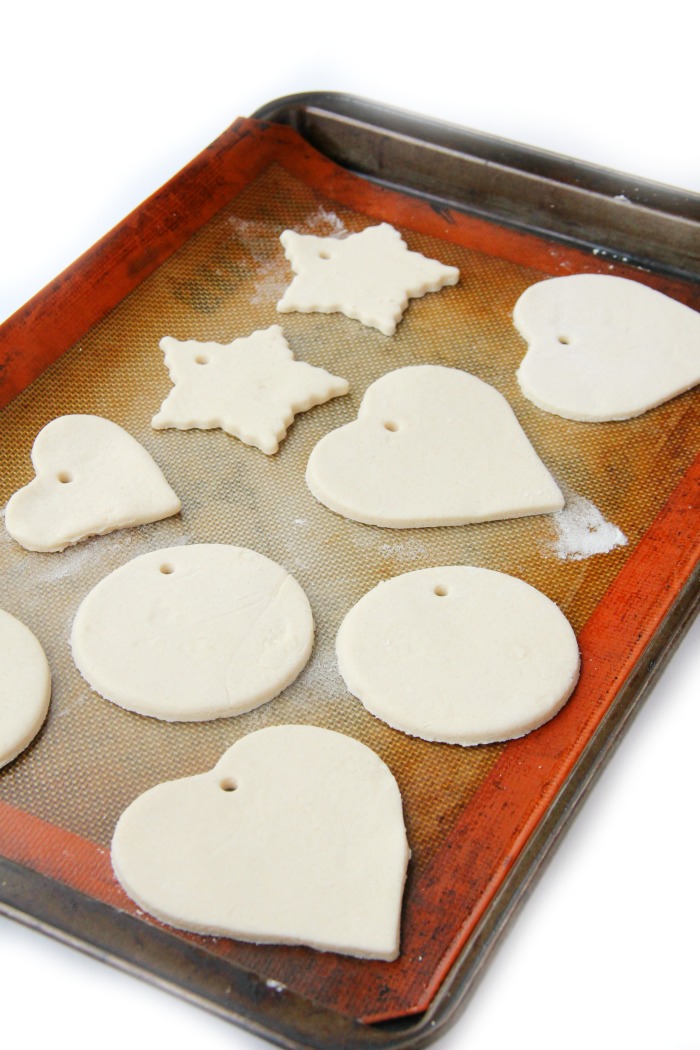
Use your cookie cutters to start cutting out shapes in the dough and gently transfer them to a greased baking sheet or one covered with a baking mat.
I'm using a heart-shaped cookie cutter for my example, but there are tons of Christmas cookie cutter sets available during the holidays.
Once the shapes are on the baking sheet, use a straw to poke holes into the top of each ornament.
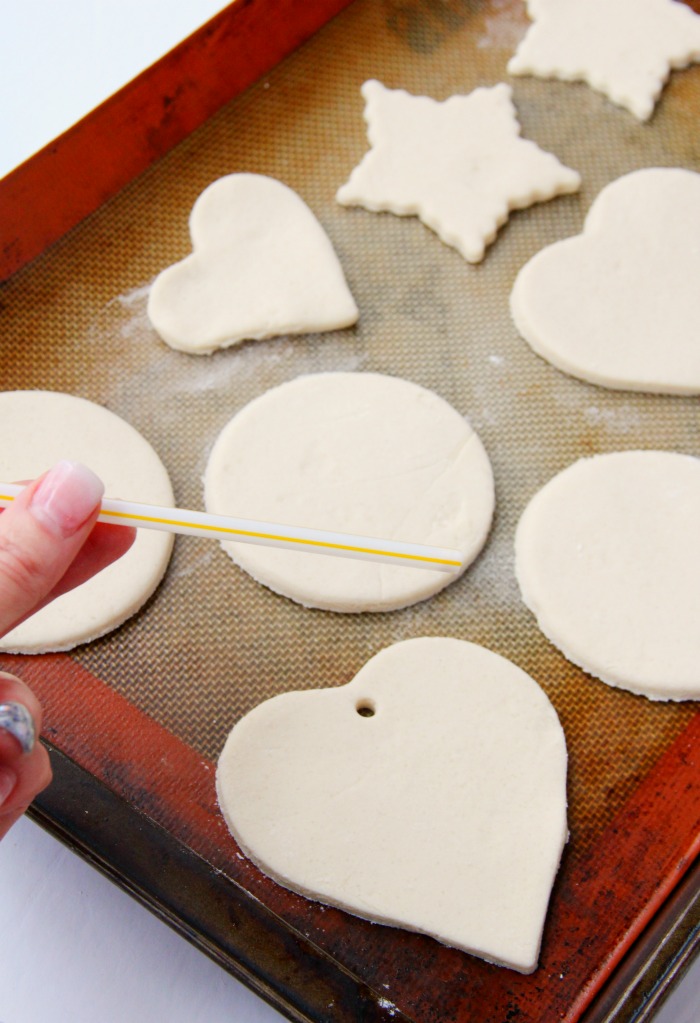
After the holes are poked through, they're ready to go into the oven!
I normally bake the ornaments at 250º Fahrenheit for 2 hours. If your ornaments seem a bit "doughy" yet, you can place them back into the oven to bake for another 30-60 minutes.
Thicker dough will take more baking in the oven - up to 3-4 hours. Keep that in mind when you're rolling out the dough.
The next part is the toughest. This is where you. . . wait.
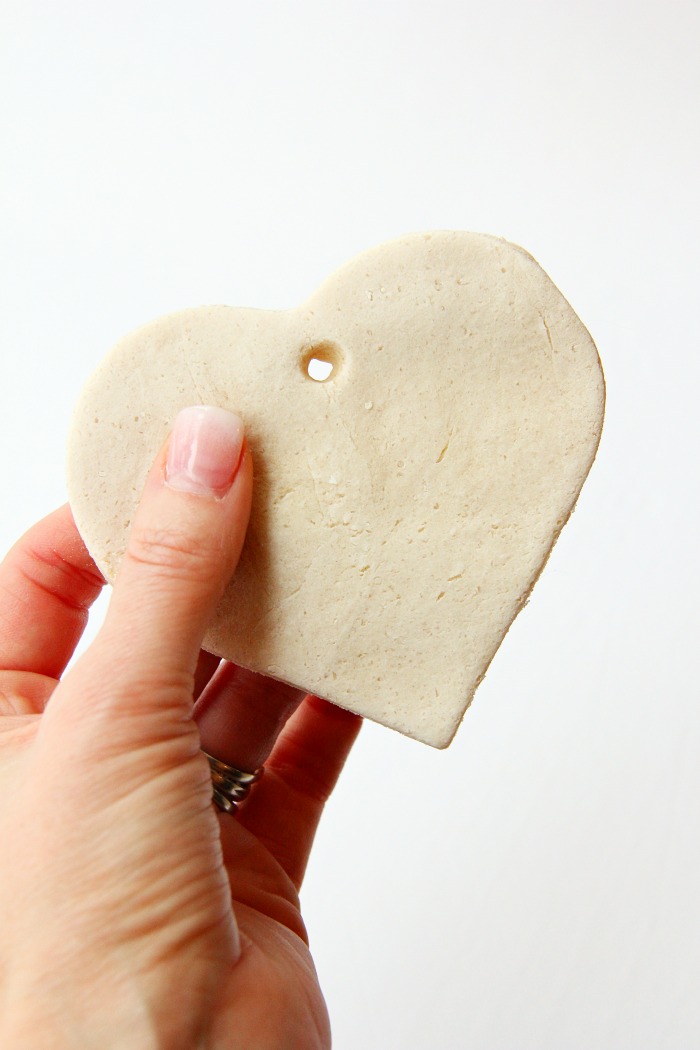
If you want the best results possible, allow the ornaments to air dry for 2-3 days before decorating them. Yes, I said 2-3 days. Plan ahead, people.?
HOW TO DECORATE SALT DOUGH ORNAMENTS
To decorate the salt dough ornaments, you'll need:
- Jute twine (for hanging the ornaments)
- Paint brushes
- Acrylic glitter paint
- Glitter
- Glue
- Mod Podge
Just for the record, you don't have to use BOTH acrylic glitter paint and glitter. I experimented with both. The heart below was decorated with acrylic glitter paint.
I found that the acrylic glitter paint looked cool, but it was a bit of a tedious process. It may take a couple layers of paint to make the ornament really sparkle.
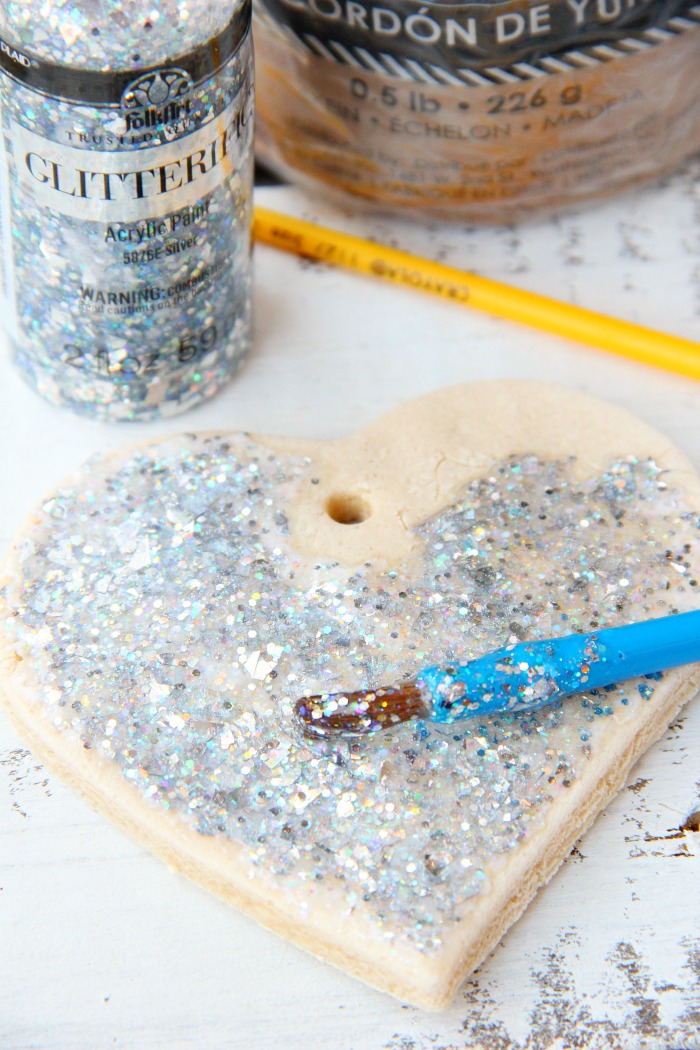
I opted to use glue and glitter for most of the ornaments. Use a paintbrush to brush on the glue, sprinkle the ornament with glitter and shake off the excess.

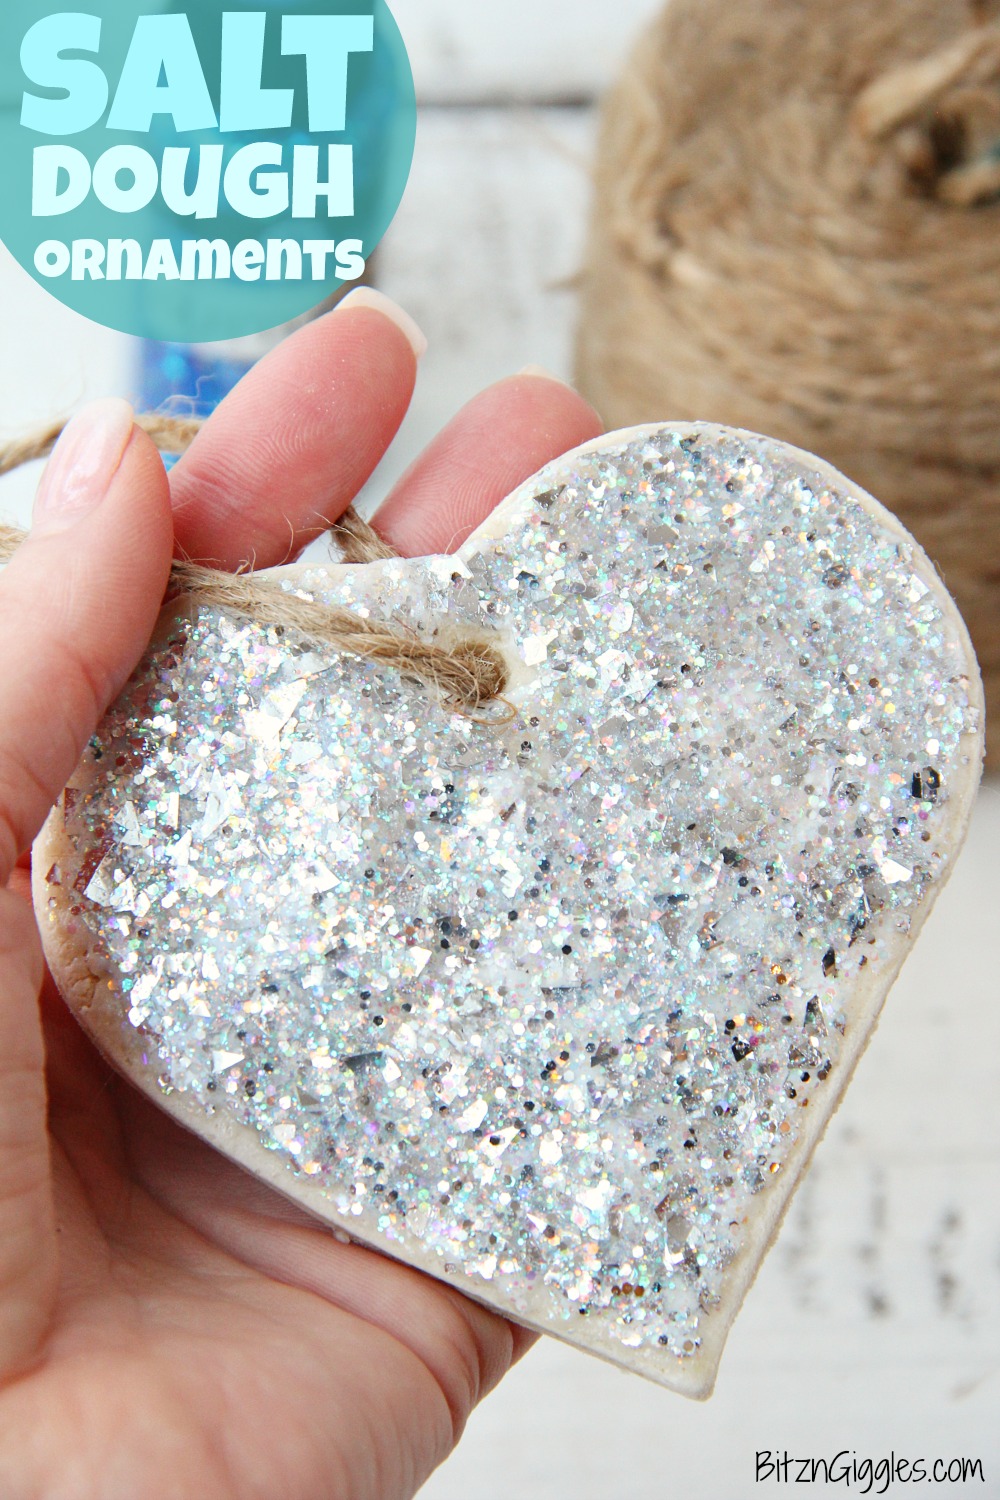
To create a :hanger" for the ornament, cut off a piece of the jute twine, loop it through the hole in the ornament and then tie the two ends together.

To "seal" the ornament, you can brush on Mod Podge or spray on a clear glaze finish.
DOES SALT DOUGH GO MOLDY?
Salt, itself, is a preservative, but if you leave your ornaments untreated without applying Mod Podge or the clear glaze, they could absorb moisture and eventually go moldy over time.

CAN YOU OVER BAKE SALT DOUGH?
Well, yes, you can - so if you see the dough shapes start to bubble or crack while baking, it's time to take them out!

IS IT POSSIBLE TO DECORATE SALT DOUGH BEFORE IT DRIES?
For best results you should AT THE VERY LEAST allow the dough to dry overnight.

LOOKING FOR MORE CHRISTMAS CRAFT IDEAS?
- Magic Reindeer Food With Free Printable
- Peppermint Bath Bombs
- Snow Ice Cream
- Ice Luminary
- Merry & Bright Printable Christmas Label
- Illuminated Snow Scene in a Jar

Salt Dough Ornaments
Equipment
- Cookie cutters
- Drinking straw
Materials
- 2 cups flour
- ½ cup salt
- ¾ cup warm water
- Jute twine
- Acrylic glitter paint
- Glitter
- Glue
- Mod Podge
Instructions
- Preheat oven to 250º Fahrenheit.
- Combine flour and salt in a bowl.
- Add the warm water. Knead the dough 10-15 minutes, adding additional water a little at a time if your dough seems a bit too dry. Too much water will produce a sticky, unworkable dough.
- Spinkle a little extra flour on your working surface. Roll the dough out to about ¼" thickness with a rolling pin.
- Use your cookie cutters to start cutting out shapes in the dough.
- Gently transfer dough shapes to a greased baking sheet.
- Use the straw to poke holes into the top of each ornament.
- Bake the ornaments for 2 hours. If your ornaments seem a bit "doughy" yet, you can place them back into the oven to bake for another 30-60 minutes.
- Allow the ornaments to air dry for 2-3 days before decorating them.
- Using a paintbrush, decorate the ornaments with glue and glitter or acrylic glitter paint.
- Allow paint or glitter to dry.
- Cut off a piece of jute twine, loop it through the hole in the ornament and then tie the two ends together to create a "hanger."
- Brush on Mod Podge or spray on a clear glaze finish.
Notes
- Thicker dough will take more baking in the oven - up to 3-4 hours. Keep that in mind when you're rolling out the dough.
Leave a Reply