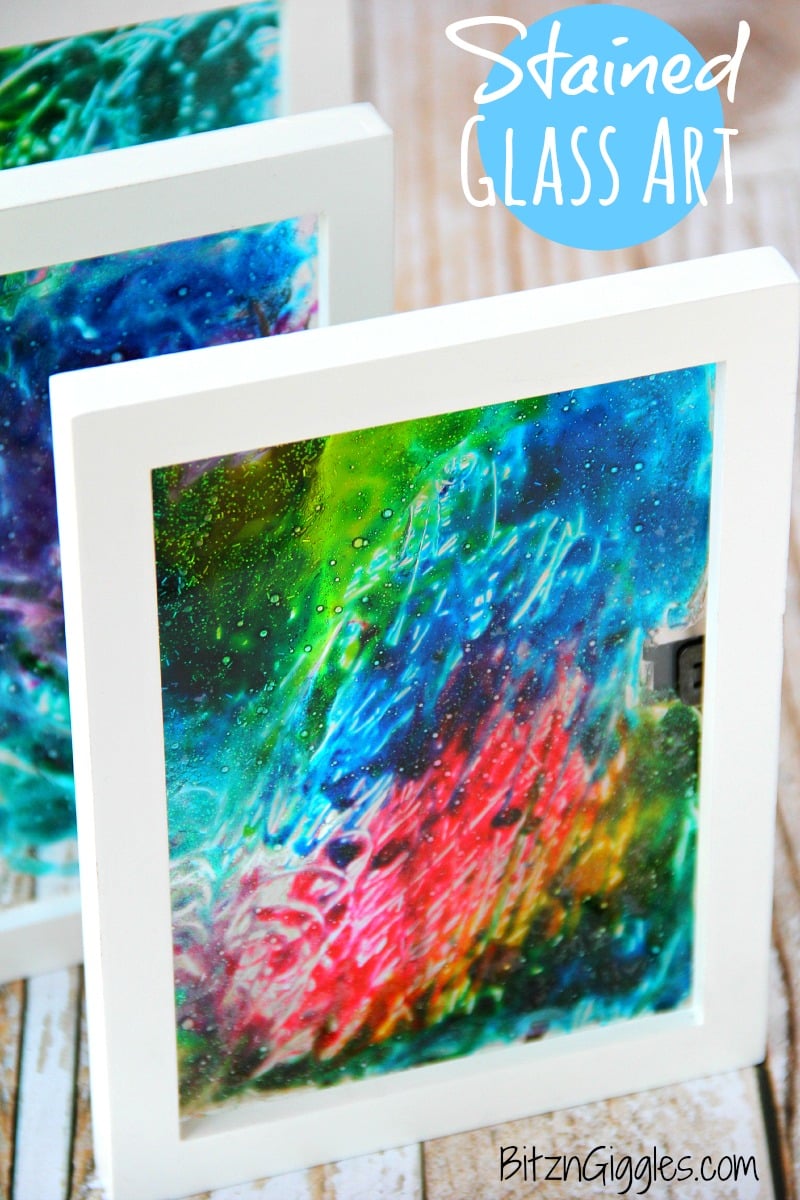
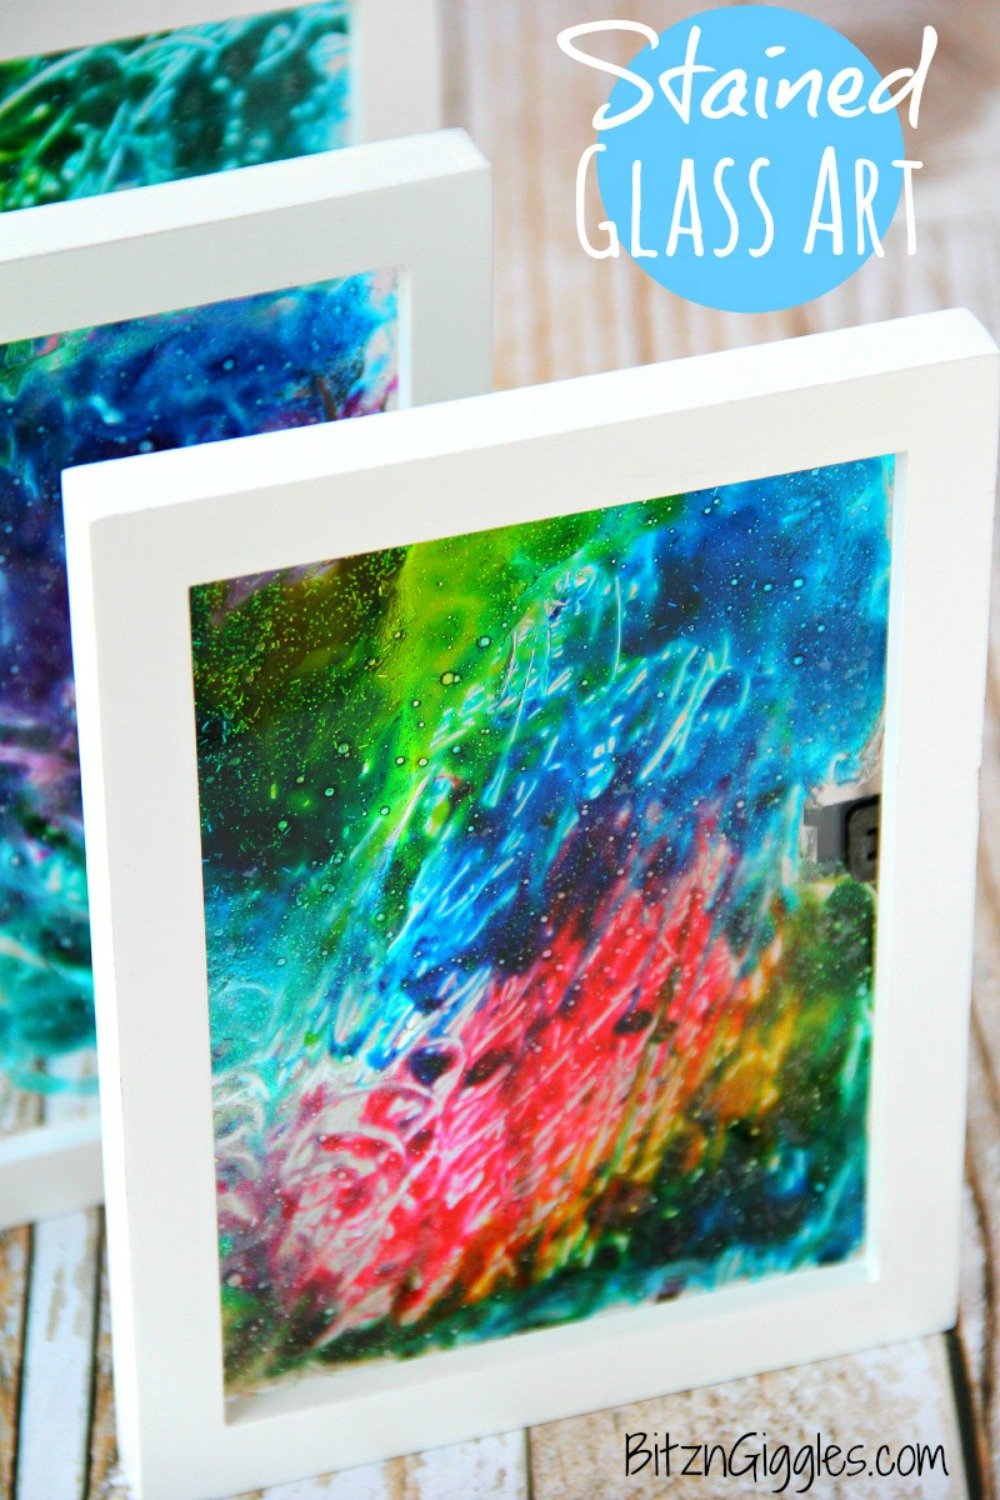
Stained Glass Art - A super simple project that uses glue and food coloring to produce breathtaking results!
Want to Save This Recipe?
I've been seeing so many fun Mother's Day projects around everywhere, and today, I'm sharing one of my own! This Stained Glass Art is fun to make any time of the year and believe it or not, even children as young as 3 years old can do this! I shared this about a month ago over at Smart School House, and today I'm bringing over to Bitz & Giggles to share with all of you!
I remember seeing this project at my son's school years ago. To prepare for it, however, the teachers were adding food coloring to empty condiment squirt bottles filled with glue and shaking them like crazy for what seemed like hours to get everything mixed. It looked like quite the process. I loved how their art turned out, but between you and me, that's just way too much work.
I'm going to show you an easy way to achieve the same stained glass effect without all the muscle and prep. You just add the glue and the food coloring separately. Glitter glue is translucent so when you hang your art, the sun will really make the colors shine. I also love the little specks of glitter sprinkled throughout! This project is so easy and affordable and the end result is quite breathtaking. This is so much fun for families to sit down and work on together!
Here's what you're going to need:
Materials
- Glitter glue
- Toothpicks or paint brushes
- Food coloring (we used neon)
- Picture frames (we used 5x7 frames)
- Suction cup hangers (for hanging frames on your window later on - I found mine at Walmart)
So, first things first. Let's talk about the frame. I found some white 5x7 frames at Walmart. They had three left on the shelf so I grabbed one for my son, one for my daughter and, of course, one for me. There's no way I was missing out on the fun.

- You want to begin by disassembling the frame. The cardboard back to the frame doesn't get used for the project so you can set it aside.
- Clean the glass with some glass cleaner and then place it inside the white frame.
- Grab hold of the hanging tab and, here's what we want to do with it:
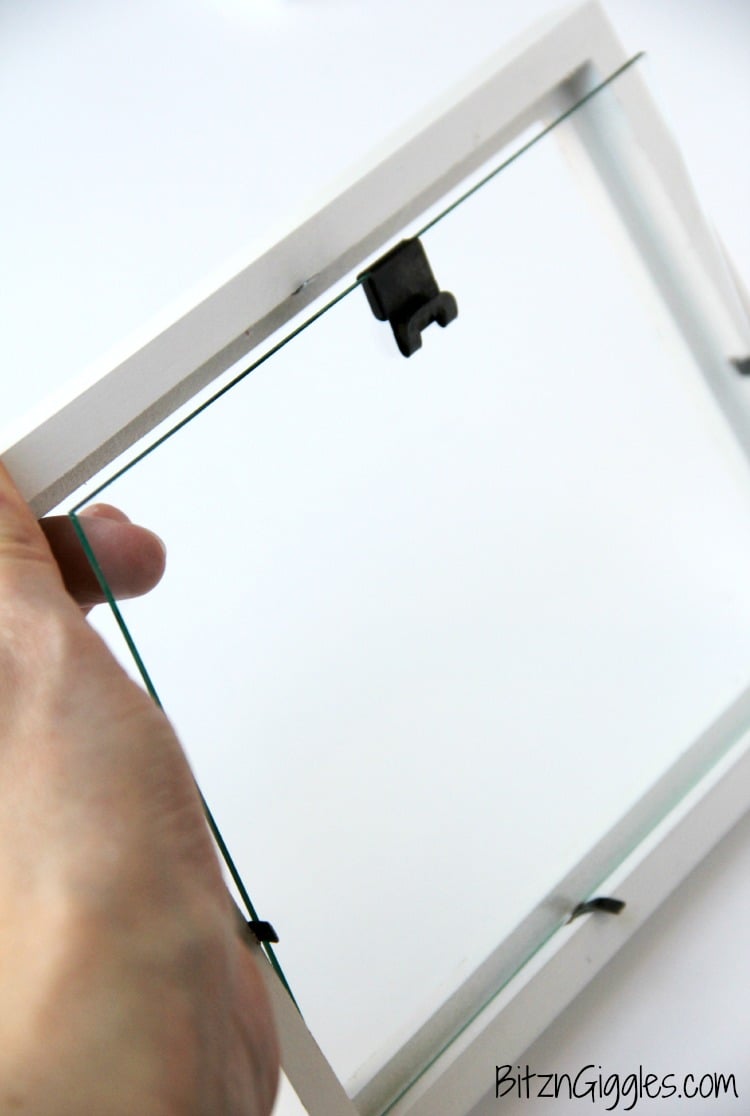
First decide how you're going to hang your frame when you're don. Vertically or horizontally? I decided I wanted to hang my horizontally, so I positioned my hanging tab onto the glass in the middle of the frame and then pushed down the little tabs that hold the glass in. It worked out that one of the little tabs fit right over the hanging tab so I was able to secure it further.
If you want to be absolutely certain the glass is going nowhere (including the hanging tab), you could hot glue the glass to the frame. During my assembly, I didn't feel it was necessary, so I opted out.
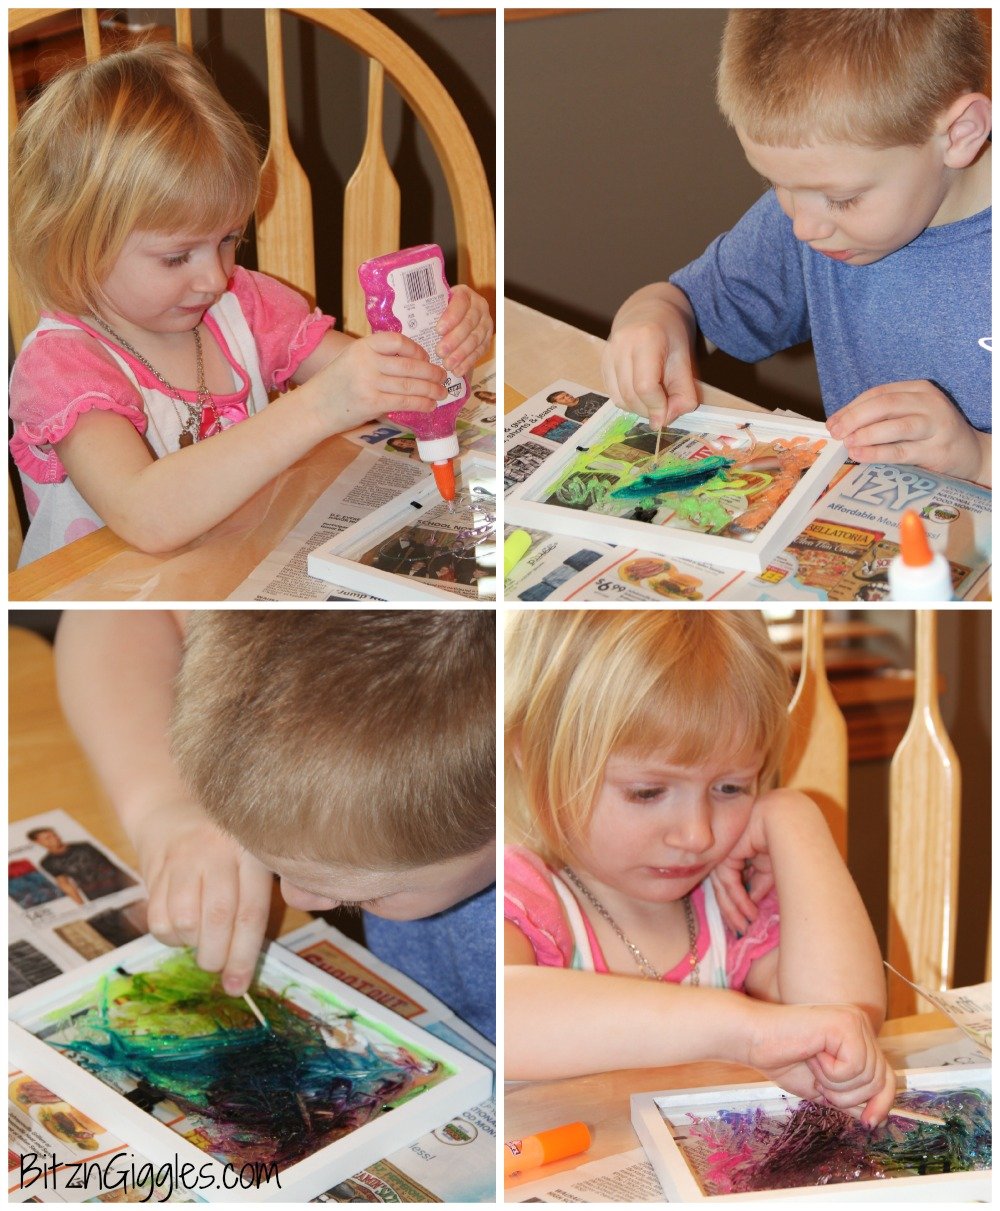
Once the frames are ready to go, cover your work surface. I used wax paper and newspapers on top of that. Then, I set out the glitter glue, toothpicks and food coloring, and called in the troops.
The kids had so much fun with this project. If you want to ensure the kiddos walk away with clean hands, you could always have them wear some plastic gloves. We braved it, and, believe it or not, the color they did get on their fingers came off pretty easily.
Alright, here's what you'll want to do next:
- Position your frame so the back is facing up.
- Squirt glue all over the glass. There is no rhyme or reason here. Add a little, add some more.
- Add one drop of food coloring at a time to various parts of the glass. I wouldn't suggest putting all of the colors in one place or you'll just end up with a black puddle on your glass.
- You can use a toothpick to blend the colors into each other and create some swirl or line designs. Here's where the kids can get real creative.
- Once you're happy with your design, allow the glue to dry overnight.
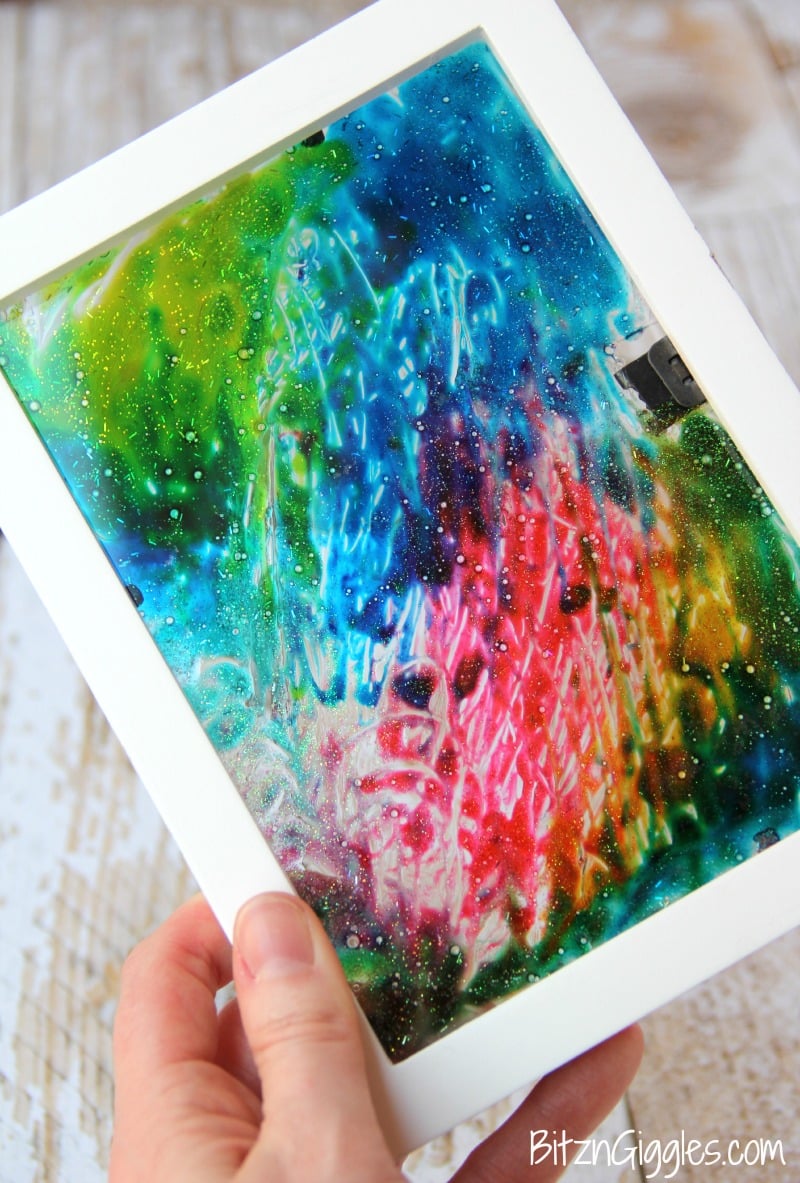
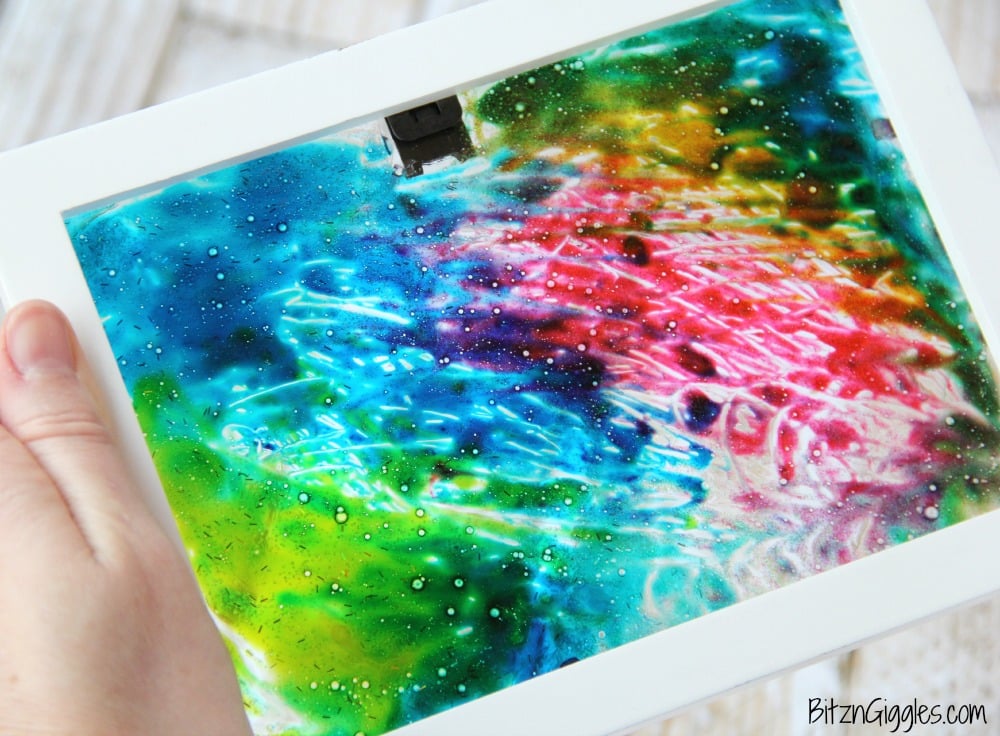
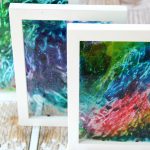
I love how these frames turned out. I adore all of the bright colors. They look beautiful hanging up on our patio door.
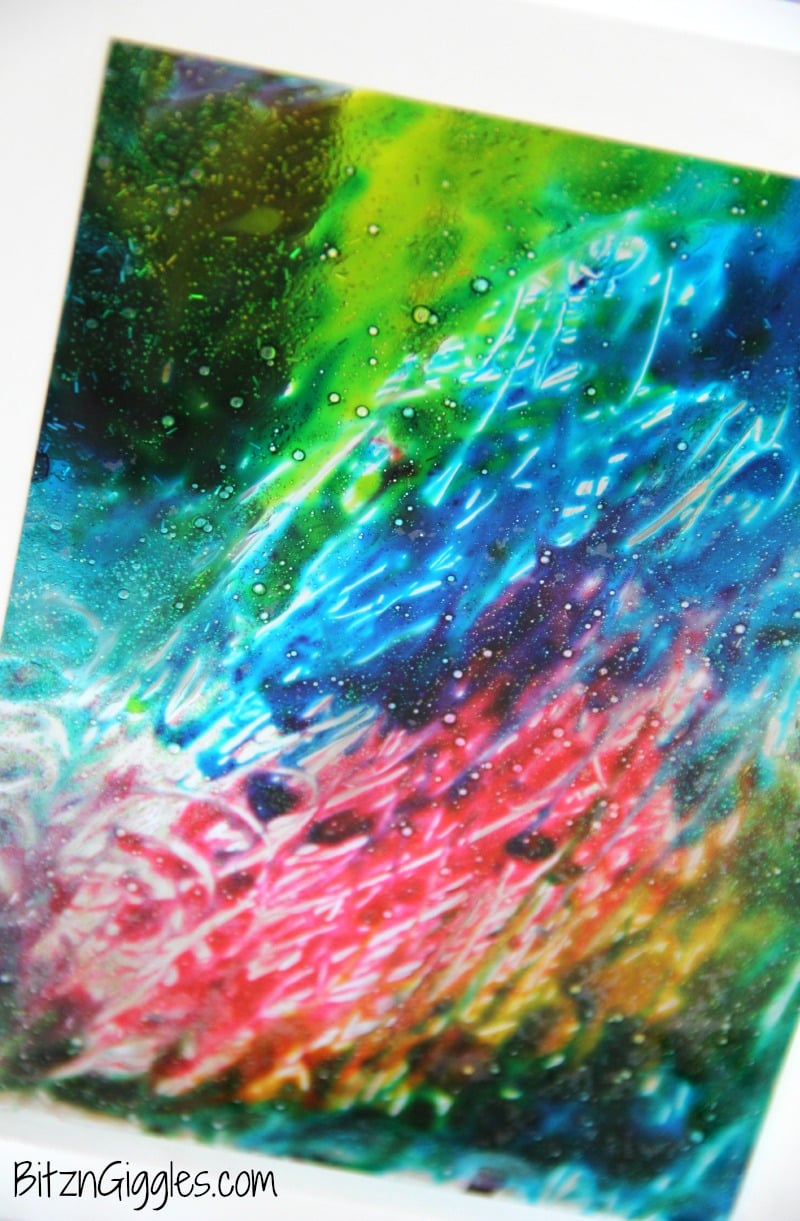
If you look real close you can see bubbles, glitter and fine line designs. To give it a bit of a different look, you could use a paintbrush to create softer lines and blending.
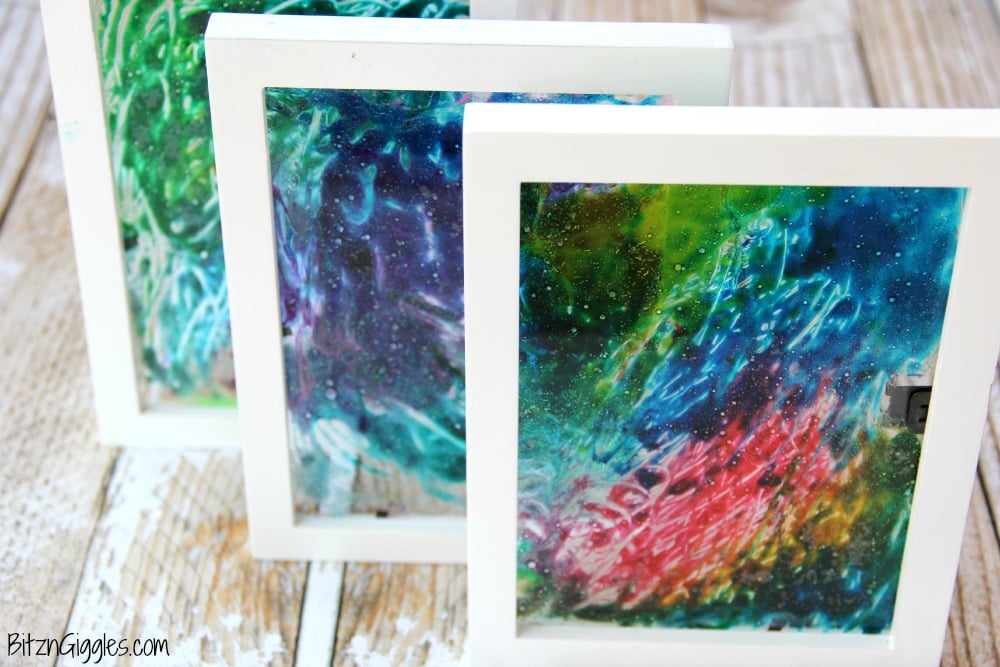
Each frame will have a little bit different look to it. I love that. It's really a work of art. It becomes even more beautiful when you allow light to shine through. Isn't this a perfect project for Spring? I think so!
I can't wait to hear how your frames turn out. Will you use two colors or five? Will you go with a black frame or a white one? I would love to hear about the little artists that helped you, too. As with anything glass, if you have little hands involved, just make sure the kids are supervised throughout the entire project.
I've never tried this technique on plastic or plexiglass. I don't see why it wouldn't work on one of those surfaces. However, I've been known to be wrong once or twice. Just ask my hubby. . .and my kids. They're quick to tell me if that happens (of course they are).
Well, Happy Spring, friends! Bring a little pop of color into your homes with this simple and beautiful project. These frames also make great gifts. Think Father's Day, Mother's Day, birthdays, etc. Grab the kids and just have fun with it!
IN SEARCH OF MORE COLORFUL PROJECTS
TO WELCOME IN SPRING?


I'd love for you to follow all of my recipes and adventures over at Bitz & Giggles, and don't forget to check me out online!
CONNECT WITH ME HERE:
Twitter | Instagram | Pinterest | Google+ | Facebook | Bloglovin'
Stained Glass Art
Materials
- Glitter glue
- Toothpicks or paint brushes
- Food coloring (we used neon)
- Picture frames (we used 5x7 frames)
- Suction cup hangers
Instructions
- You want to begin by disassembling the frame. The cardboard back to the frame doesn't get used for the project so you can set it aside.
- Clean the glass with some glass cleaner and then place it inside the white frame.
- Grab hold of the hanging tab.
- Once the frames are ready to go, cover your work surface. I used wax paper and newspapers on top of that.
- Then, I set out the glitter glue, toothpicks and food coloring, and called in the troops.
- Position your frame so the back is facing up.
- Squirt glue all over the glass. There is no rhyme or reason here. Add a little, add some more.
- Add one drop of food coloring at a time to various parts of the glass. I wouldn't suggest putting all of the colors in one place or you'll just end up with a black puddle on your glass.
- You can use a toothpick to blend the colors into each other and create some swirl or line designs. Here's where the kids can get real creative.
- Once you're happy with your design, allow the glue to dry overnight.
Notes
- Glass Cleaning: Ensure that the glass surface is thoroughly cleaned with glass cleaner before starting the project. Any dirt or residue on the glass can interfere with the adhesion of the glitter glue and affect the overall appearance of the stained glass art.
- Color Placement: When adding food coloring to the glitter glue, distribute the colors evenly across the glass surface. Avoid concentrating all the colors in one area to prevent them from blending into a muddy color. Experiment with different patterns and designs to create vibrant and visually appealing stained glass effects.
- Drying Time: Allow sufficient drying time for the glitter glue to set completely. Overnight drying ensures that the colors remain vivid and the glue adheres firmly to the glass surface. Rushing the drying process may lead to smudging or uneven drying, affecting the quality of the finished stained glass art.
Karen Elsworthy
Wonder how this will go with alcohol inks as I have them on hand no food colouring, I'm gonna try it out
April
Why do you need to use food coloring if you use colored glitter glue
Sara
The colored glitter glue isn't real vibrant so I used food coloring to brighten up the color.
Jennie
If you’re worried about stained hands, before you start rub a little bit of hand cream on theie hands. It seems to make it easier to remove. I’m a Grammy now so I send him home with colorful hands after a fun day. I love this idea.
Wanda
love your stained glass, although I did something a little different. As I don't like kids using glass that can break, i bought a heavy duty plastic, (sorry i don't remember how heavy), and at the time they weren't using glue yet, i bought stained glass paint from michaels (pretty expensive, use the glue). Painted on the plastic and voila, i had window clings. It is pretty fun.
Sara
What a great idea, Wanda!
Hilary
Love your stained glass! I might try this with some additional support needs kids I work with. To make things cheaper and safer I might use clear plastic instead of glass and frame with card. Do you think that would work, please? Thanks
Sara
I've never tried it on plastic, Hilary. I'd maybe test it on plastic first before you buy all of the supplies for the kids. Good luck and let us know if it works!
Kristie Sumner
Did you use clear glitter glue or colored glitter glue? I am doing a summer camp with the theme of colors next week and this project is perfect for learning about mixing colors! Just curious how colored glitter glue would impact the result. What kind of glitter glue did you use?
Sara
We used Elmer's glitter glue. The colored glue doesn't overpower the food coloring by any means.