How to Remove Wax From Your Wall - How to remove cooled wax from the wall after your wax warmer accidentally gets bumped!
Want to Save This Recipe?
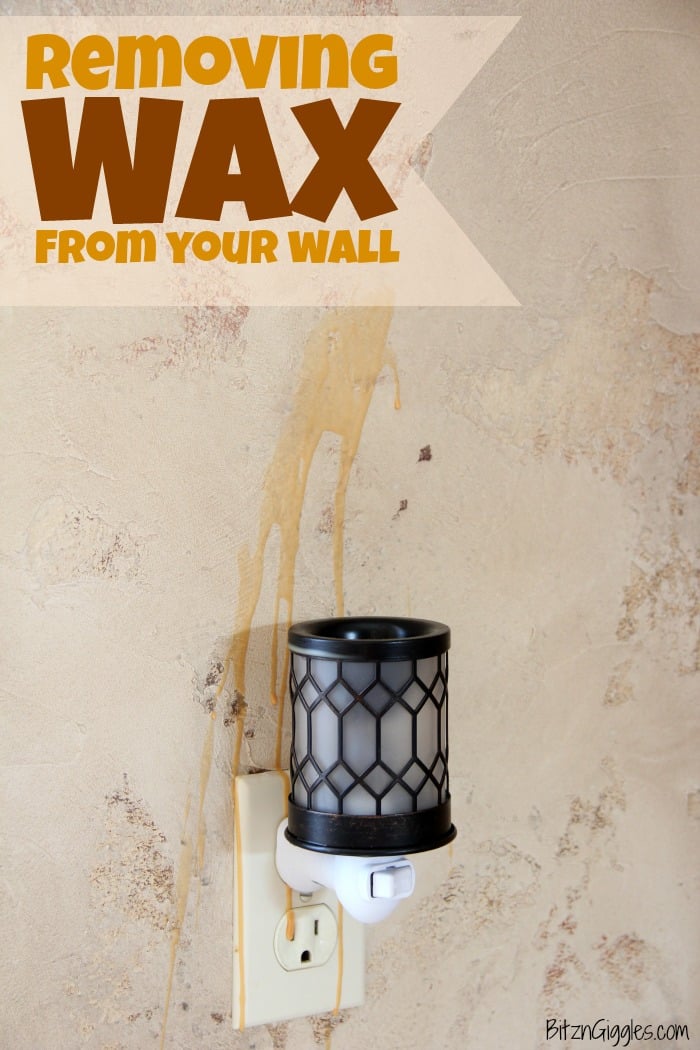
Let's rewind to December 31 of last year. We had our closest friends and family over to help ring in the New Year. The kids had started throwing around a big beach ball in the house, and before I knew it, it hit the wax warmer I had sitting on our console table against the wall at the bottom of our stairs. . . and warm liquid wax. . .went. . .everywhere. All over the wall.
I pretty near had a heart attack - yep, I almost lost it, but thankfully because I'm a courteous person, and we had guests in our home, I held my crazy in and just tried to figure out what to do. My friend jumped in to help and tried to scrape the wax away, only to find that scraping the wax was actually damaging the wall and taking the paint off.
In horror, we both looked at each other and tried to think fast. What we tried next actually worked, and it's the solution I'm sharing with you today. If you're wondering how to remove wax from your wall, you've come to the right place.
Things You'll Need
So, if this just happened to you and you're panicking like I did, calm down. I'm going to tell you what you need to make everything better again. I got your back. 😉
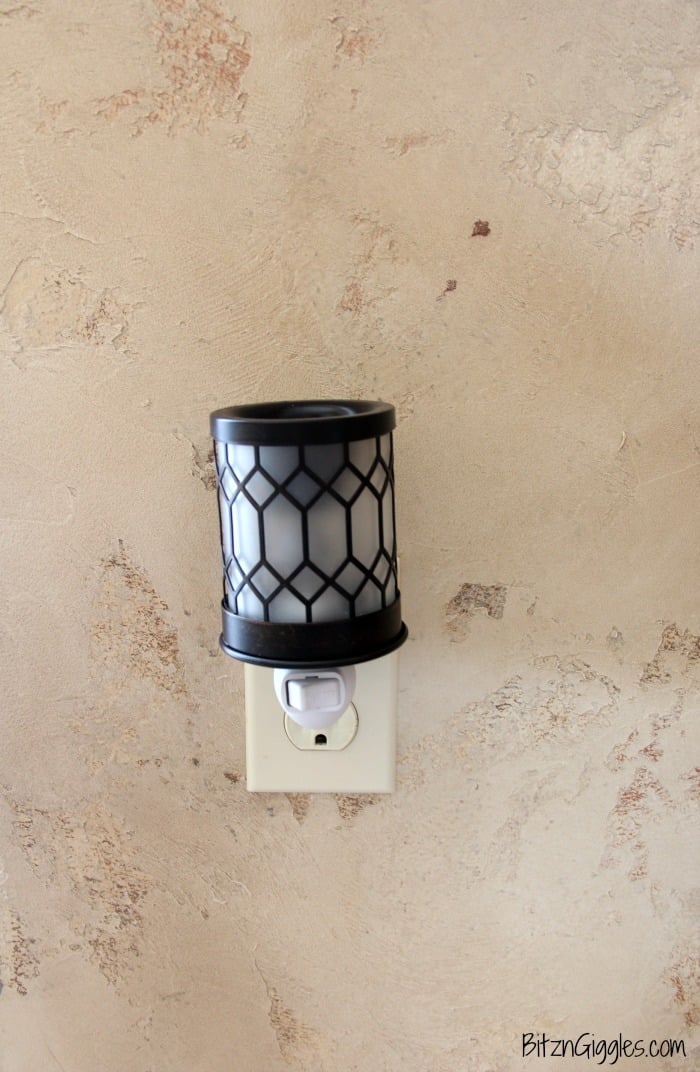
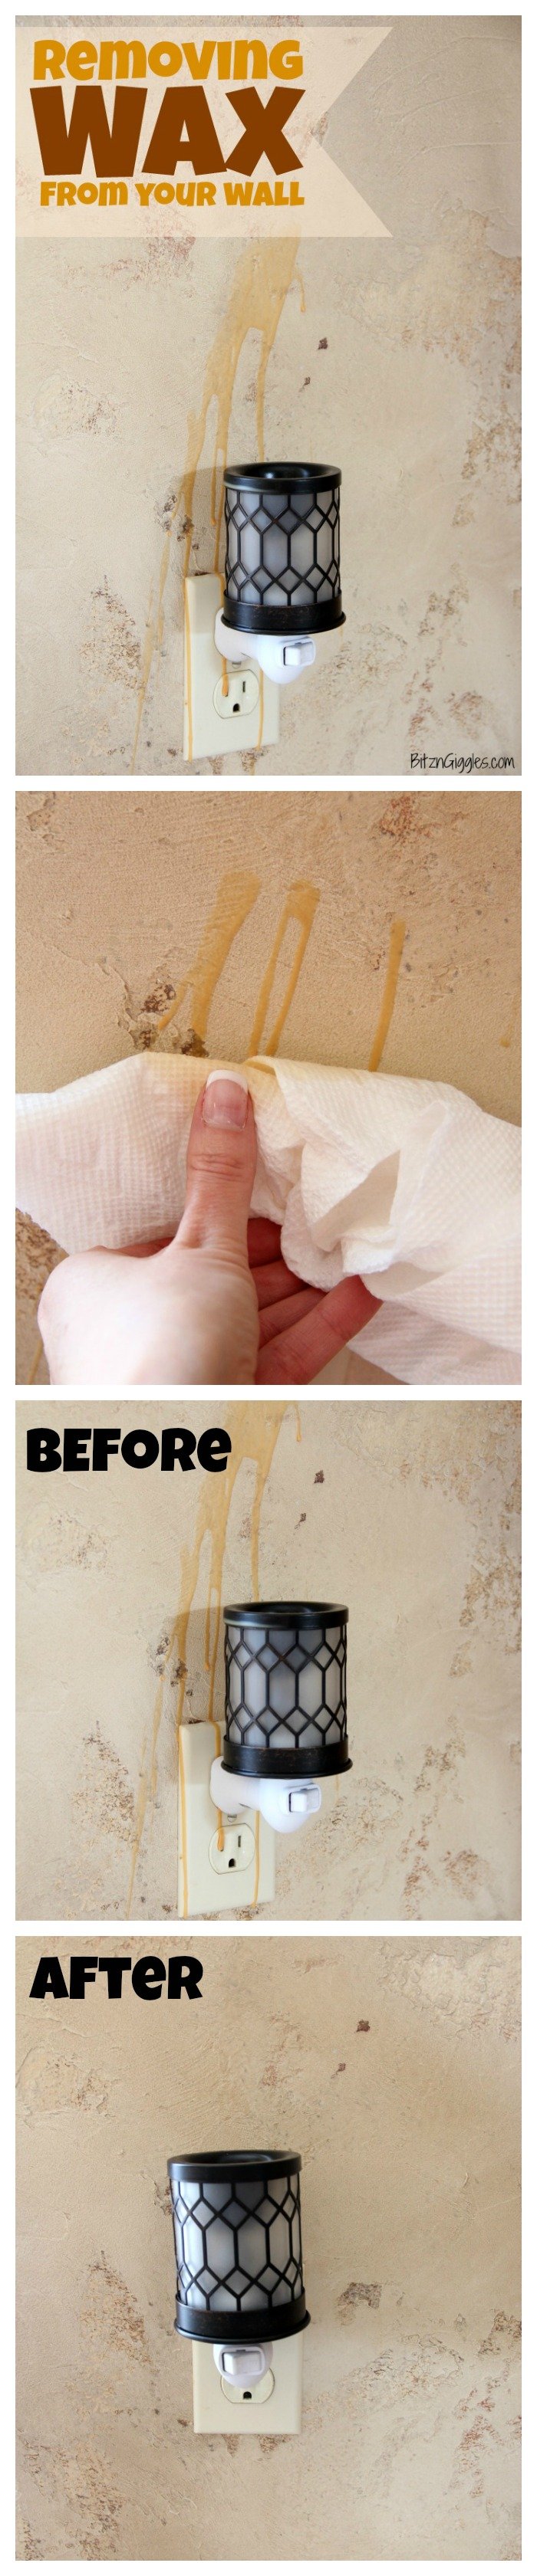
Once you gather your items (I'll let you know what those are in a minute), come back, read through the instructions and watch my video at the bottom of the post for the actual technique. The photos and the video I'm showing you today are from the SECOND time this happened. This time it happened with one of my wax warmer night lights, and the wax spewed (does anyone else not like that word?) all over our textured living room wall. ?
Ok, so all you really need are two items:
- A hair dryer that can get pretty hot
- Paper towels to help catch and wipe the wax
The Technique
Plug your hair dryer in and turn it to the hottest setting.
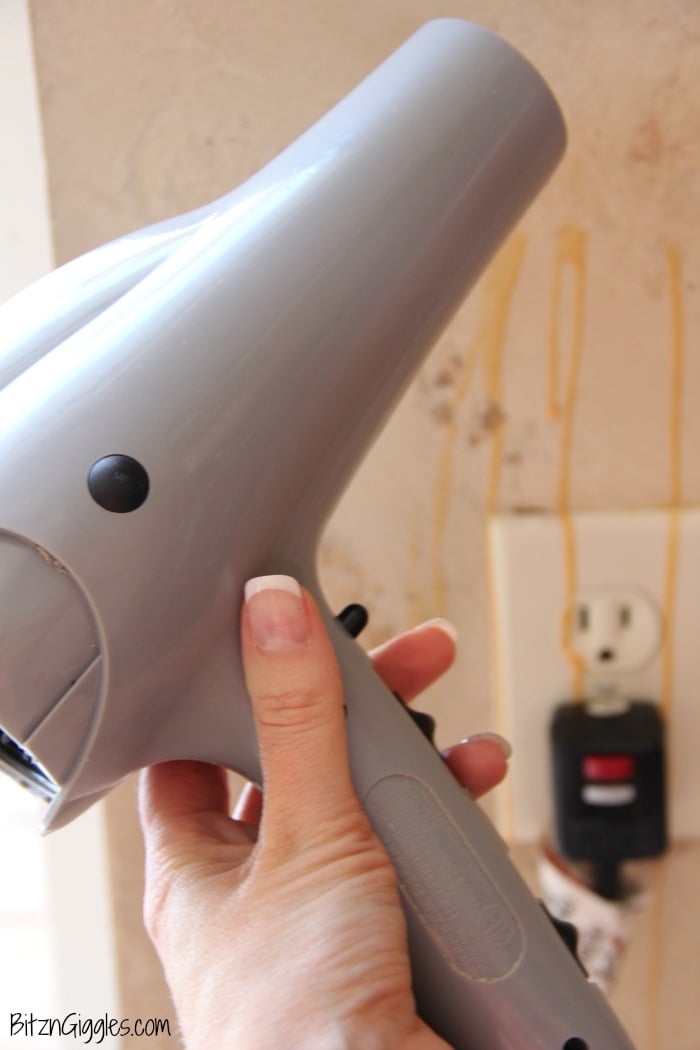
Hold the hair dryer very close to the wax on the wall or surface it has spilled.
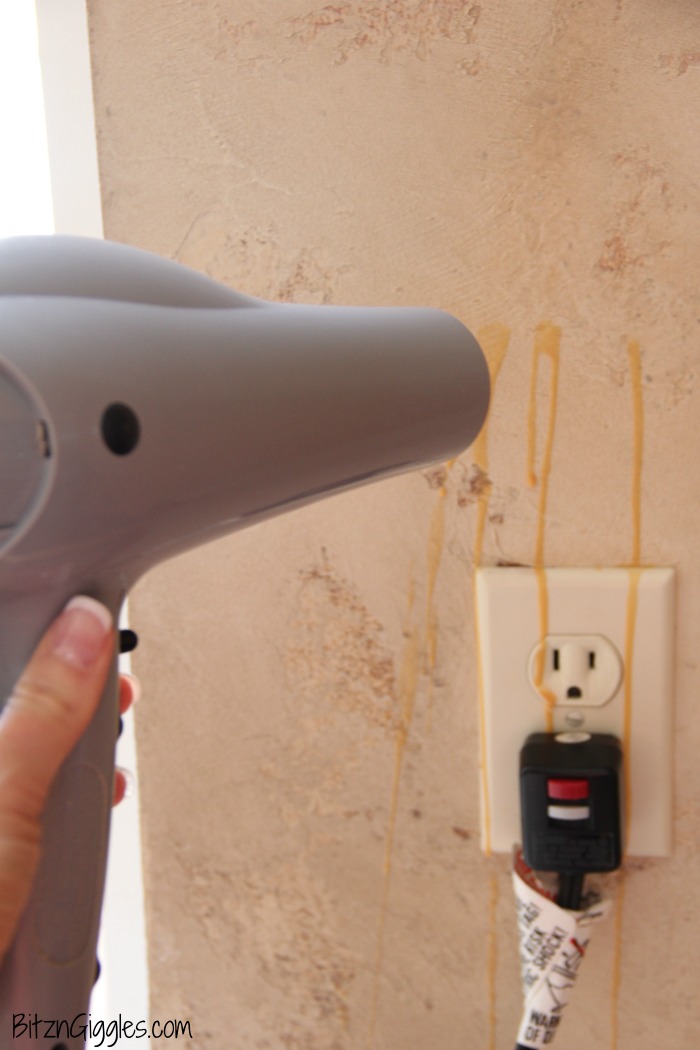
While you're holding the hair dryer, in your other hand, bunch up some paper towels and hold them underneath the hair dryer to catch the wax as it melts and begins to drip down the wall.
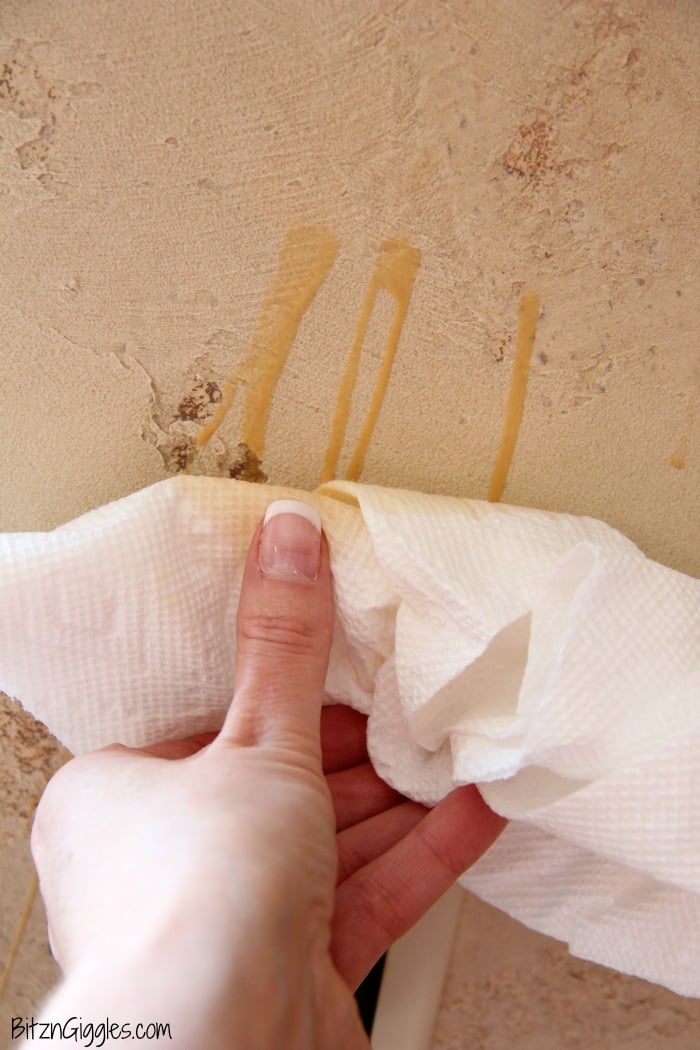
Catch the wax as it begins to run down the wall and begin to wipe it away quickly with the clean paper towels. Quickly rotate the paper towels to ensure you are always using a clean spot to wipe away the wax.
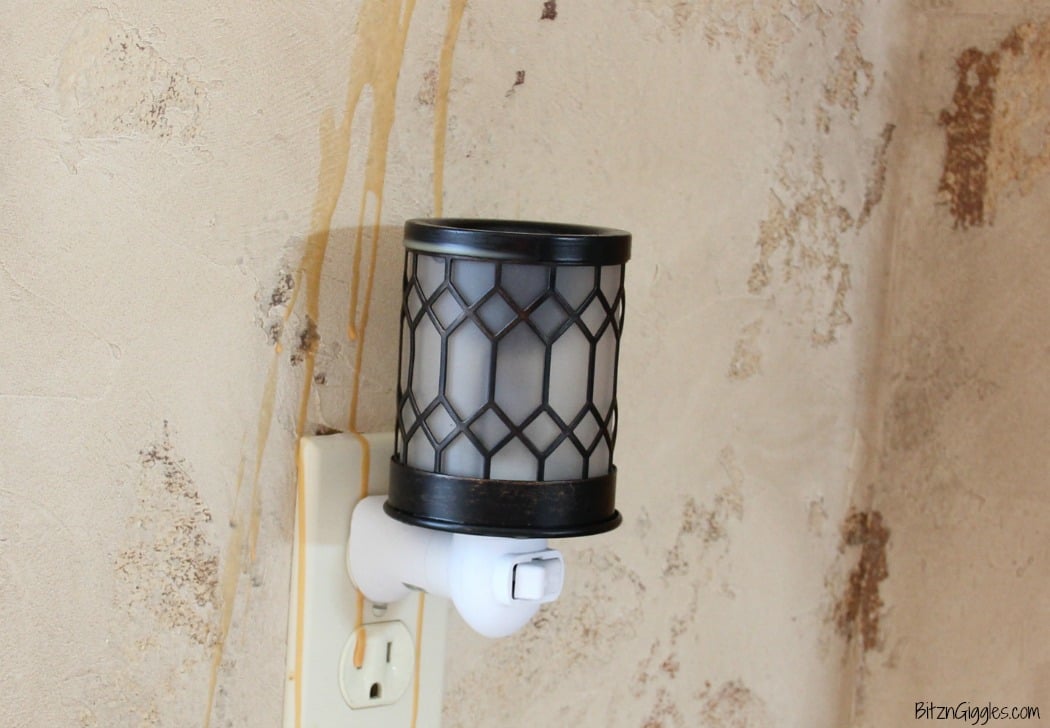
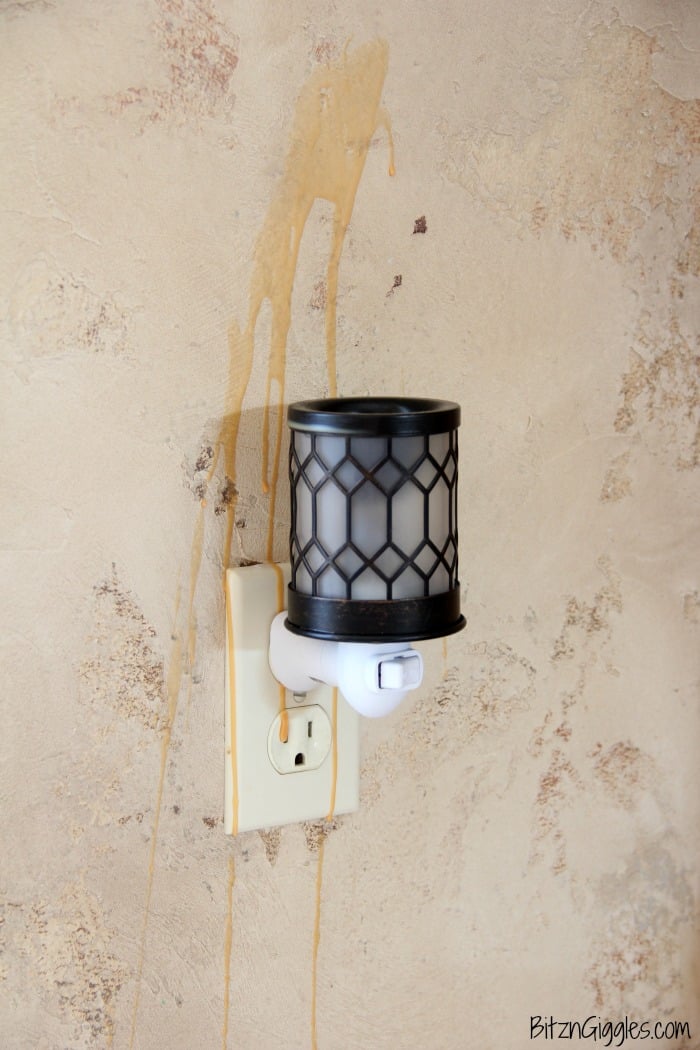
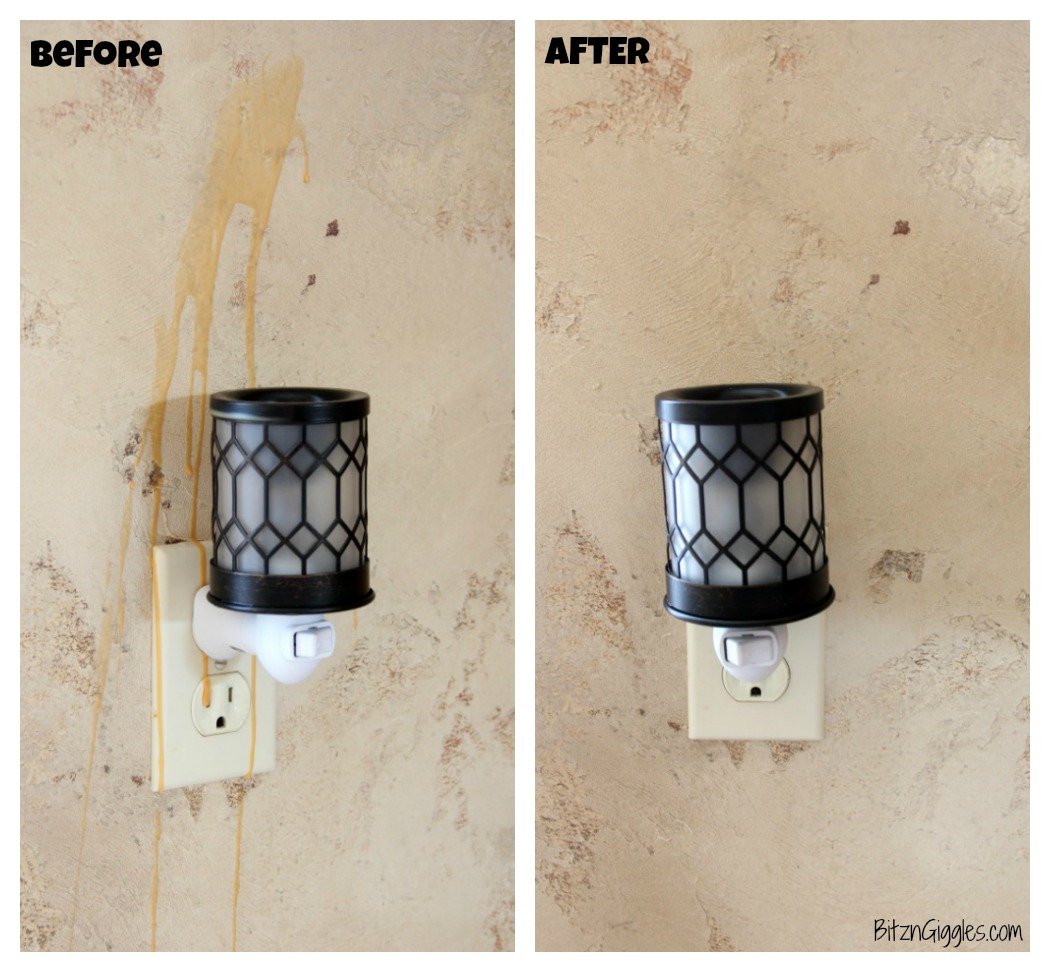
It really works. Your wall will look good as new. Take a look at the before and after.
How to Remove Wax From Your Wall "In Action"
If you're still a bit nervous and need more than just photos, I created a video of me removing the wax. I just wish you could have seen the first incident. It was so much worse!!
I hope the technique works for you, either now or in the future, when you may need it. I tuck this little trick in my back pocket and have it at the ready at all times because like I said at the end of my video, I'm NOT getting rid of my wax warmers! NO WAY! 🙂
I'd love to hear about your wax incidents, so please feel free to share in the comments! It makes us all feel better when we know we're not the only ones things like this happen to!
Click here for more cleaning tips!
How to Remove Wax From Your Wall
Materials
- Hair dryer
- Paper towels
Instructions
- Plug your hair dryer in and turn it to the hottest setting.
- Hold the hair dryer very close to the wax on the wall or surface it has spilled.
- While you're holding the hair dryer, in your other hand, bunch up some paper towels and hold them underneath the hair dryer to catch the wax as it melts and begins to drip down the wall.
- Catch the wax as it begins to run down the wall and begin to wipe it away quickly with the clean paper towels.
- Quickly rotate the paper towels to ensure you are always using a clean spot to wipe away the wax.
Crystal B.
Thank you soo much!! This worked exactly as you stated and in a matter of minutes!! My spill was really bad and on a textured wall. So glad I know the trick now! ?
Sara
I'm so glad it worked for you, Crystal! What a relief, right?!
Susan Boren
I love your walls. The texture and paint is beautiful. How did you do that?
Sara
Thank you, Susan. Our former neighbor is a painter and interior decorator and she did it for us. I can't take the credit. I do know that she laid a metallic foil as the base and then did a texture finish over it.