
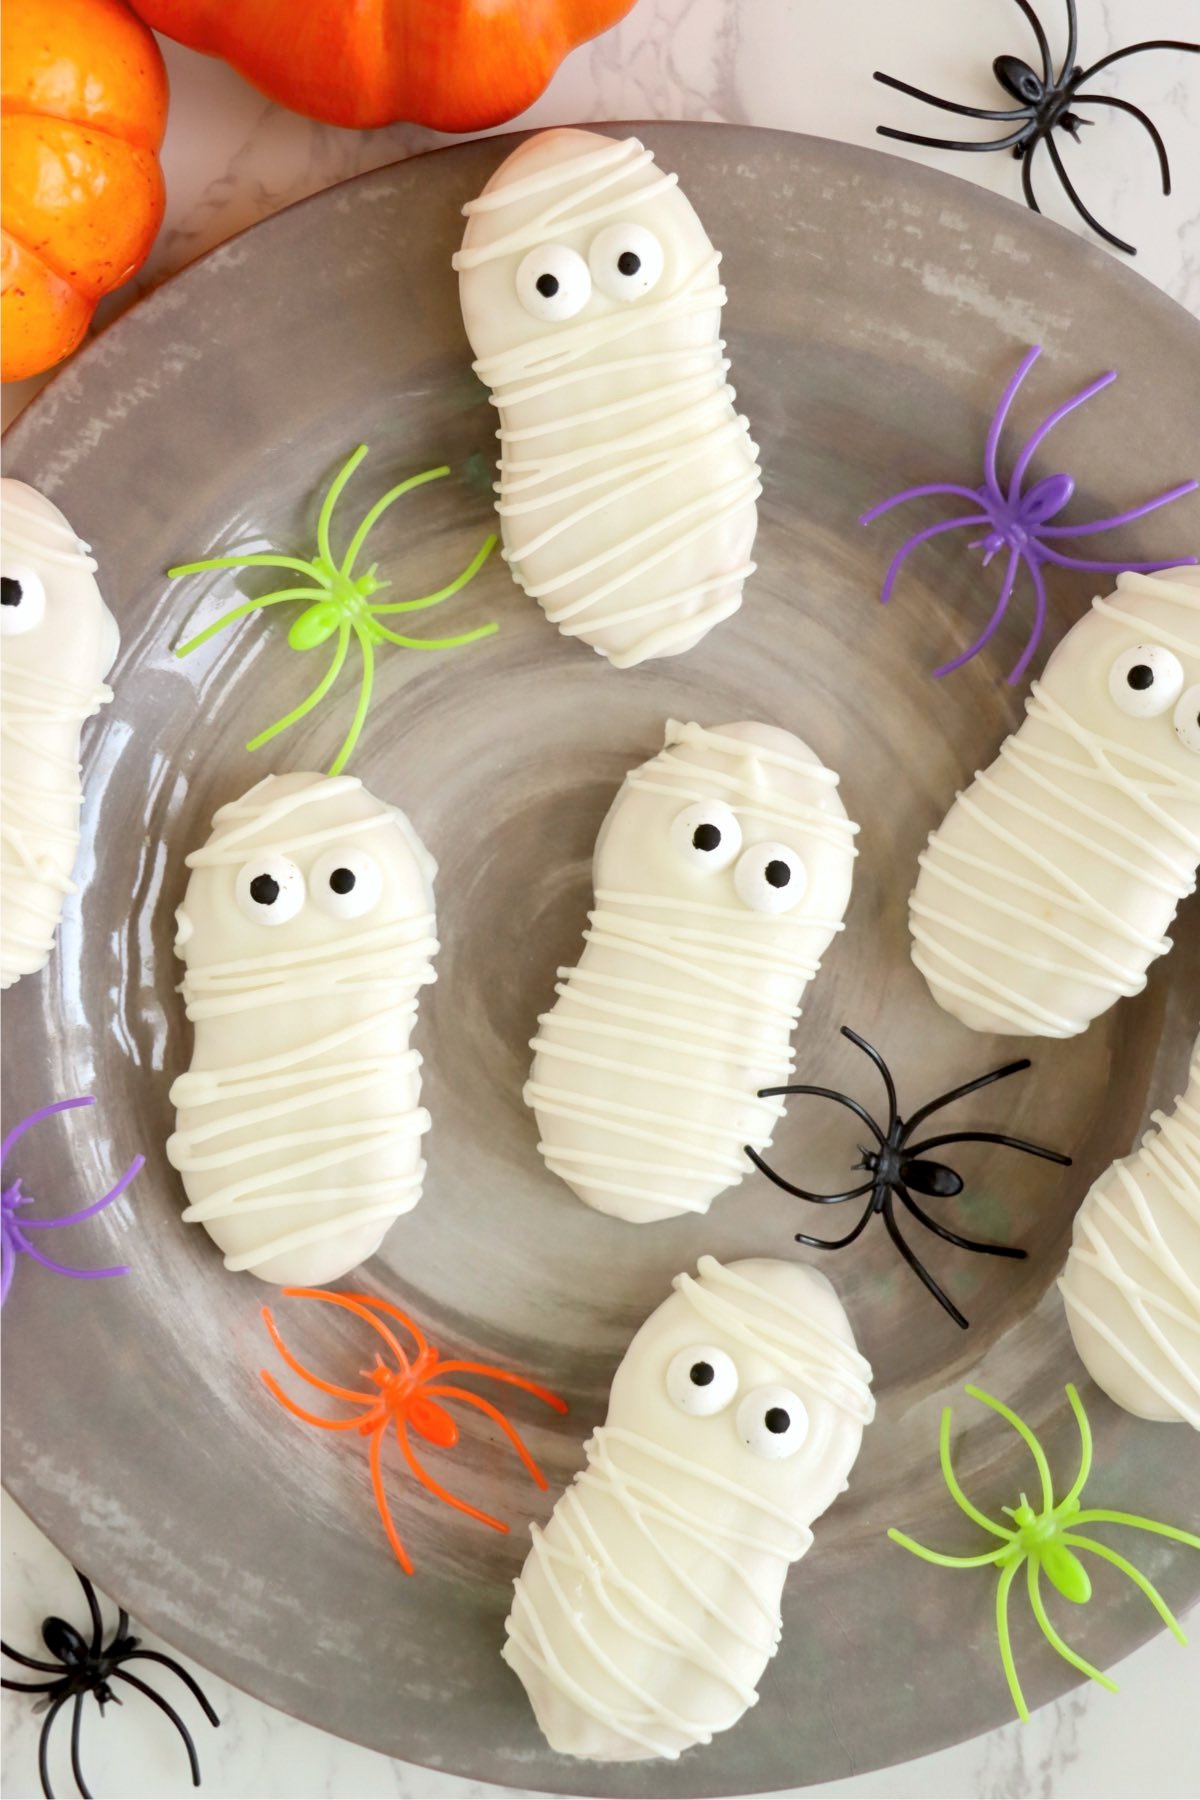
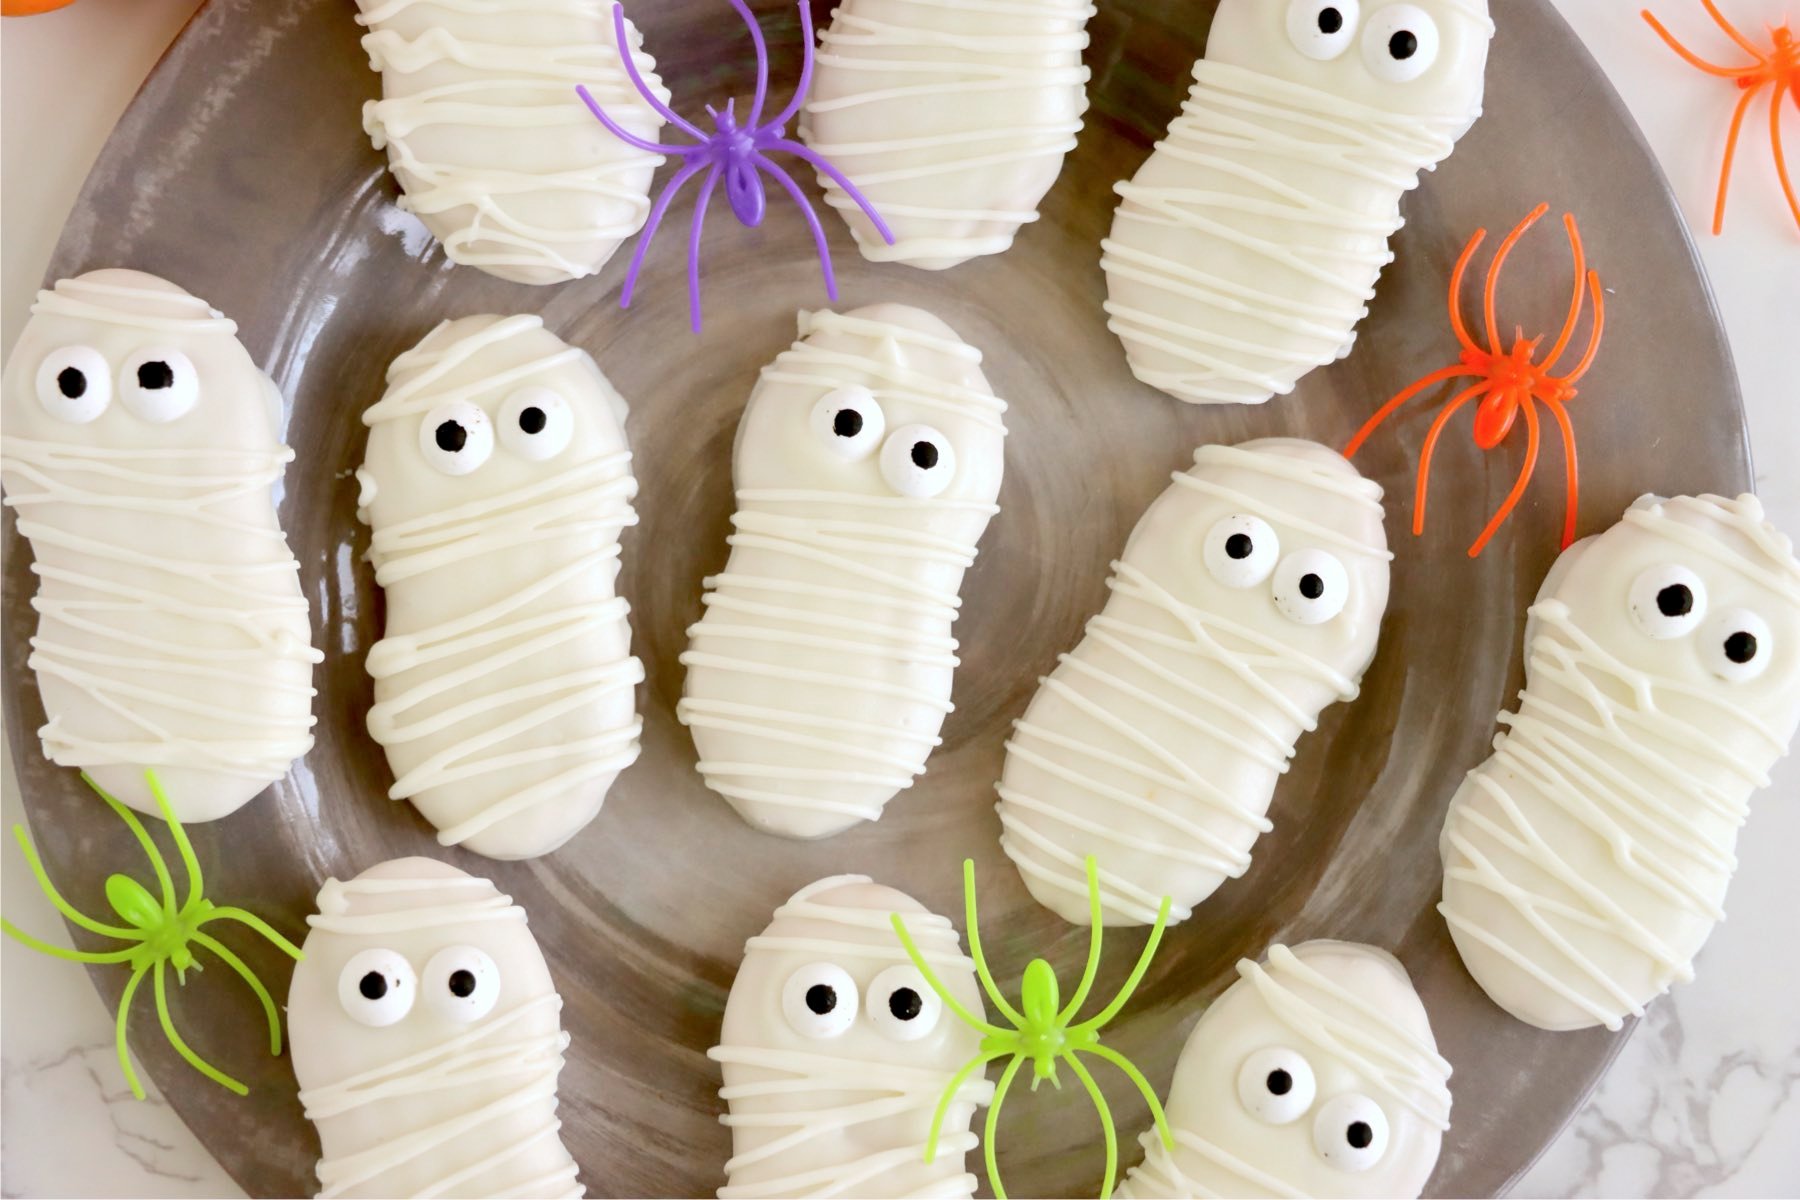
These adorably spooky Nutter Butter Mummy Cookies are the perfect treat to celebrate Halloween! Featuring crunchy peanut butter cookies dipped in creamy white chocolate almond bark, these no-bake sweets are as fun to make as they are to eat. Each cookie is drizzled with white chocolate 'bandages' and decorated with sweet candy eyes, creating the cutest little mummies around.
Want to Save This Recipe?
Whether you're in need of a treat for a Halloween party or simply looking for a fun and festive activity, these mummy cookies are sure to be a hit! They're the perfect combination of crunchy, creamy, and sweet, making them irresistible. Best of all, there's no baking involved, just a few easy steps and terrifyingly delicious results!
If you're looking to round out your Halloween spread, pair these mummy cookies with a few more frightfully fun recipes! My Spooky Deviled Eggs make a perfect party appetizer, while Air Fryer Mummy Dogs are a quick and kid-approved dinner idea. And if you're in the mood for another sweet treat, you'll love my Sheet Pan Caramel Apples- a gooey, customizable dessert that's every bit as fun to make as it is to eat.
Jump to:
Why You'll Love This Recipe
- Only 3 Ingredients: That's right - you'll only need 3 simple ingredients to make these adorable mummy cookies!
- Fun Halloween Treat: These cookies are super fun to make and decorate; the perfect fall activity to get the kids involved!
- No-Bake Dessert: There's no need to turn on the oven for these festive treats! Buying premade cookies makes this a super convenient Halloween dessert.
- Perfect for Parties: These spooky-cute cookies are always a hit at Halloween gatherings, bake sales, and classroom parties. Adults love my Halloween Veggie Pizza - a festive and flavorful option that adds the perfect savory touch to any party spread.
- Kid-Friendly: Little ones can help dip, decorate, and place the candy eyes - making it a great hands-on activity for all ages.
- Make-Ahead Friendly: Prepare them in advance and store in an airtight container - they stay fresh and picture-perfect for days.
Ingredients
Gather the ingredients below to make these easy Nutter Butter mummy cookies!

- Nutter Butter cookies are crunchy, creamy, and sturdy enough to hold up when dipped.
- White almond bark melts smoothly and is ideal for both dipping and piping. It doesn't harden too quickly, so you'll have plenty of time to work with it.
- Candy eyeballs can be found at most craft stores or grocery stores.
See recipe card for full information on ingredients and quantities.
Substitutions & Variations
- Candy Eye Substitutes: No candy eyes? No problem. Use mini chocolate chips, small dots of melted dark chocolate, or black gel icing instead.
- Ghost Cookies: Simply skip the bandage drizzle to turn these mummies into the cutest ghost cookies!
- Tone Down the Sweetness: For cookies with a little less sweetness, try dipping only half of the cookie. This can also save you from the messiness of dipping the whole cookie! I use the same technique with my Witchy Caramel Apples - coating just part of the apple for the perfect balance of flavor and a fun, eye-catching look.
- Melting White Chocolate: If you're using regular white chocolate instead of white almond bark, be a little more careful when melting in the microwave. Heat it in 15-second intervals instead, stirring in between and keeping a close eye on the chocolate so that it doesn't burn. You can also add a teaspoon of coconut oil to the melted chocolate if it's still a little thick.
- Chocolate Mummies: Swap the white almond bark for milk or dark chocolate coating for a tasty twist and a fun color contrast with the candy eyes.
- Festive Drizzle Colors: Use orange, purple, or green candy bark for colorful "bandages" that make your mummies stand out on the dessert table. For more candy bark inspiration, check out my Pumpkin Oreo Balls - they use the same vibrant orange and green candy coating for a perfectly festive Halloween touch!
How to Make Mummy Cookies
Once you've gathered all your ingredients, line a baking sheet with parchment paper, then melt the white bark in a microwave-safe bowl in 30-second intervals, stirring frequently until smooth. Then follow the steps below for these Halloween cookies.

- Step 1: Dip each cookie into the melted bark.
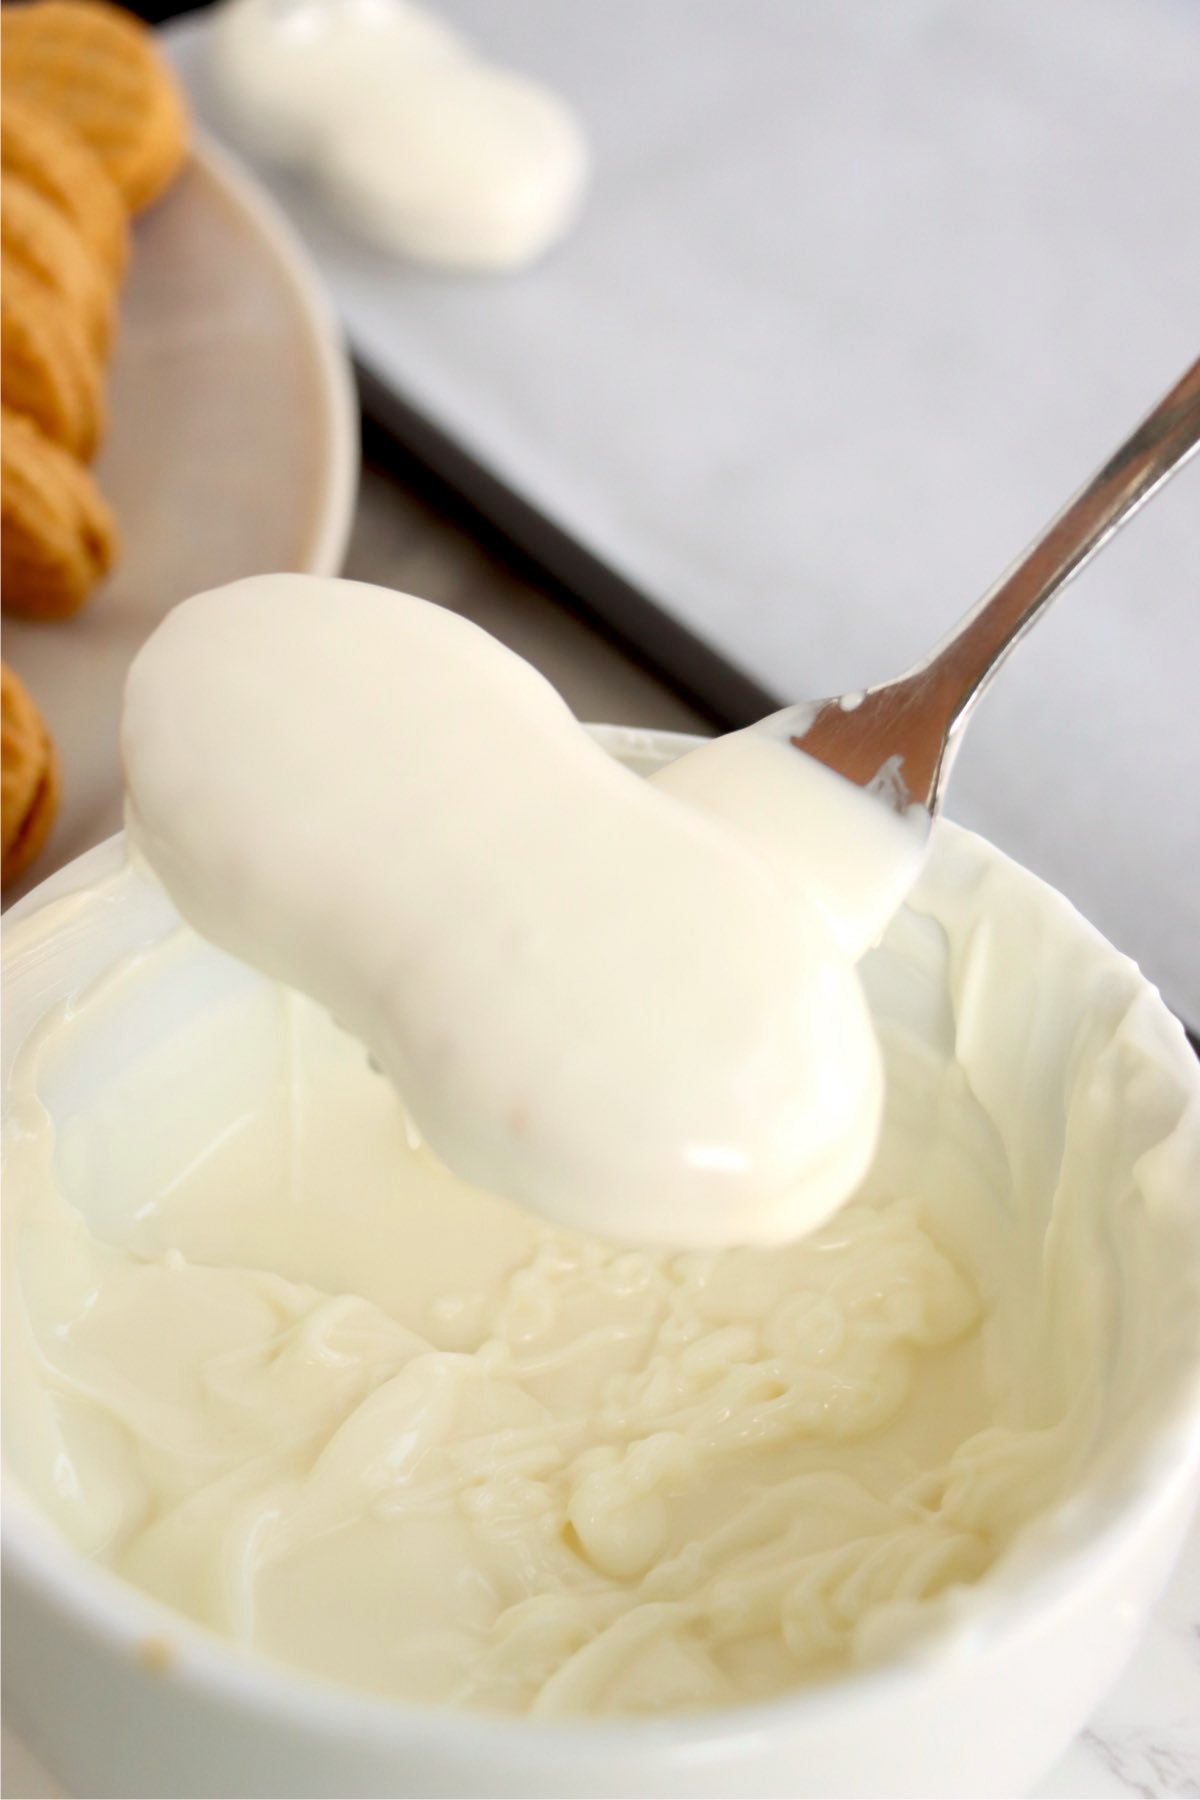
- Step 2: Allow the excess bark to drip off.
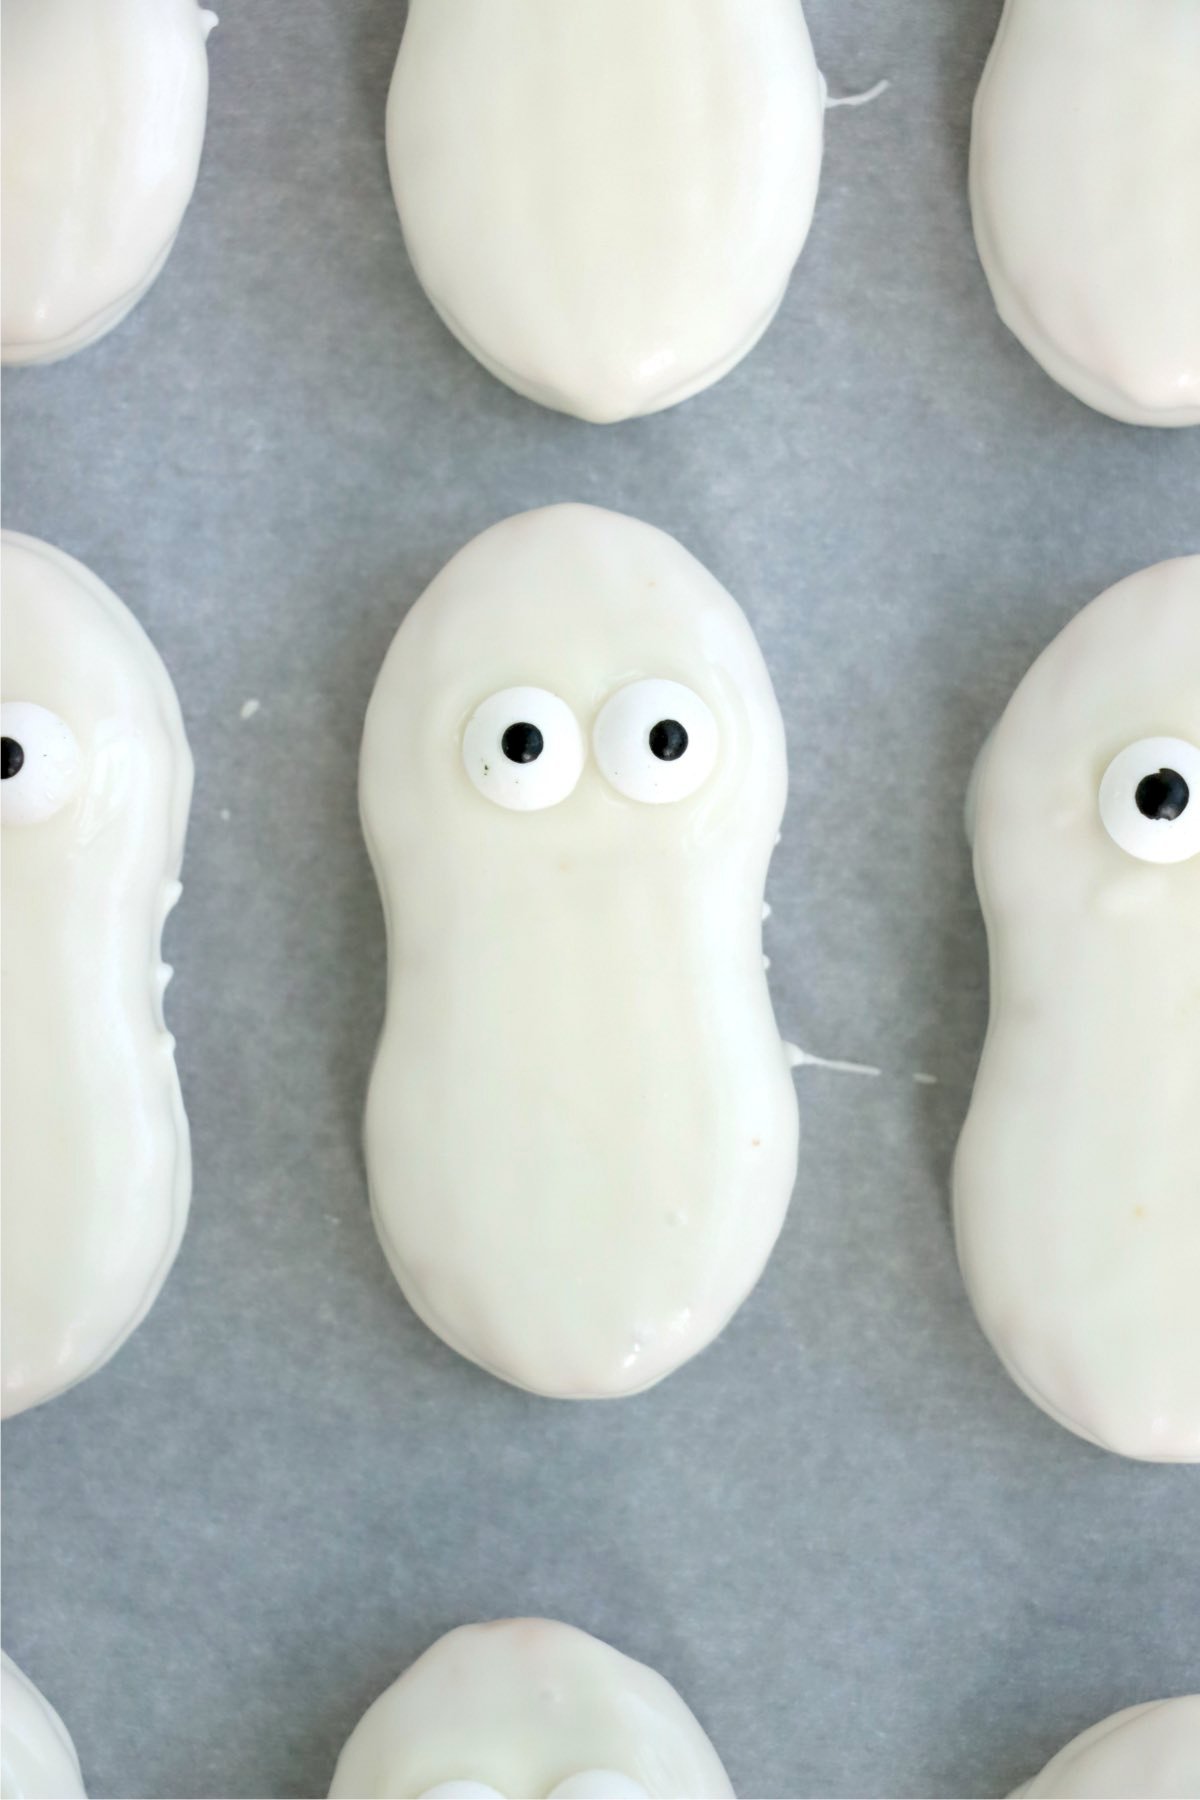
- Step 3: Place each cookie on your prepared baking sheet, immediately placing the eyes on before the bark hardens.
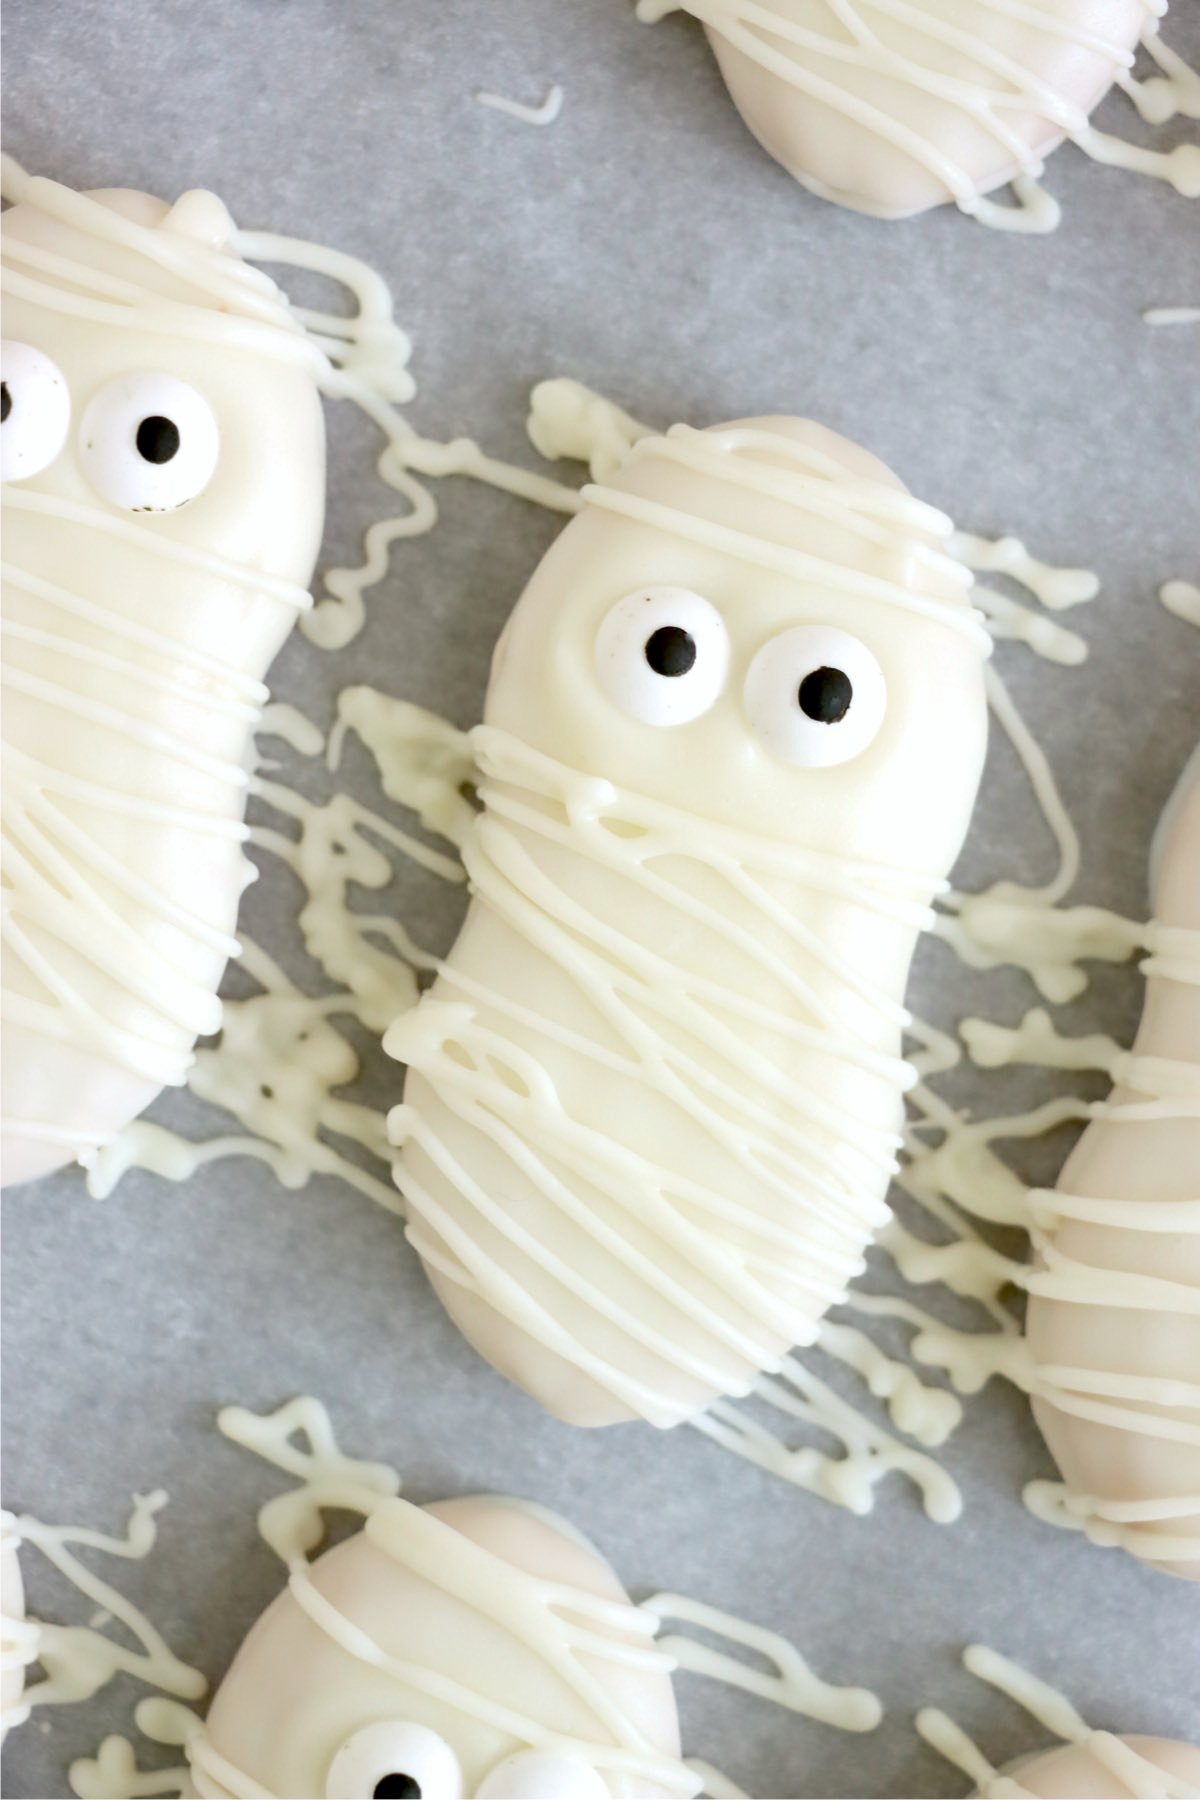
- Step 4: Transfer remaining melted bark to a small ziplock baggy. Cut a very small corner off and pipe the "bandages" onto each mummy cookie.

Helpful Tips
- Speed Up Cooling: To speed things up, pop the cookies in the fridge to harden the chocolate faster. They should firm up in 10-15 minutes compared to 30 minutes at room temperature.
- Add Eyes Quickly: Make sure to place the candy eyes before the chocolate fully sets so that they stick properly. If the chocolate has already set, use a little melted chocolate as "glue" to attach them.
- Drizzling Without a Piping Bag: You can use a spoon or even a fork to drizzle on the bandages if you don't want to use a Ziploc or piping bag. It works great in a pinch!
- Work in Small Batches: To prevent the chocolate from cooling too quickly, dip and decorate just a few cookies at a time so you can add the eyes before it sets.
- Prep Everything First: Have your parchment paper, melted bark, candy eyes, and piping setup ready to go before you start dipping - once you begin, things move quickly!
- Avoid Overheating Chocolate: Overheating can cause chocolate to seize and turn grainy. Melt in short intervals and stir often for a smooth, glossy finish or use a chocolate melting pot for great results!
- Thin Out the Coating: If your melted bark is too thick, stir in a teaspoon of coconut oil or shortening to help it coat the cookies more easily.
- Keep Hands Clean: Use a fork or candy dipping tool to lower cookies into the melted bark - it helps keep them evenly coated and avoids messy fingers.
- Set on a Cooling Rack: If you prefer less pooling around the base, place dipped cookies on a wire rack set over parchment instead of directly on the sheet.
Recipe FAQs
Yes! You can use white chocolate chips, but melt them carefully in short 15-second intervals to avoid burning. Adding a teaspoon of coconut oil or shortening can help make the coating smoother for dipping.
The trick is to add them while the chocolate coating is still wet. If it's already hardened, use a dab of melted chocolate as "glue" to attach them.
At room temperature, it takes about 30 minutes. To speed things up, place the cookies in the refrigerator for 10-15 minutes.

Storage & Freezing Instructions
Storage Instructions
To store your mummy cookies, keep them in an airtight container in the refrigerator, or in a cooler spot at room temperature, for up to 2 weeks.
Freezing Instructions
These mummy cookies can be kept in the freezer for up to a month. Simply place them into a freezer bag and thaw them in the fridge before enjoying!
More Halloween Recipes You'll Love
Looking for other Halloween recipes like this? Try these:

Did you try this recipe?
If you decide to try this Mummy Cookies recipe or any other recipe on my website, please leave a ⭐️ star rating and let me know how it went in the 💬 comments below! I'd love to hear from you!
Mummy Cookies
Ingredients
- 20 Nutter Butter cookies
- 12 ounces white almond bark
- 40 candy eyeballs
Instructions
- Prepare a baking sheet by lining it with parchment paper.
- In a microwave-safe bowl, melt white bark in 30-second intervals, stirring often until smooth.
- Dip each cookie into the melted bark, allowing the excess to drip off. Place each cookie on your prepared baking sheet, immediately placing the eyes on before the bark hardens.
- Transfer remaining melted bark to a small ziplock baggy. Cut a very small corner off and pipe the "bandages" onto each mummy cookie.
- Allow to harden before serving.
Notes
- Speed Up Cooling: To speed things up, pop the cookies in the fridge to harden the chocolate faster. They should firm up in 10-15 minutes compared to 30 minutes at room temperature.
- Add Eyes Quickly: Make sure to place the candy eyes before the chocolate fully sets so that they stick properly. If the chocolate has already set, use a little melted chocolate as "glue" to attach them.
- Drizzling Without a Piping Bag: You can use a spoon or even a fork to drizzle on the bandages if you don't want to use a Ziploc or piping bag. It works great in a pinch!
- Work in Small Batches: To prevent the chocolate from cooling too quickly, dip and decorate just a few cookies at a time so you can add the eyes before it sets.
- Prep Everything First: Have your parchment paper, melted bark, candy eyes, and piping setup ready to go before you start dipping - once you begin, things move quickly!
- Avoid Overheating Chocolate: Overheating can cause chocolate to seize and turn grainy. Melt in short intervals and stir often for a smooth, glossy finish.
- Thin Out the Coating: If your melted bark is too thick, stir in a teaspoon of coconut oil or shortening to help it coat the cookies more easily.
- Keep Hands Clean: Use a fork or candy dipping tool to lower cookies into the melted bark - it helps keep them evenly coated and avoids messy fingers.
- Set on a Cooling Rack: If you prefer less pooling around the base, place dipped cookies on a wire rack set over parchment instead of directly on the sheet.
Leave a Reply