
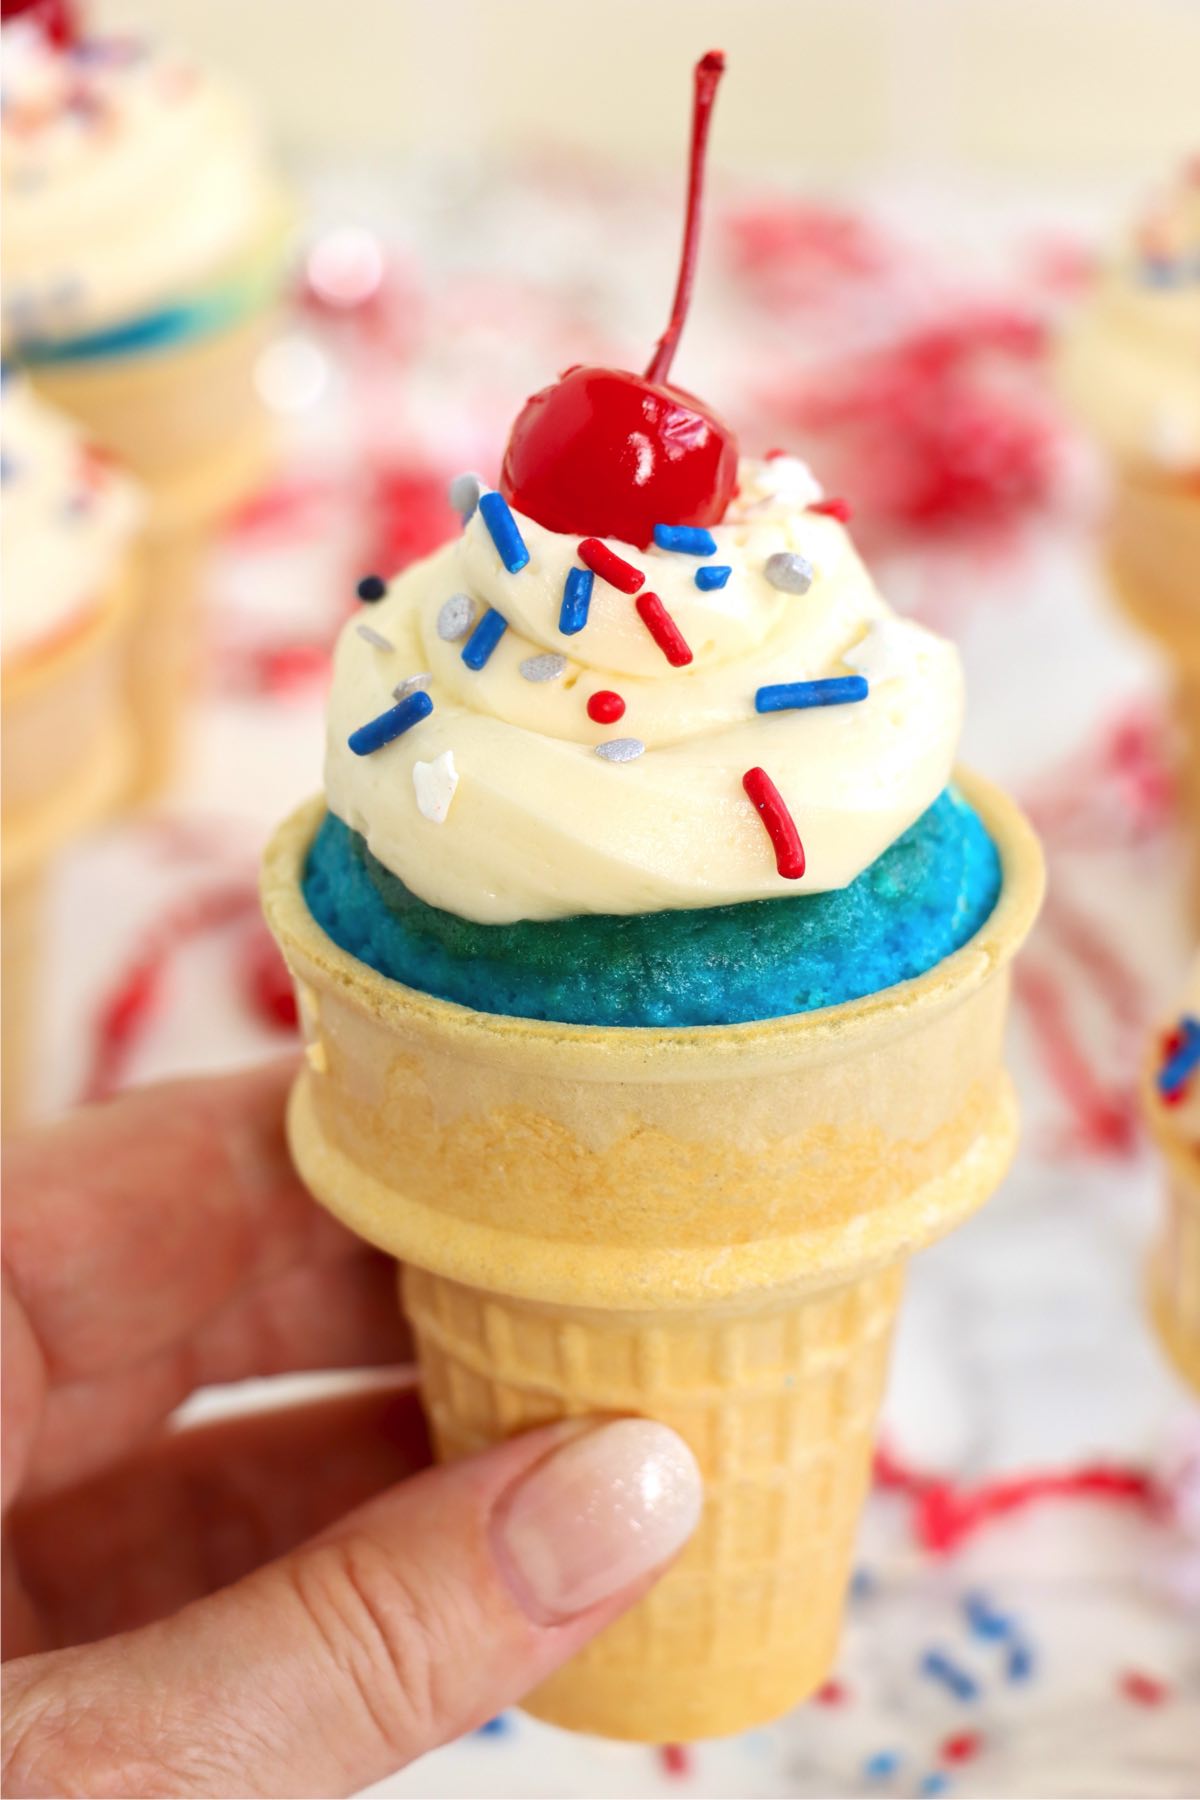
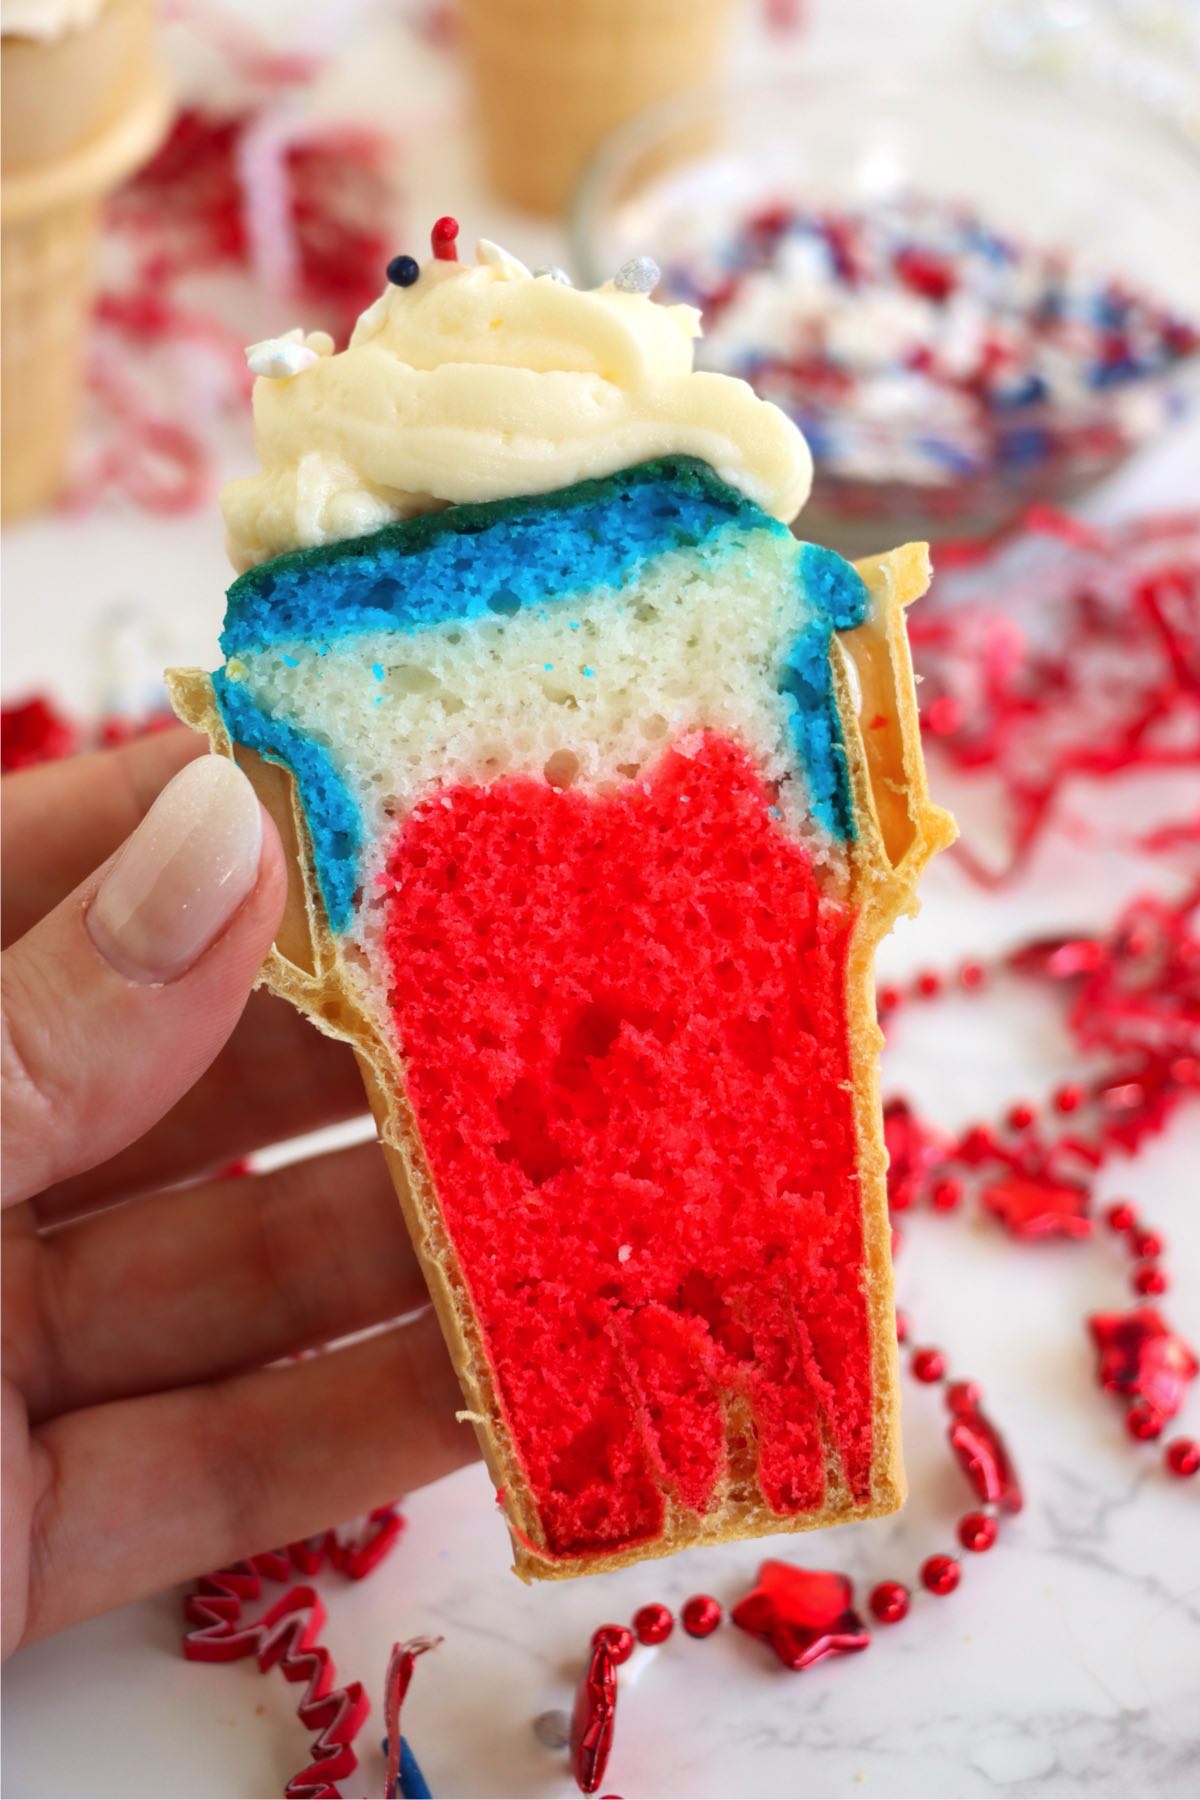
These 4th of July Ice Cream Cone Cupcakes are a fun and festive twist on a classic treat-perfect for summer celebrations! The red, white, and blue swirled cake batter is baked right inside crunchy ice cream cones for a patriotic surprise in every bite.
Want to Save This Recipe?
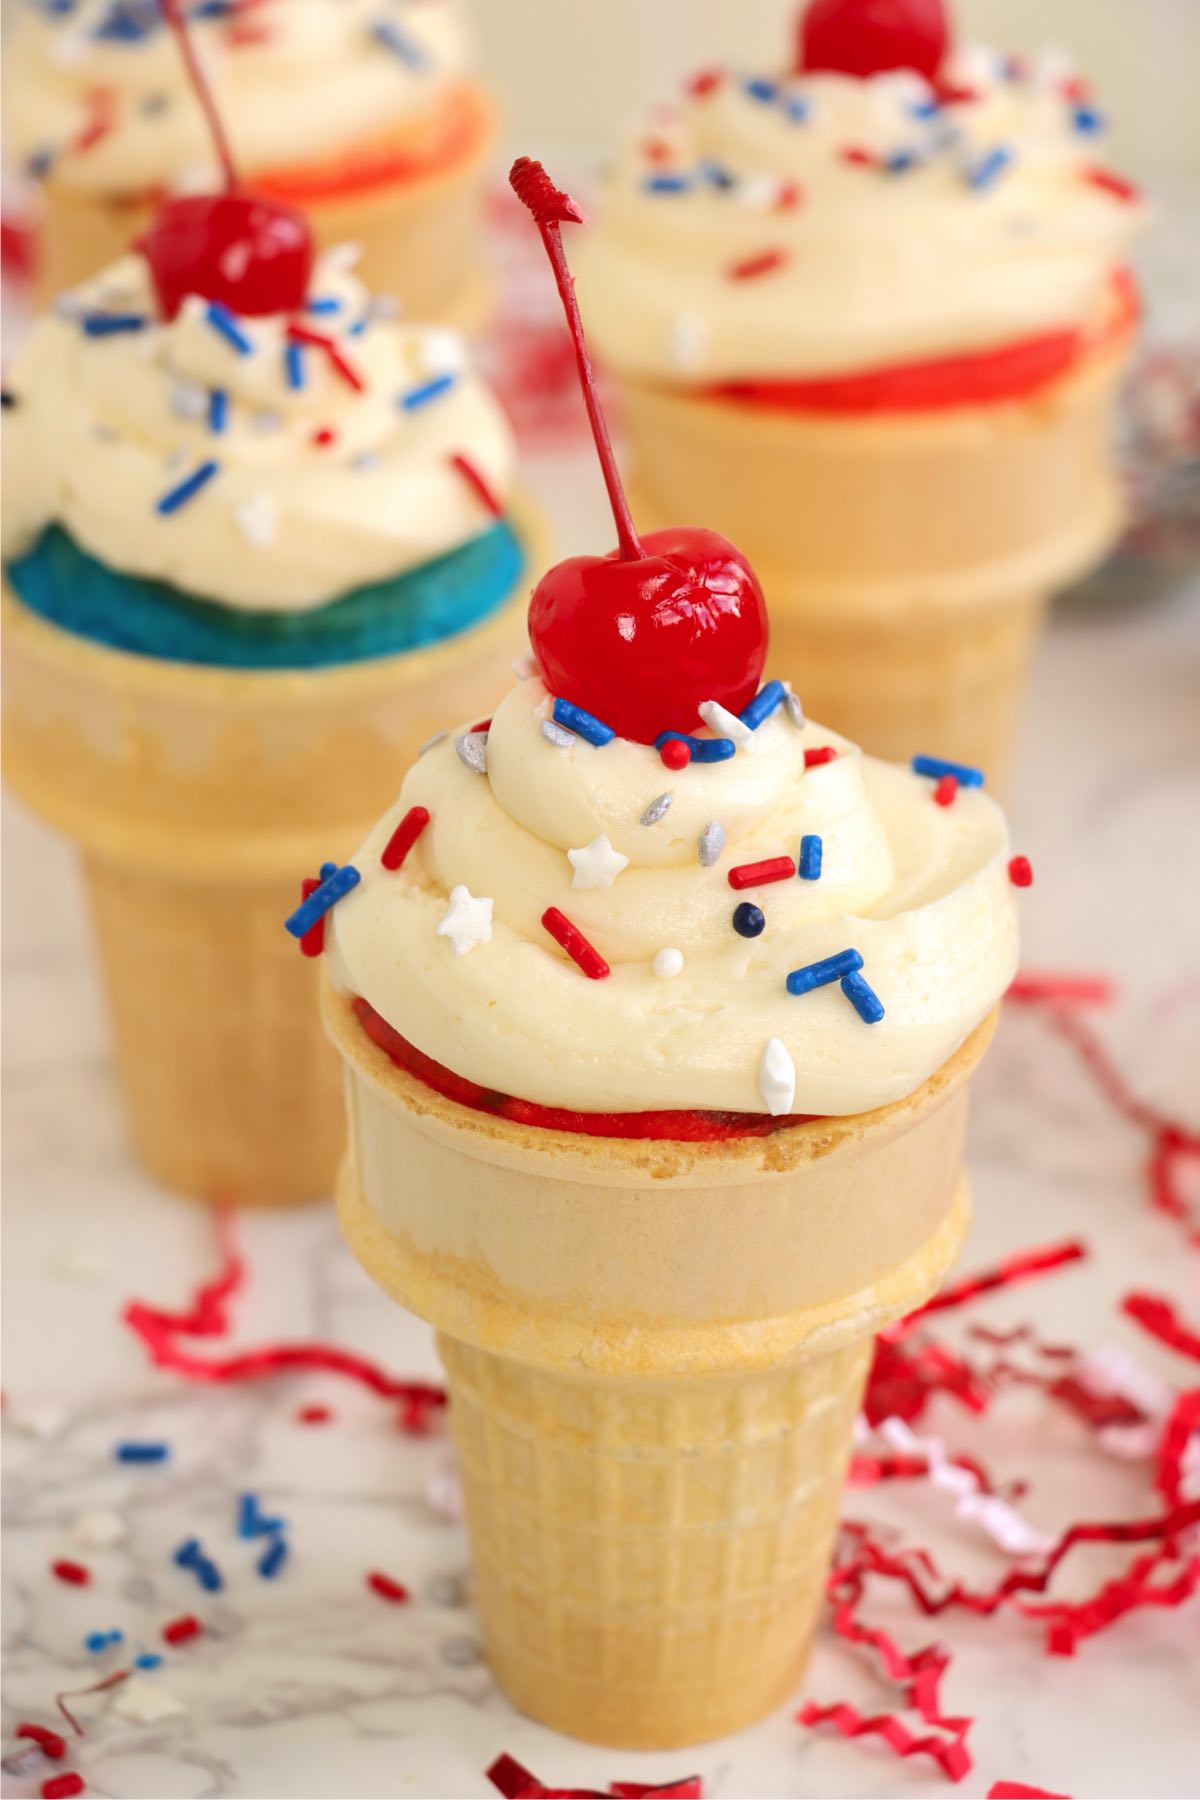
Topped with fluffy homemade frosting, sprinkles, and a cherry, they look just like mini sundaes. They're easy to make, easy to serve, and guaranteed to be a hit at your 4th of July party!
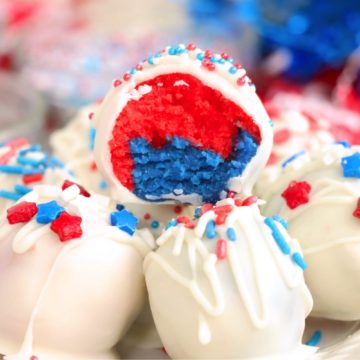
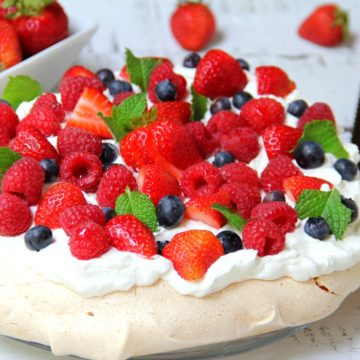
If you're looking for even more red, white, and blue inspiration, be sure to check out these festive favorites! These Red, White, and Blue Cake Pops are always a crowd-pleaser, and this American Flag Fruit Pizza makes a colorful and refreshing centerpiece. For something cool and creamy, don't miss the Vanilla Wafer Icebox Cake-it's a chilled treat perfect for hot summer days
Jump to:
Why You'll Love This Recipe
- The best of both worlds! These treats combine the fun of ice cream cones with the flavor of cupcakes for a unique, crowd-pleasing dessert.
- Deceptively easy. They may look fancy, but they're surprisingly simple to make with basic ingredients and minimal fuss.
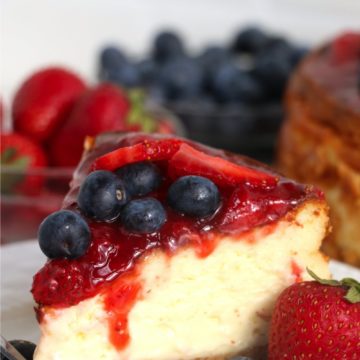
- Perfect for patriotic parties. Festive and fun for the 4th of July, Memorial Day, or any red, white, and blue celebration-just like this refreshing Patriotic Berry Trifle, another crowd-favorite layered with flavor and color.
- No melting mess! They look like ice cream, but since they're fully baked cupcakes, they hold up beautifully in warm summer weather. Love this idea? Be sure to check out our fun twist on the classic with these Rice Krispie Ice Cream Cones too!
Ingredients
Gather the ingredients below to make these ice cream cone cupcakes!

- Ice cream cake cones: Use your favorite brand and make sure that they are flat-bottomed cake cones rather than waffle or sugar cones. You can sometimes even find colored red, white, and blue cones in stores if you want even more color!
- White cake mix (and ingredients listed in box directions) is best for achieving bright red and blue cupcakes!
- Blue and red gel food coloring is the best way to get vibrant colors for your cupcakes.
- Butter: make sure it's at room temperature and softened for the easiest mixing!
- Powdered sugar leaves you with a smooth, fluffy buttercream frosting.
- Vanilla extract adds a sweet, classic vanilla flavor to the frosting.
- Heavy whipping cream makes the frosting creamy and easy to pipe.
- Maraschino cherries with stems are a fun "cherry on top" finishing touch!
- Red, white, and blue sprinkles add a patriotic flair to the cupcake cones. You can use stars, jimmies, or any other festive sprinkles you want!
See recipe card for full information on ingredients and quantities.
Substitutions & Variations
- Extra Patriotic: Dye your frosting red, white, and blue for an even bolder, festive look.
- Short on Time? Use store-bought frosting for a quicker prep without sacrificing fun.
- Colored Cones: Joy brand offers red and blue cones that add instant patriotic flair-no food coloring needed!
- Filling Surprise: Pipe a bit of jam, chocolate, or tinted frosting into the center of each cone for a fun flavor twist.
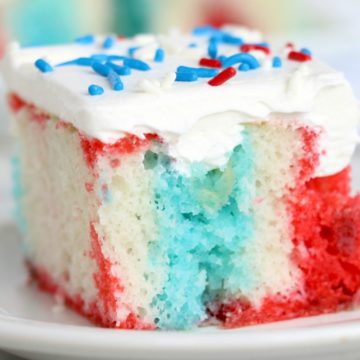
- Cake Mix Swap: Try vanilla, funfetti, or even chocolate cake mix for a different flavor combo. If you're a fan of sprinkles and colorful bakes, you'll also love our Red, White, and Blue Funfetti Cake-a festive classic bursting with patriotic flair!
How to Make Ice Cream Cone Cupcakes
Once you've gathered all your ingredients, preheat oven to 350ºF and follow the steps below to make these red, white and blue cupcakes!
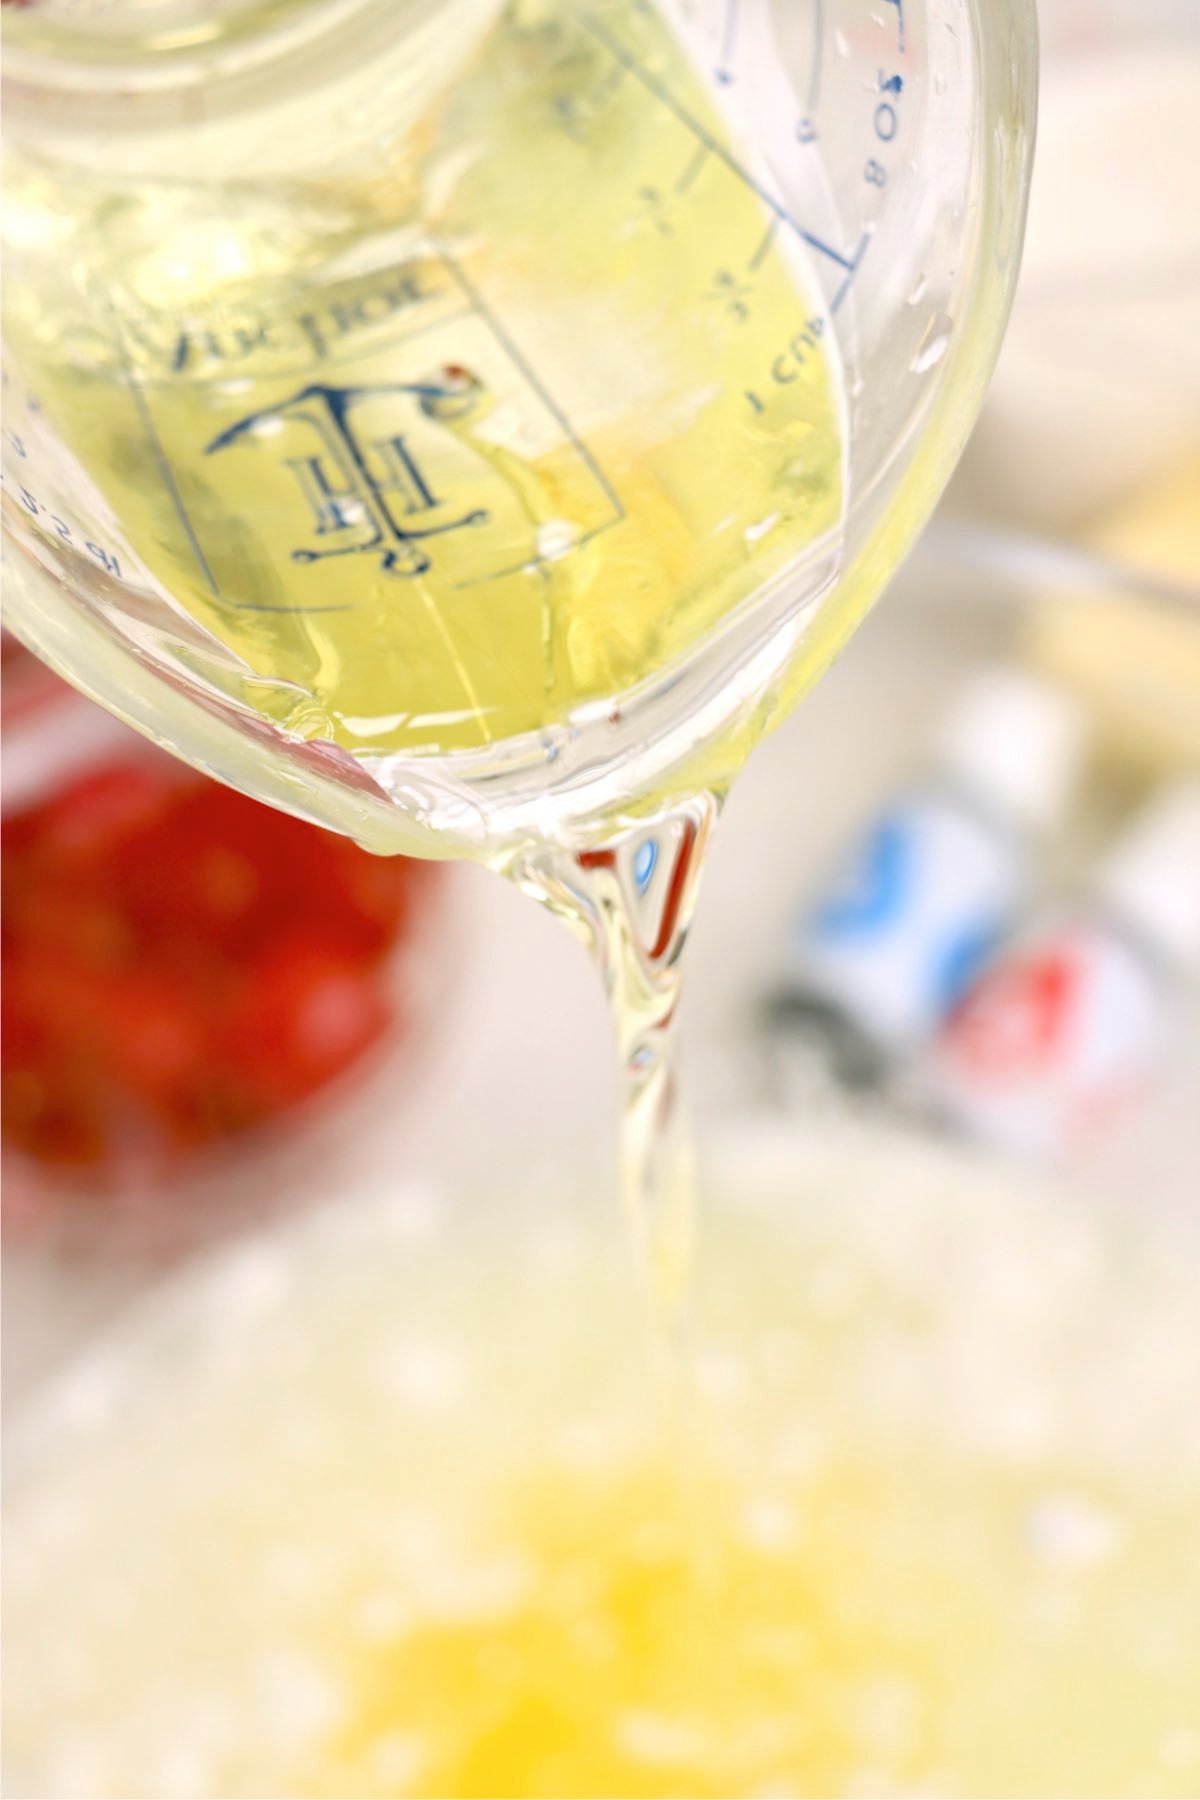
- Step 1: Prepare the cake mix according to the box directions.

- Step 2: Divide batter into three bowls-dye one red, one blue, and leave one white.
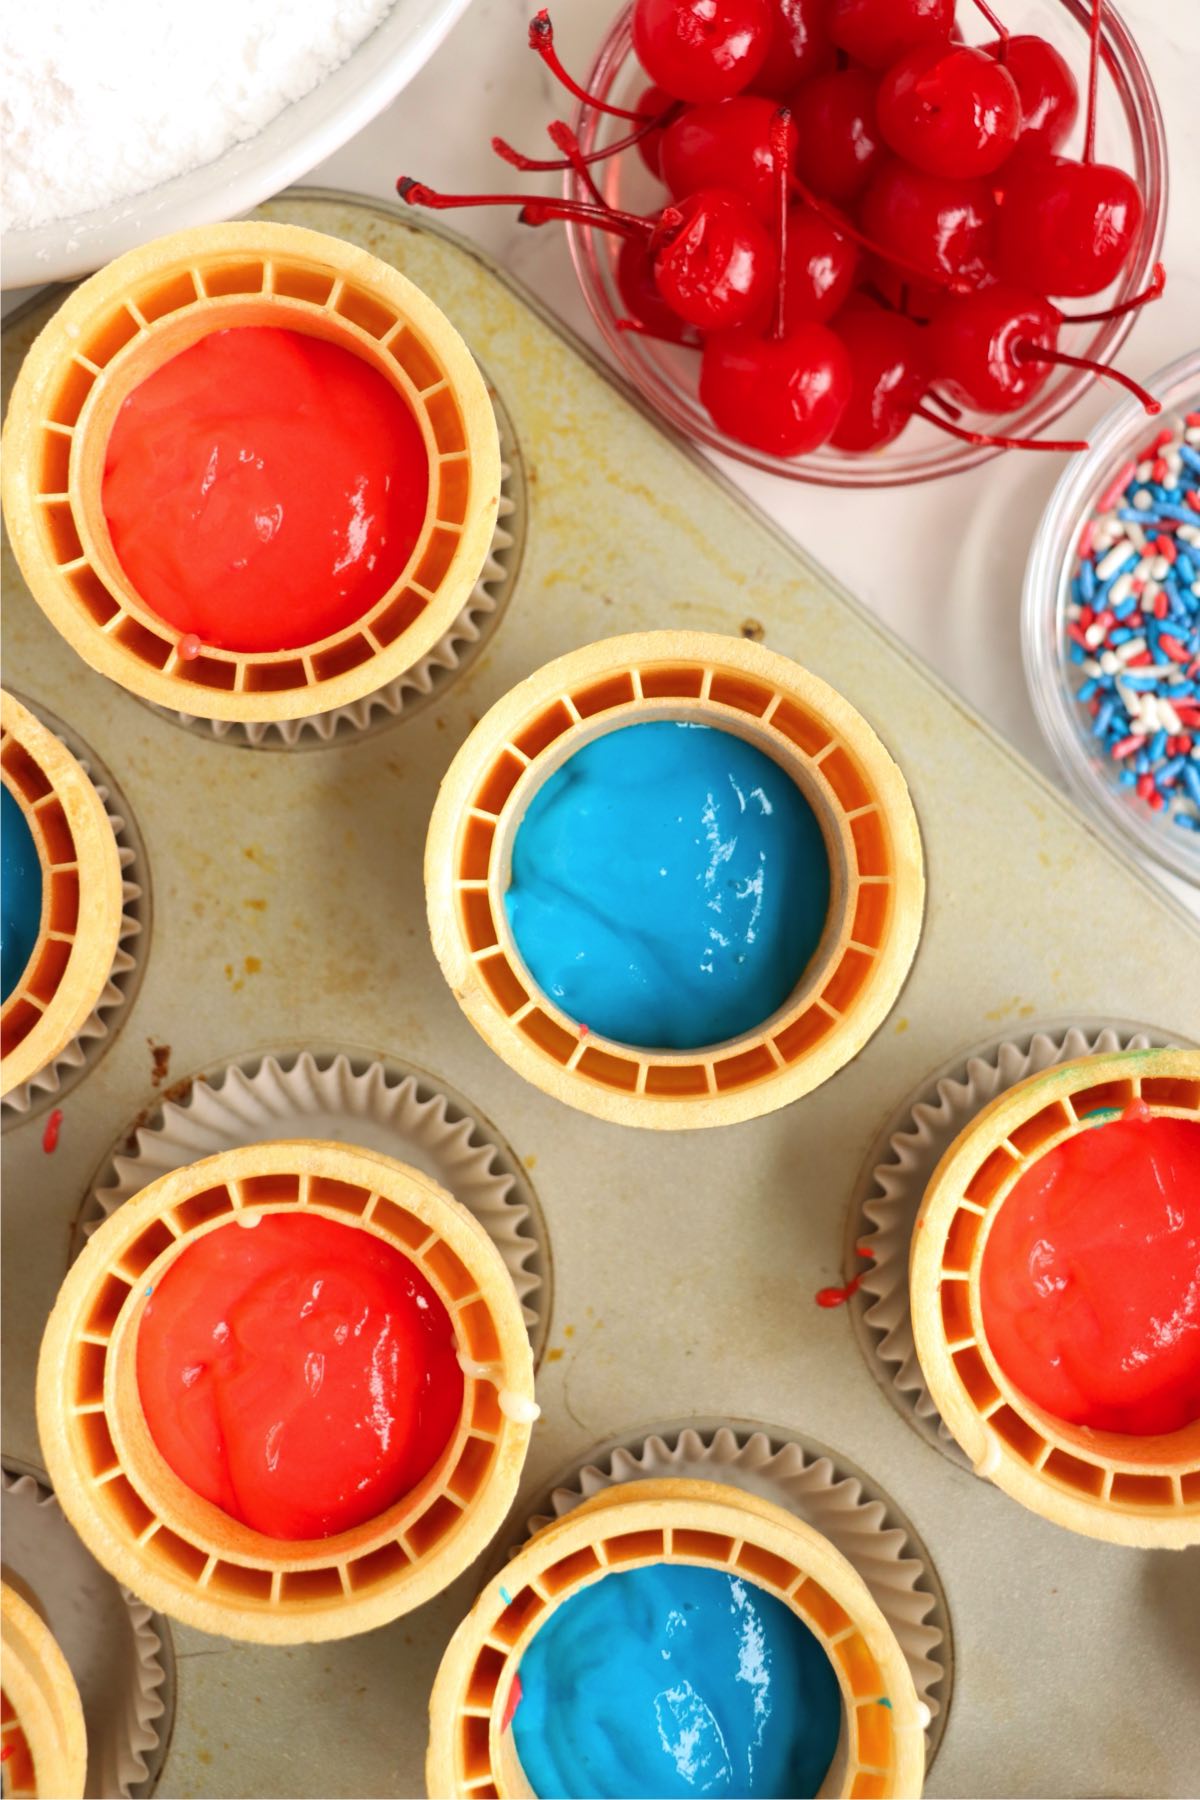
- Step 3: Place ice cream cones in a cupcake pan, fill with alternating colors of batter until 3⁄4 full.
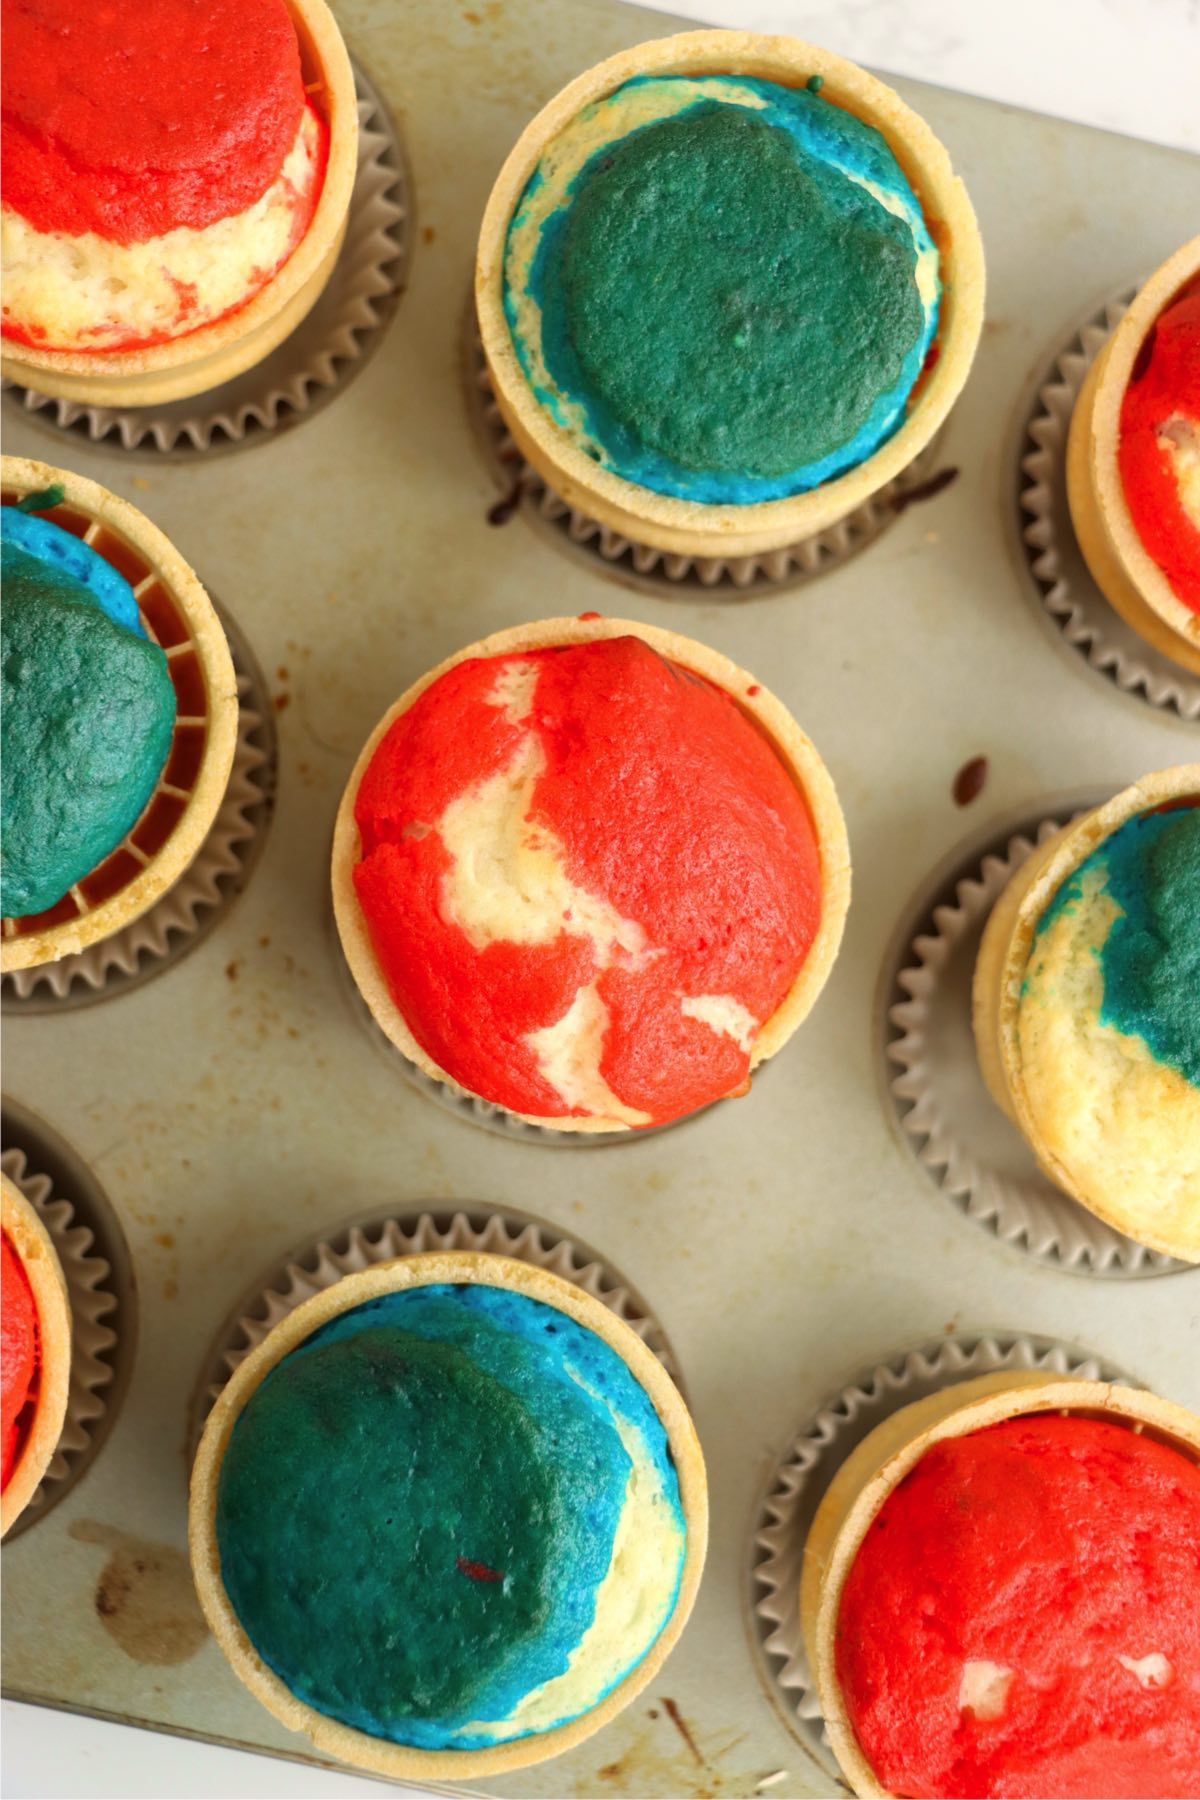
- Step 4: Bake for 25-28 minutes or until a toothpick comes out clean.
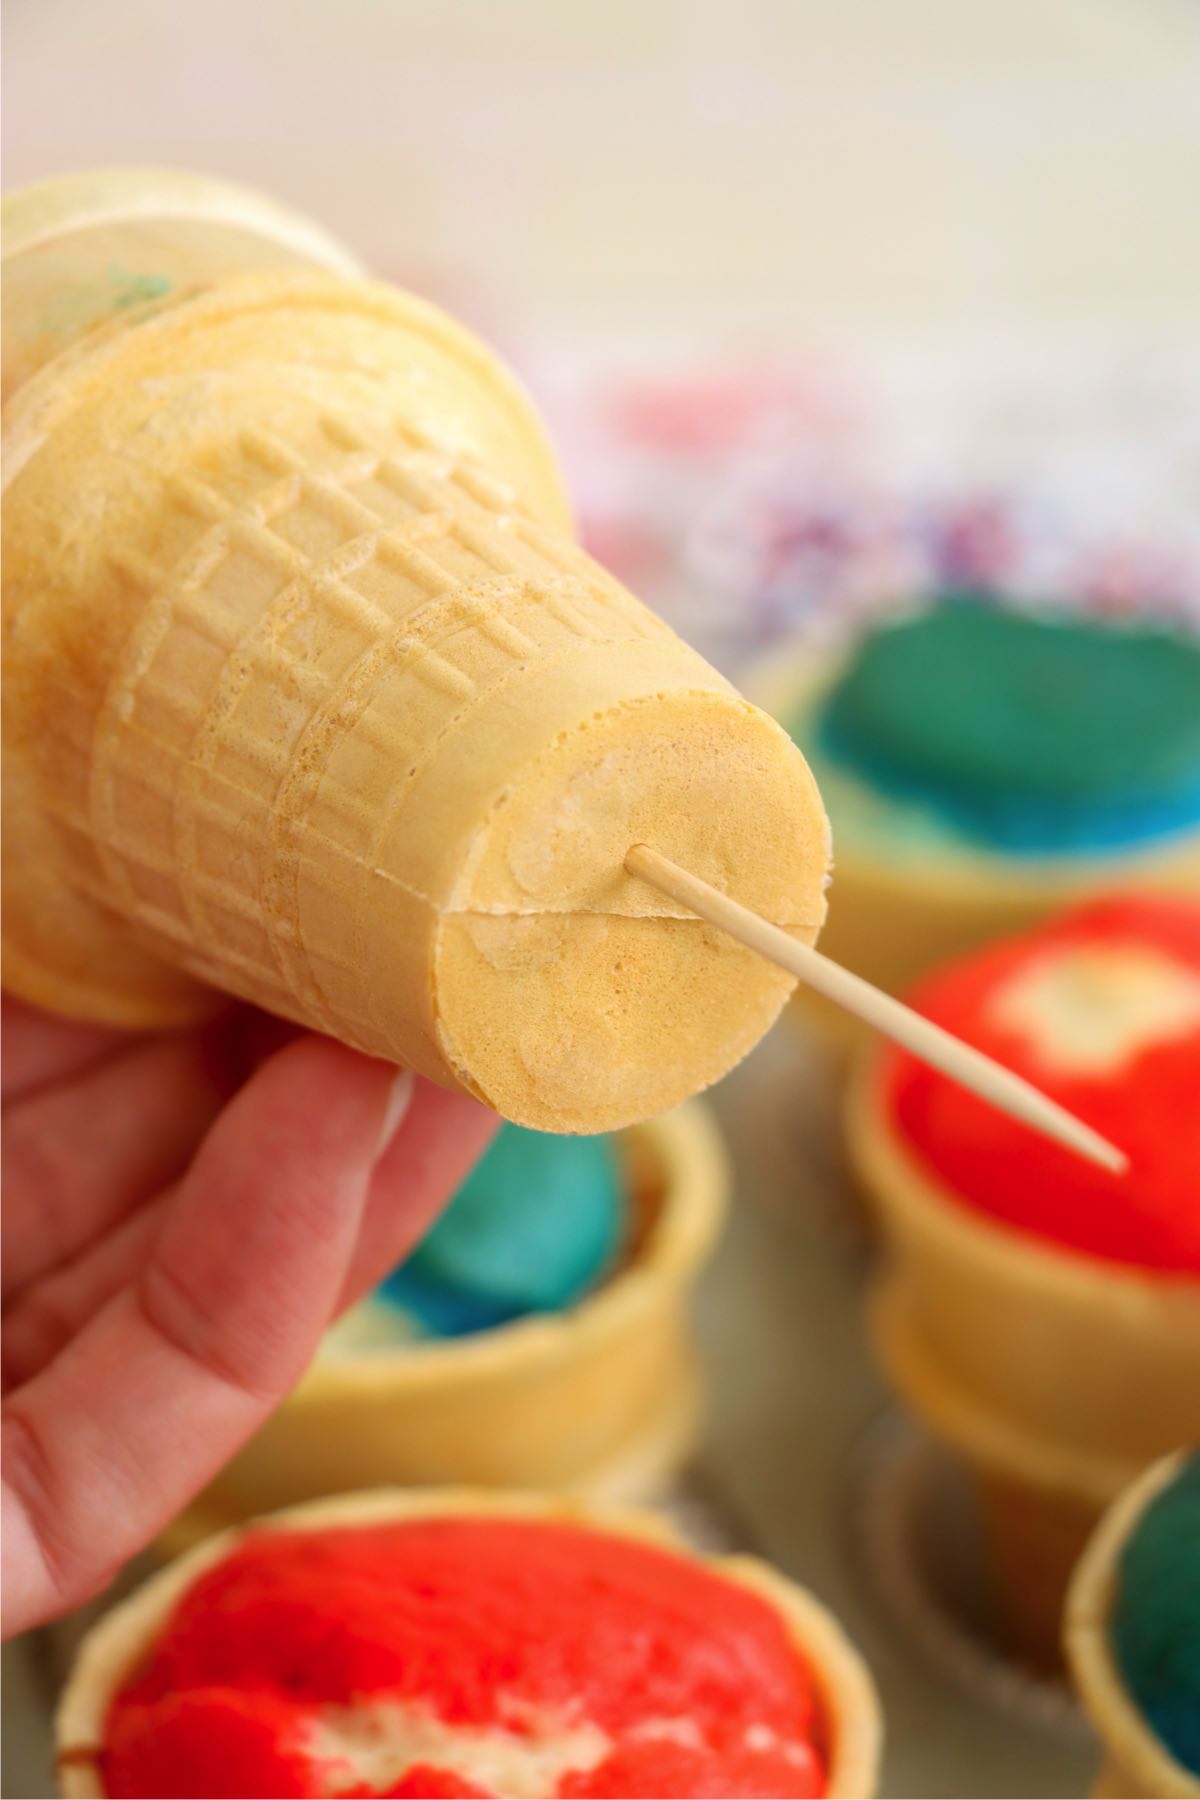
- Step 5: Cool cones for 5 minutes, poke a hole in the bottom with a toothpick, then cool completely.
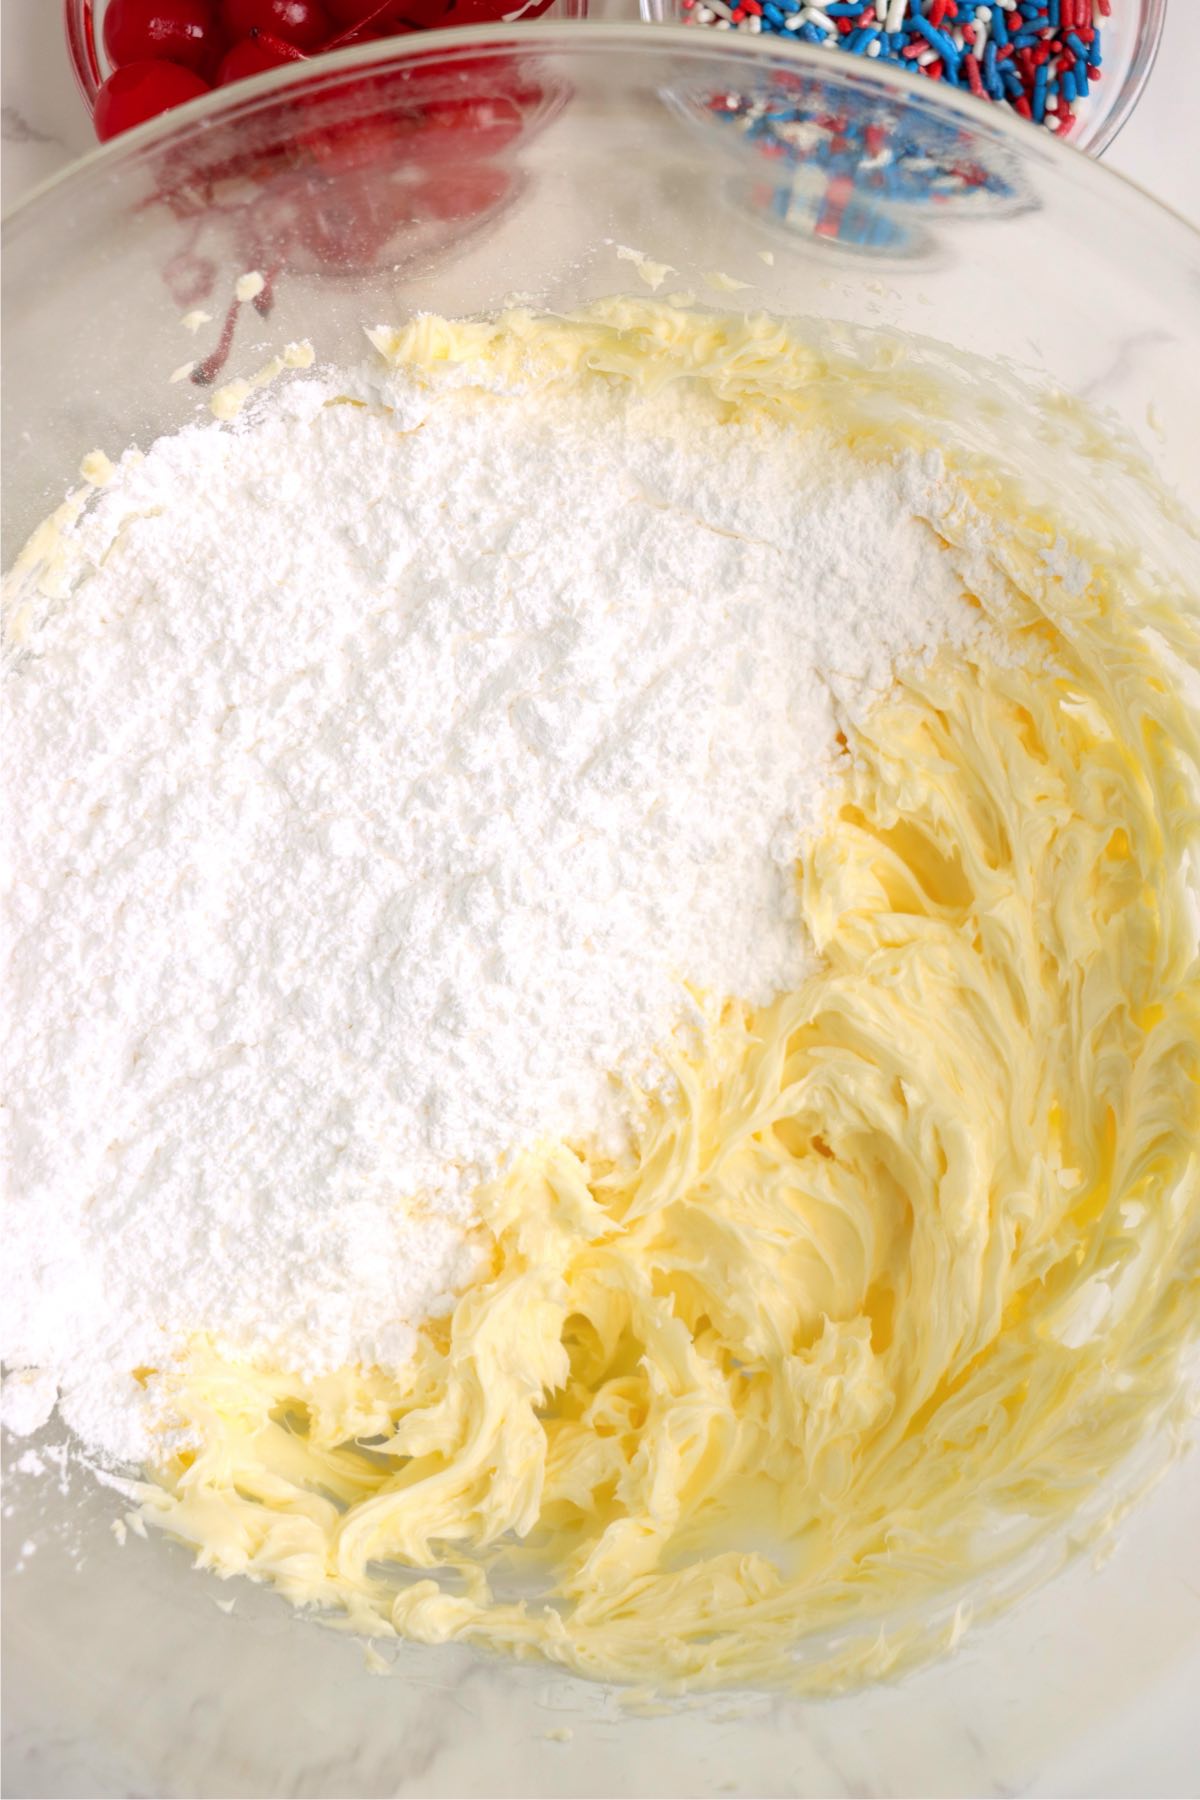
- Step 6: Beat butter until smooth, mix in powdered sugar, vanilla, and cream until fluffy, then pipe onto cones, add sprinkles, and top with a cherry.
Helpful Tips
- Prevent soggy cones: Poke a small hole in the bottom of each cone after baking to let steam escape and keep the cones crisp.
- No cupcake pan? No problem! Cover a casserole dish with heavy-duty foil and cut small "X" shapes for the cones to sit in. It keeps them upright during baking and cooling.
- Don't overfill: Only fill cones about ¾ full-too much batter can cause overflow in the oven.
- Cool completely before frosting: Warm cupcakes can cause the frosting to melt or slide off, especially in summer heat.

Recipe FAQs
You can make this treat up to a day in advance, but any longer than that and you risk soggy cones. Store them uncovered or loosely covered at room temperature until you're ready to serve.
After baking, poke a small hole in the bottom of each cone to let steam escape. This helps prevent the cones from becoming soft or soggy.
If you're transporting these to a party, you can keep them in a casserole dish with aluminum foil to stabilize the cones. You could also use any deep container with a cardboard insert that has cone-sized holes that will hold them upright as you travel.
You can use an ice cream cone tray for a polished look, stand them upright on a decorative platter, or make a simple DIY stand by cutting cone-sized holes into a sturdy cardboard box or cake board.

Storage & Freezing Instructions
Storage Instructions
You can store leftover ice cream cone cupcakes in the pan that you baked them in (once it's cooled down). Simply keep them uncovered or loosely covered at room temperature and they should last for 2-3 days.
Freezing Instructions
Ice cream cone cupcakes don't freeze well, as the cones tend to become soft and soggy when thawed. For best results, enjoy them fresh!
More 4th of July Dessert Recipes You'll Love
Looking for other easy 4th of July treat recipes like this? Try these:
Did you try this recipe?
If you decide to try this 4th of July Ice Cream Cone Cupcakes recipe or any other recipe on my website, please leave a ⭐️ star rating and let me know how it went in the 💬 comments below! I'd love to hear from you!
4th of July Ice Cream Cone Cupcakes
Ingredients
- 18 ice cream cake cones
- 15.25 ounce white cake mix (and ingredients listed in box directions)
- Blue and red gel food coloring
- 2 cups butter (softened)
- 8 cups powdered sugar
- 2 teaspoons vanilla extract
- 8 tablespoons heavy whipping cream
- 18 maraschino cherries with stems
- Red, white and blue sprinkles
Instructions
- Preheat oven to 350ºF.
- Prepare the cake mix according to the box directions.
- Separate the batter equally into three bowls. Add red food coloring to one bowl, blue food coloring to another, and keep one bowl white.
- Place ice cream cones in a cupcake pan.
- Using a spoon, carefully pour batter into the cones, alternating the colors, until they are ¾ full.
- Bake 25-28 minutes or until a toothpick comes out clean.
- Allow cones to cool for 5 minutes before poking a small hole in the bottom of each cone with a toothpick. Allow to cool completely.
- To prepare frosting, beat butter until smooth.
- Add powdered sugar. Beat again until smooth.
- Add vanilla and heavy whipping cream. Beat until smooth, light, and fluffy.
- Transfer frosting to a large ziploc bag. Cut the corner of the bag off and pipe frosting onto each cone. Immediately add sprinkles and top with a cherry.
Notes
- Prevent soggy cones: Poke a small hole in the bottom of each cone after baking to let steam escape and keep the cones crisp.
- No cupcake pan? No problem! Cover a casserole dish with heavy-duty foil and cut small "X" shapes for the cones to sit in. It keeps them upright during baking and cooling.
- Don't overfill: Only fill cones about ¾ full-too much batter can cause overflow in the oven.
- Cool completely before frosting: Warm cupcakes can cause the frosting to melt or slide off, especially in summer heat.
Leave a Reply