
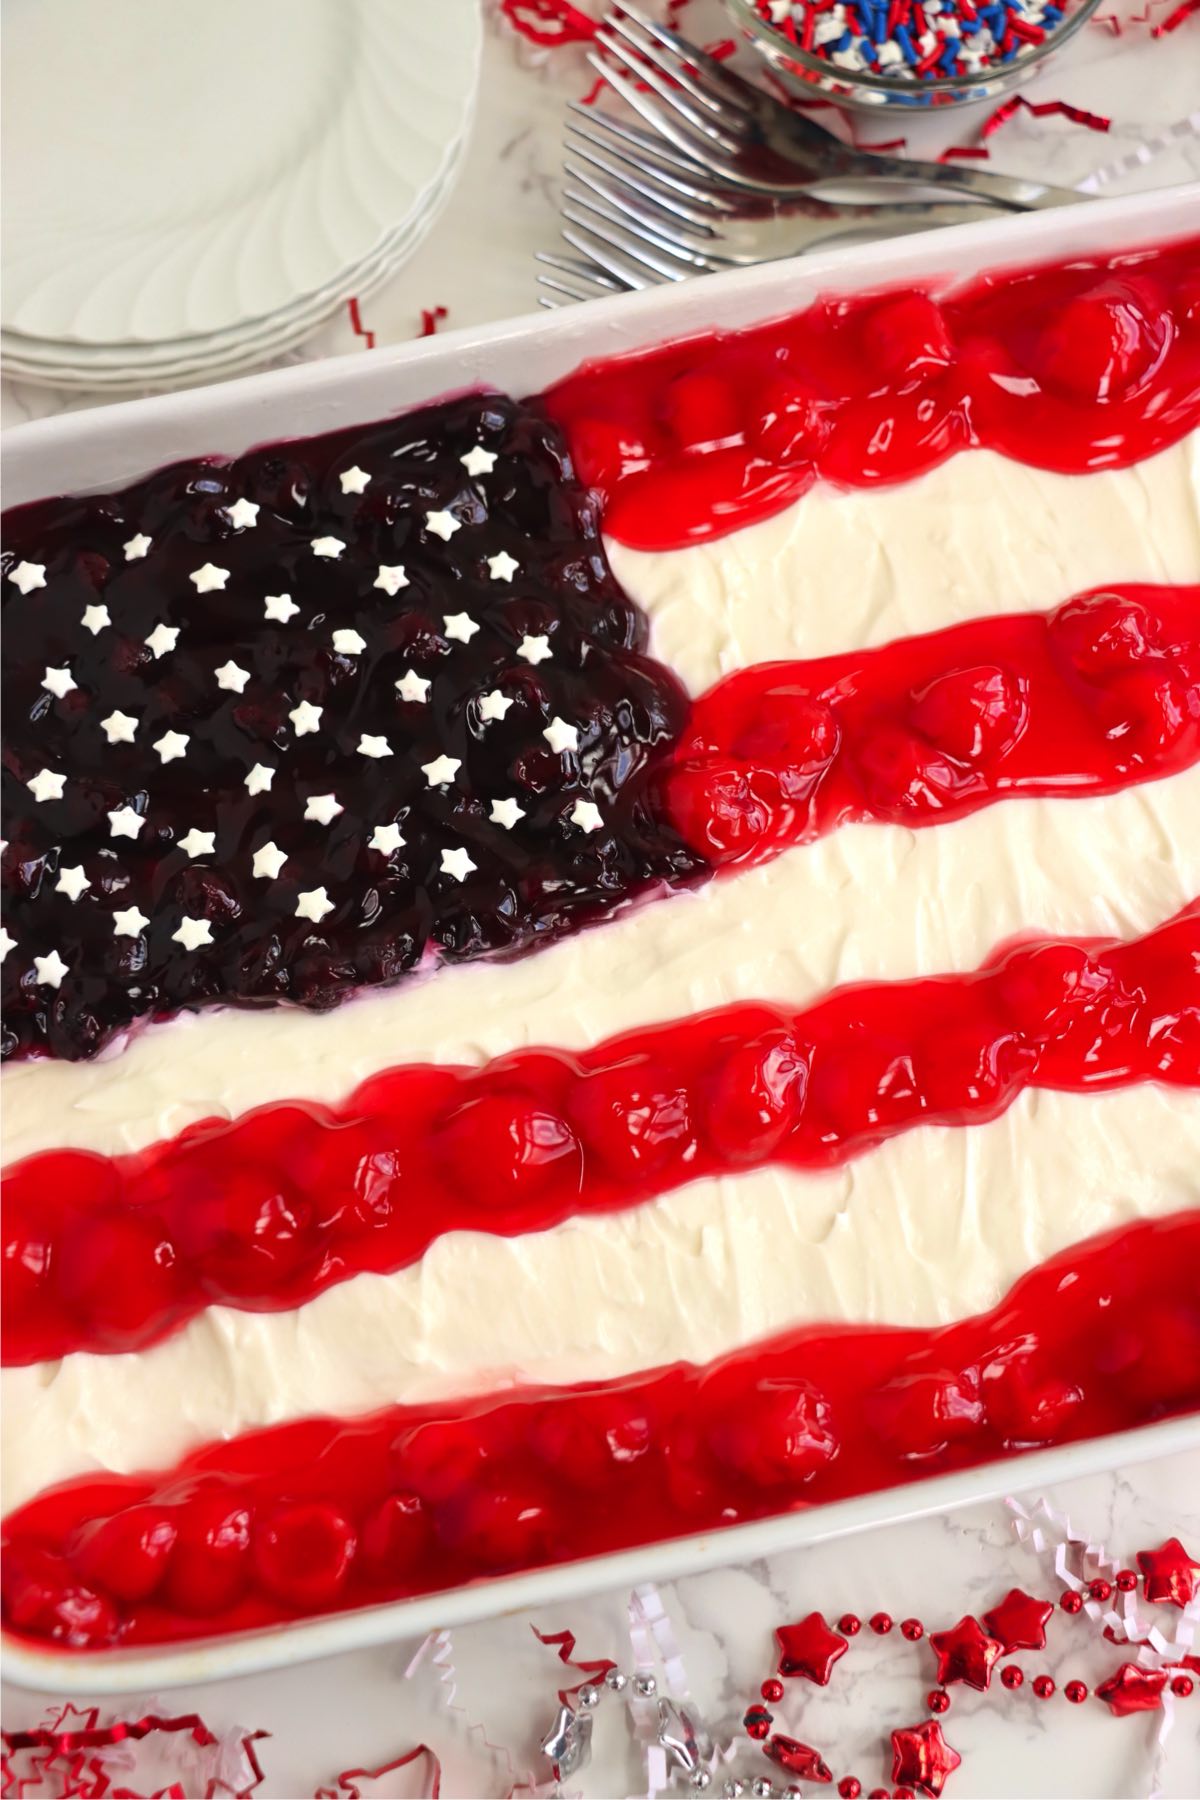
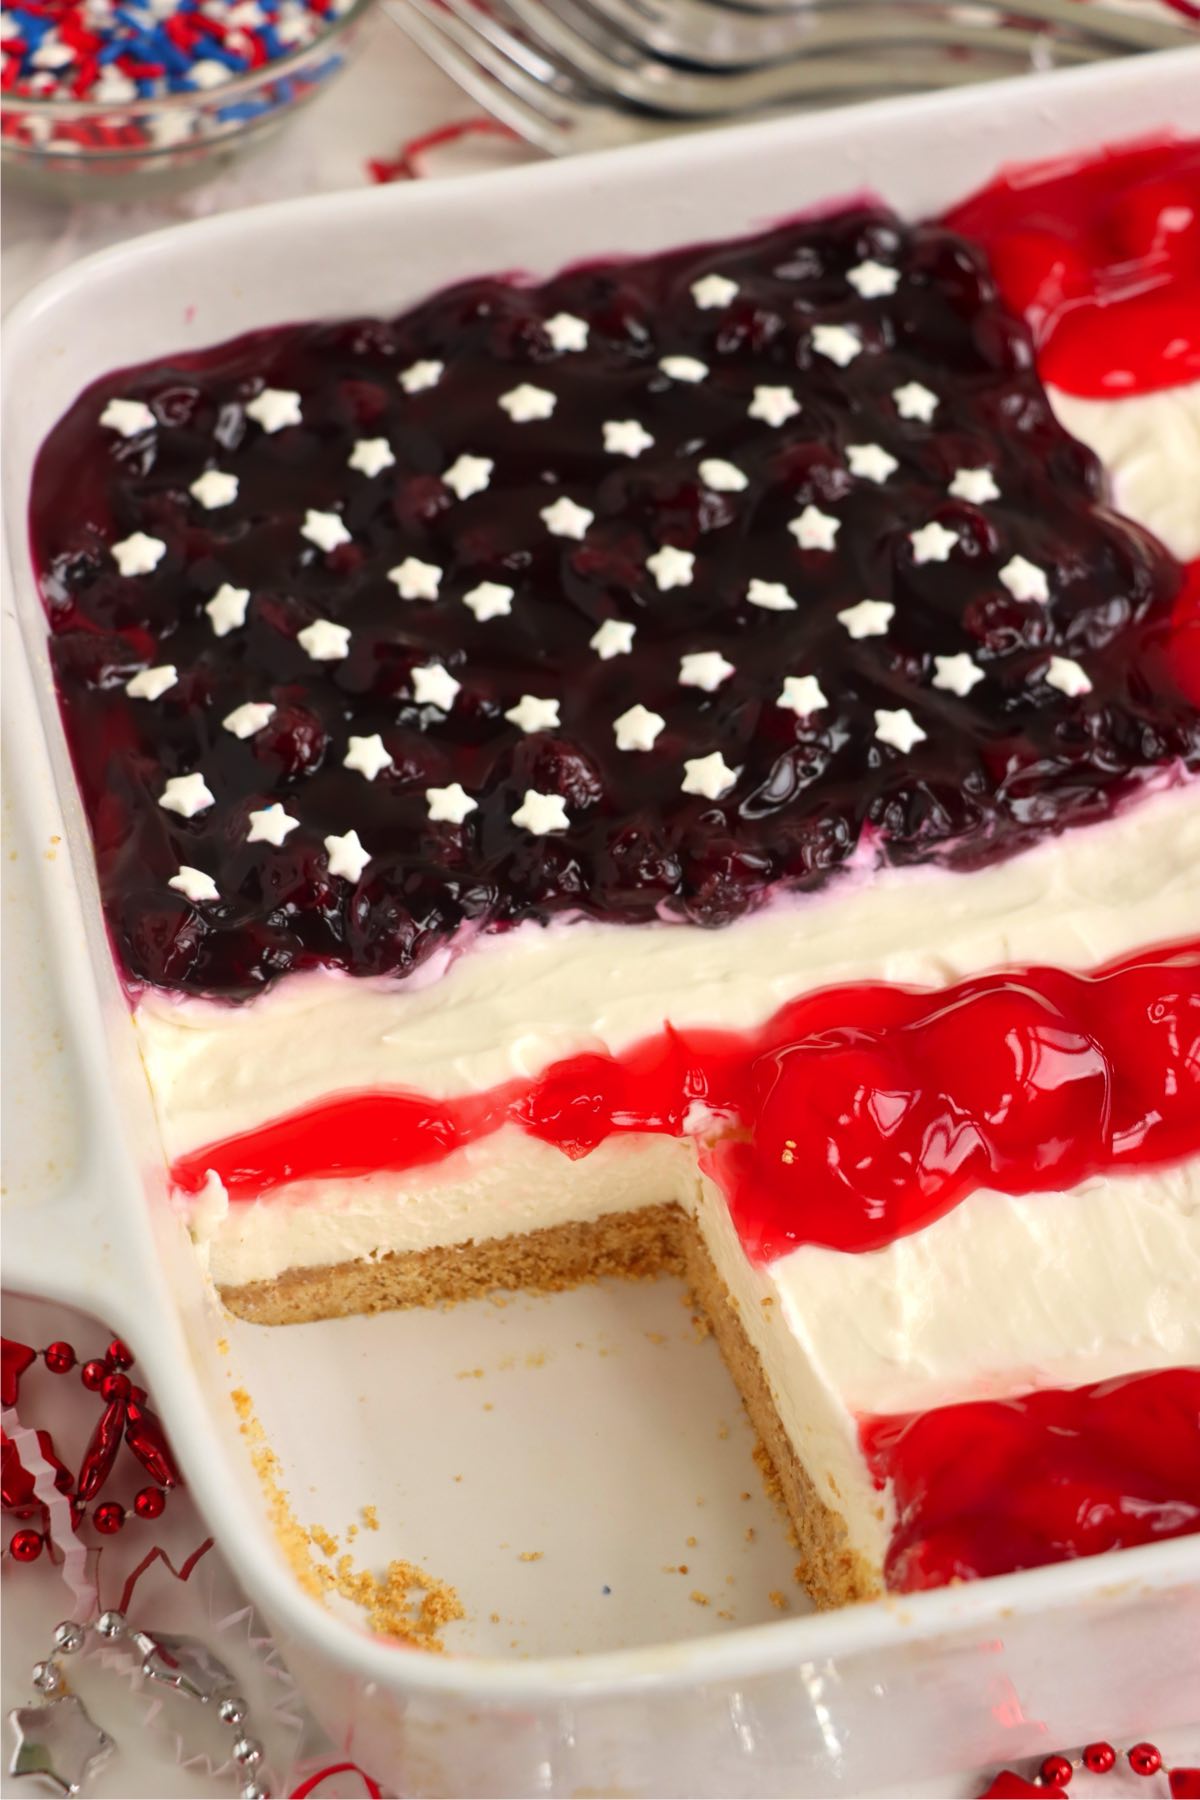
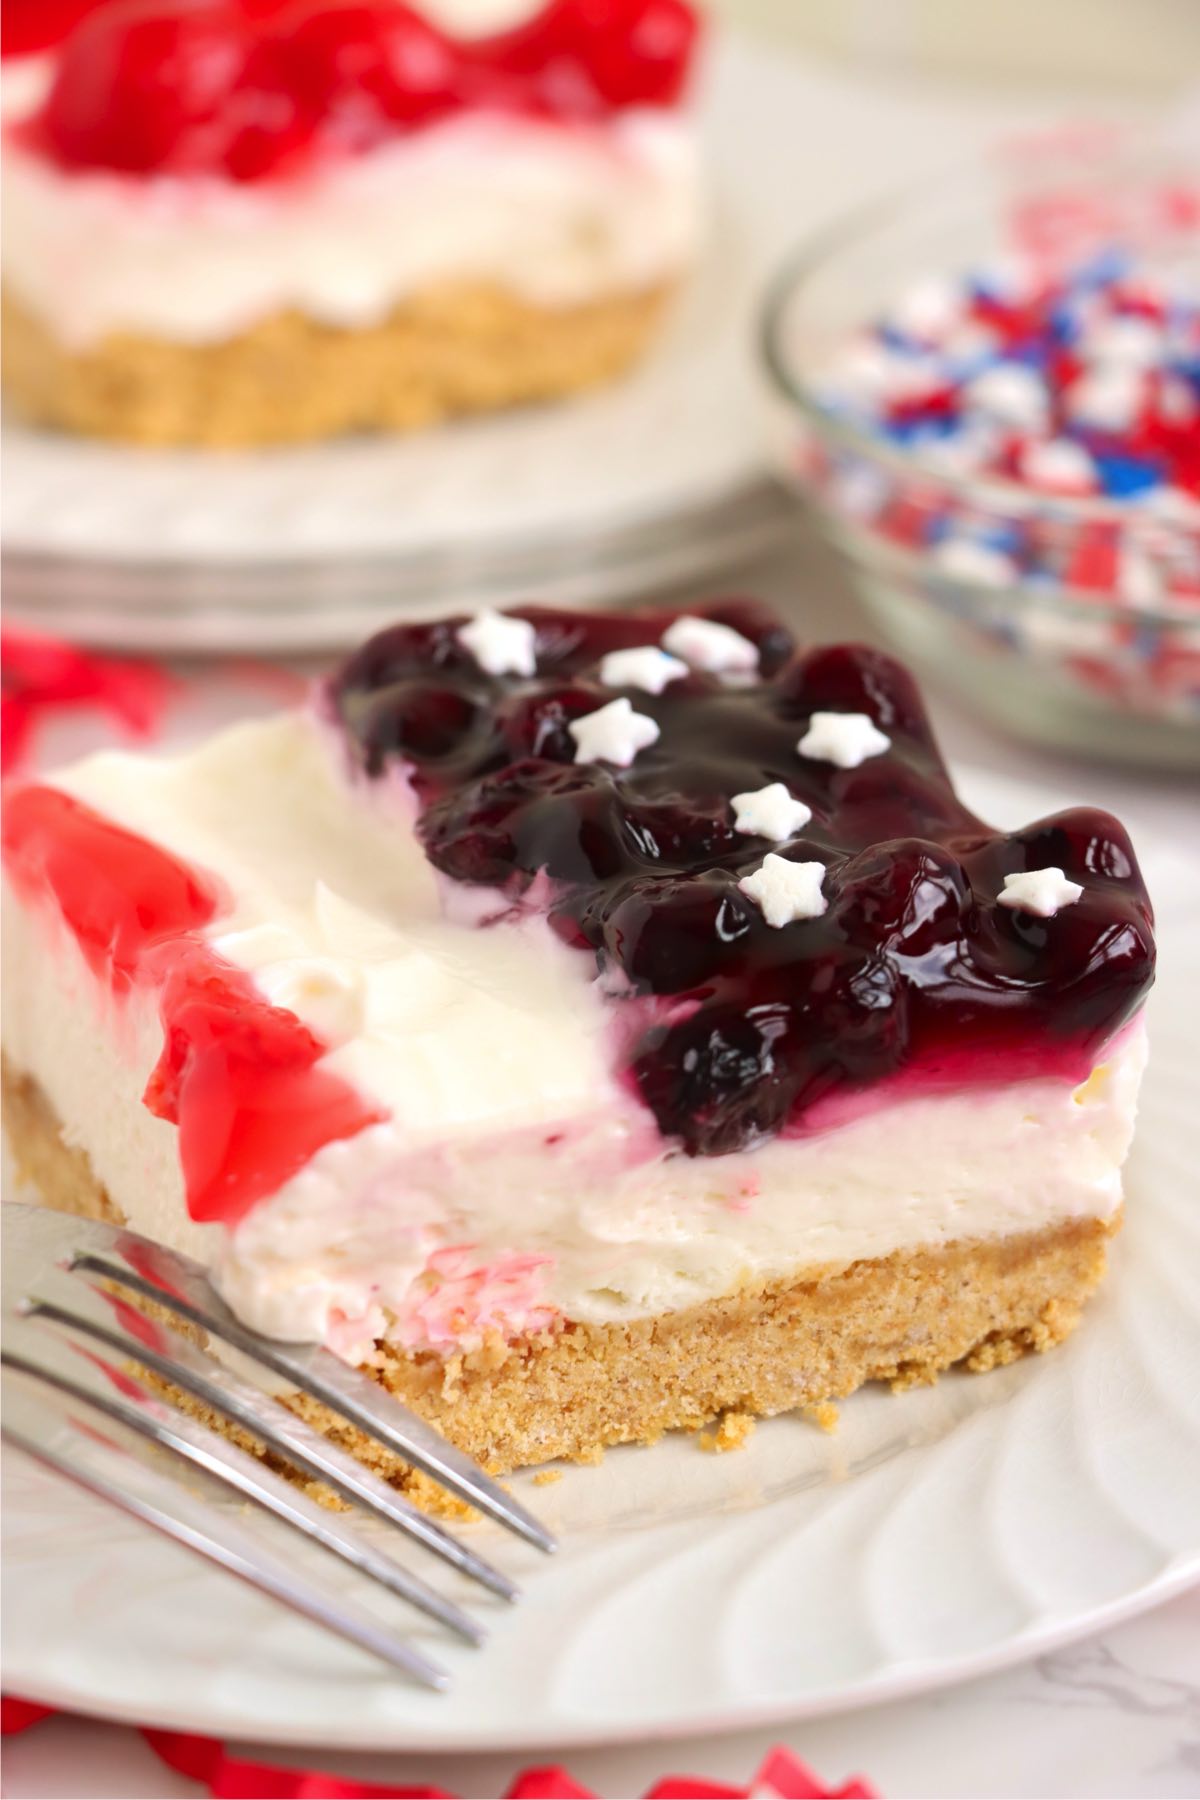
This American Flag Cheesecake is the ultimate no-bake dessert for your 4th of July celebration! With layers of creamy cheesecake filling over a buttery graham cracker crust, it's topped with cherry and blueberry pie filling to create a festive flag design that's as fun to make as it is to serve.

Want to Save This Recipe?
Whether you're hosting a backyard BBQ or bringing a dish to a party, this red, white, and blue cheesecake is sure to wow your guests. It's cool, creamy, and easy to prep ahead-making it the perfect patriotic treat!
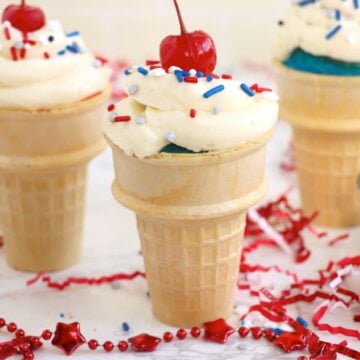
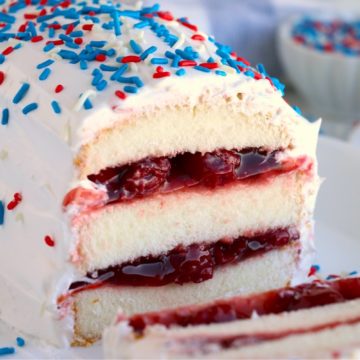
If you're looking to round out your holiday dessert table, don't miss these other festive favorites! These fun and colorful 4th of July Ice Cream Cone Cupcakes are always a hit with kids, and these Red, White and Blue Cake Pops make for easy grab-and-go treats. For something cool and crowd-pleasing, try this no-fuss Ice Cream Layer Cake-perfect for beating the summer heat!
Jump to:
Why You'll Love This Recipe
- No-bake recipes are great for the summertime, and with no oven required, you'll have more time to enjoy the warm weather and your refreshing dessert! If you're looking for more cool and easy treats, try my Strawberry Crumble Ice Cream Cake, Banana Pudding Icebox Cake, or this creamy, colorful Rainbow Sherbet Punch-all perfect for hot days and festive gatherings!
- With its colorful, patriotic design, this festive dessert is fun to make and sure to impress! If you love flag-themed treats, you'll also enjoy this easy and vibrant American Flag Fruit Pizza made with sugar cookie crust and fresh fruit.
- This cheesecake is made to share and is guaranteed to please a crowd.
- You can make this dessert up to a day ahead of time and finish it up just before the party starts. It's super convenient for busy holidays!
Ingredients
Gather the ingredients below to make this no-bake cheesecake recipe!
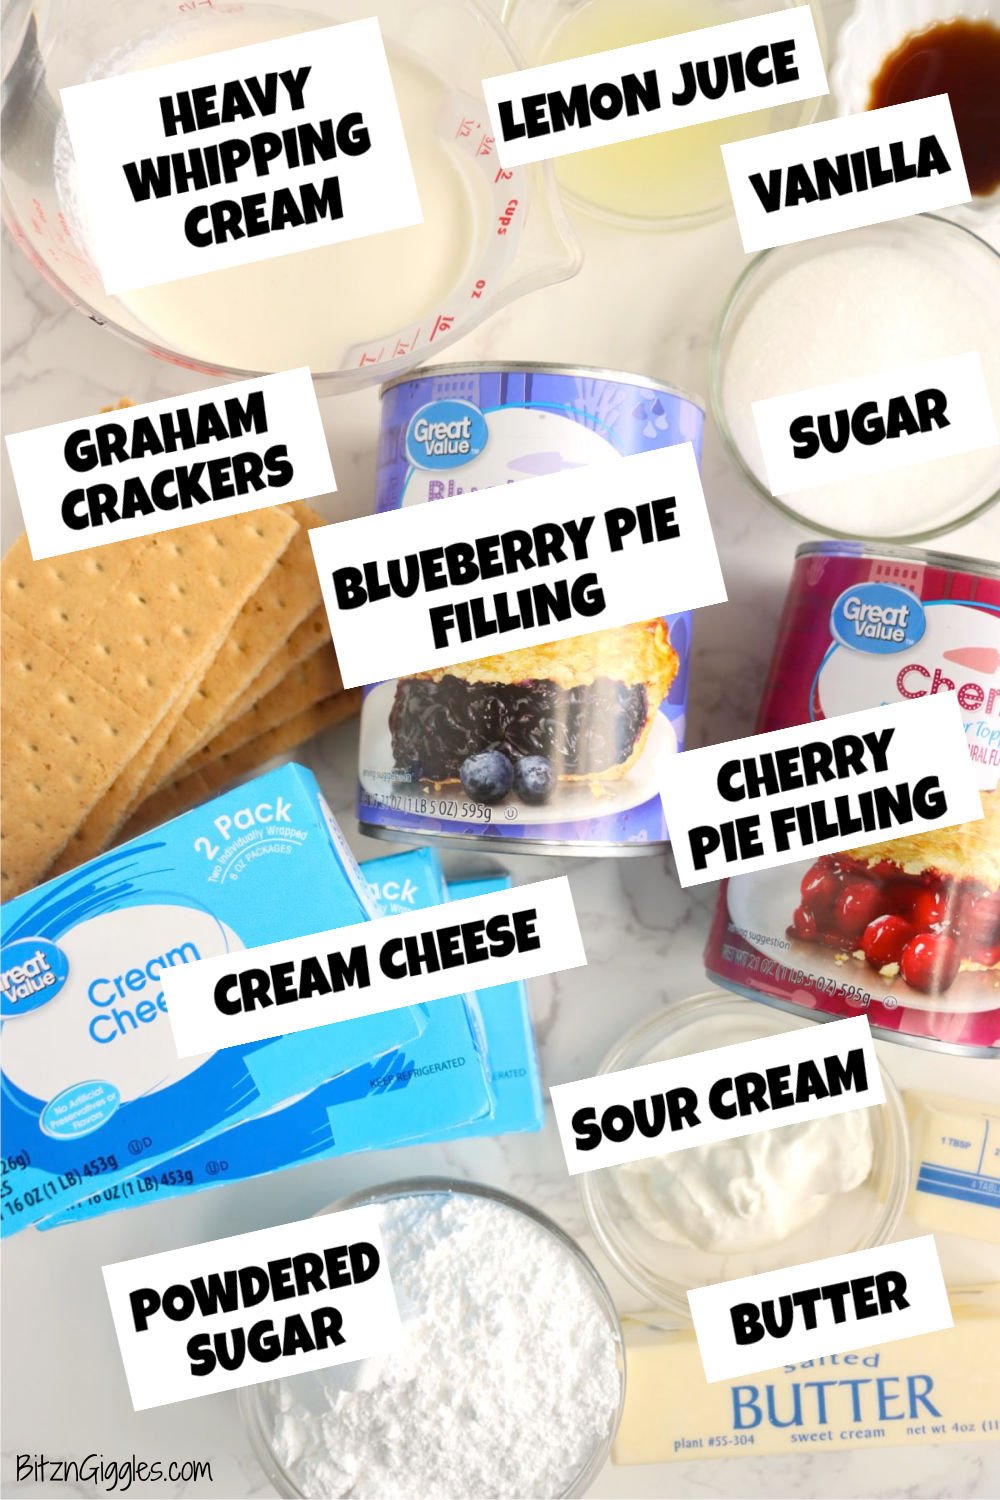
- Graham cracker crumbs: Whether you use store-bought, pre-crushed crumbs, or make your own graham crackers, any variety will make the perfect crust!
- Butter can be salted or unsalted depending on your preference.
- Cream cheese: Use room temperature cream cheese to help prevent a lumpy cheesecake!
- Sour cream makes the cheesecake slightly tangy.
- Lemon juice enhances the cheesecake flavor and brightens up the taste.
- Heavy whipping cream is convenient and the easiest way to get a fluffy cheesecake.
- Powdered sugar makes the cheesecake sweet without making it grainy as granulated sugar would.
- Vanilla is a must! It adds sweetness and flavor to the cheesecake.
- Cherry pie filling creates the red stripes of the flag, but you can swap it for a strawberry or raspberry pie filling if preferred. You could also just place fresh sliced fruits in the stripe formation if you don't want to use pie filling.
- Blueberry pie filling can be swapped for blackberry pie filling or fresh blueberries!
- Edible star sprinkles are a fun finishing touch to the cheesecake.
See recipe card for full information on ingredients and quantities.
Substitutions & Variations
- Crust Swap: Use crushed vanilla wafers, shortbread cookies, or even chocolate graham crackers instead of traditional graham cracker crumbs.
- Filling Flavor Twist: Add a little lemon zest or almond extract to the filling for a subtle flavor boost.
- Lightened-Up Version: Use reduced-fat cream cheese and light whipped topping or Greek yogurt for a slightly lighter dessert.
- Whipped Topping Shortcut: Replace homemade whipped cream with store-bought whipped topping for a faster prep time.
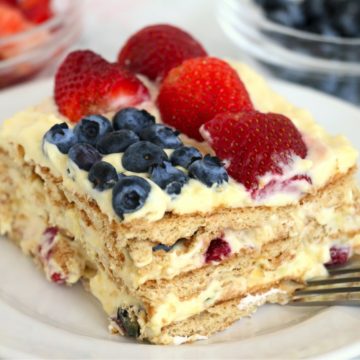
- Fruit Options: Substitute fresh strawberries or raspberries for the cherry filling and use fresh blueberries instead of pie filling for a fresher finish -just like in this light and delicious Patriotic Berry Trifle that's layered with fruit, cake, and creamy goodness.
- Mini Version: Make individual flag cheesecakes in mason jars or mini cups for a grab-and-go dessert option.
- Different Design: Instead of a flag, arrange the fruit in star shapes or swirl it for a marbled effect-still festive but easier to freestyle!
How to Make American Flag Cheesecake
Once you've gathered all your ingredients, grab a mixing bowl and follow the steps below for this 4th of July cheesecake!
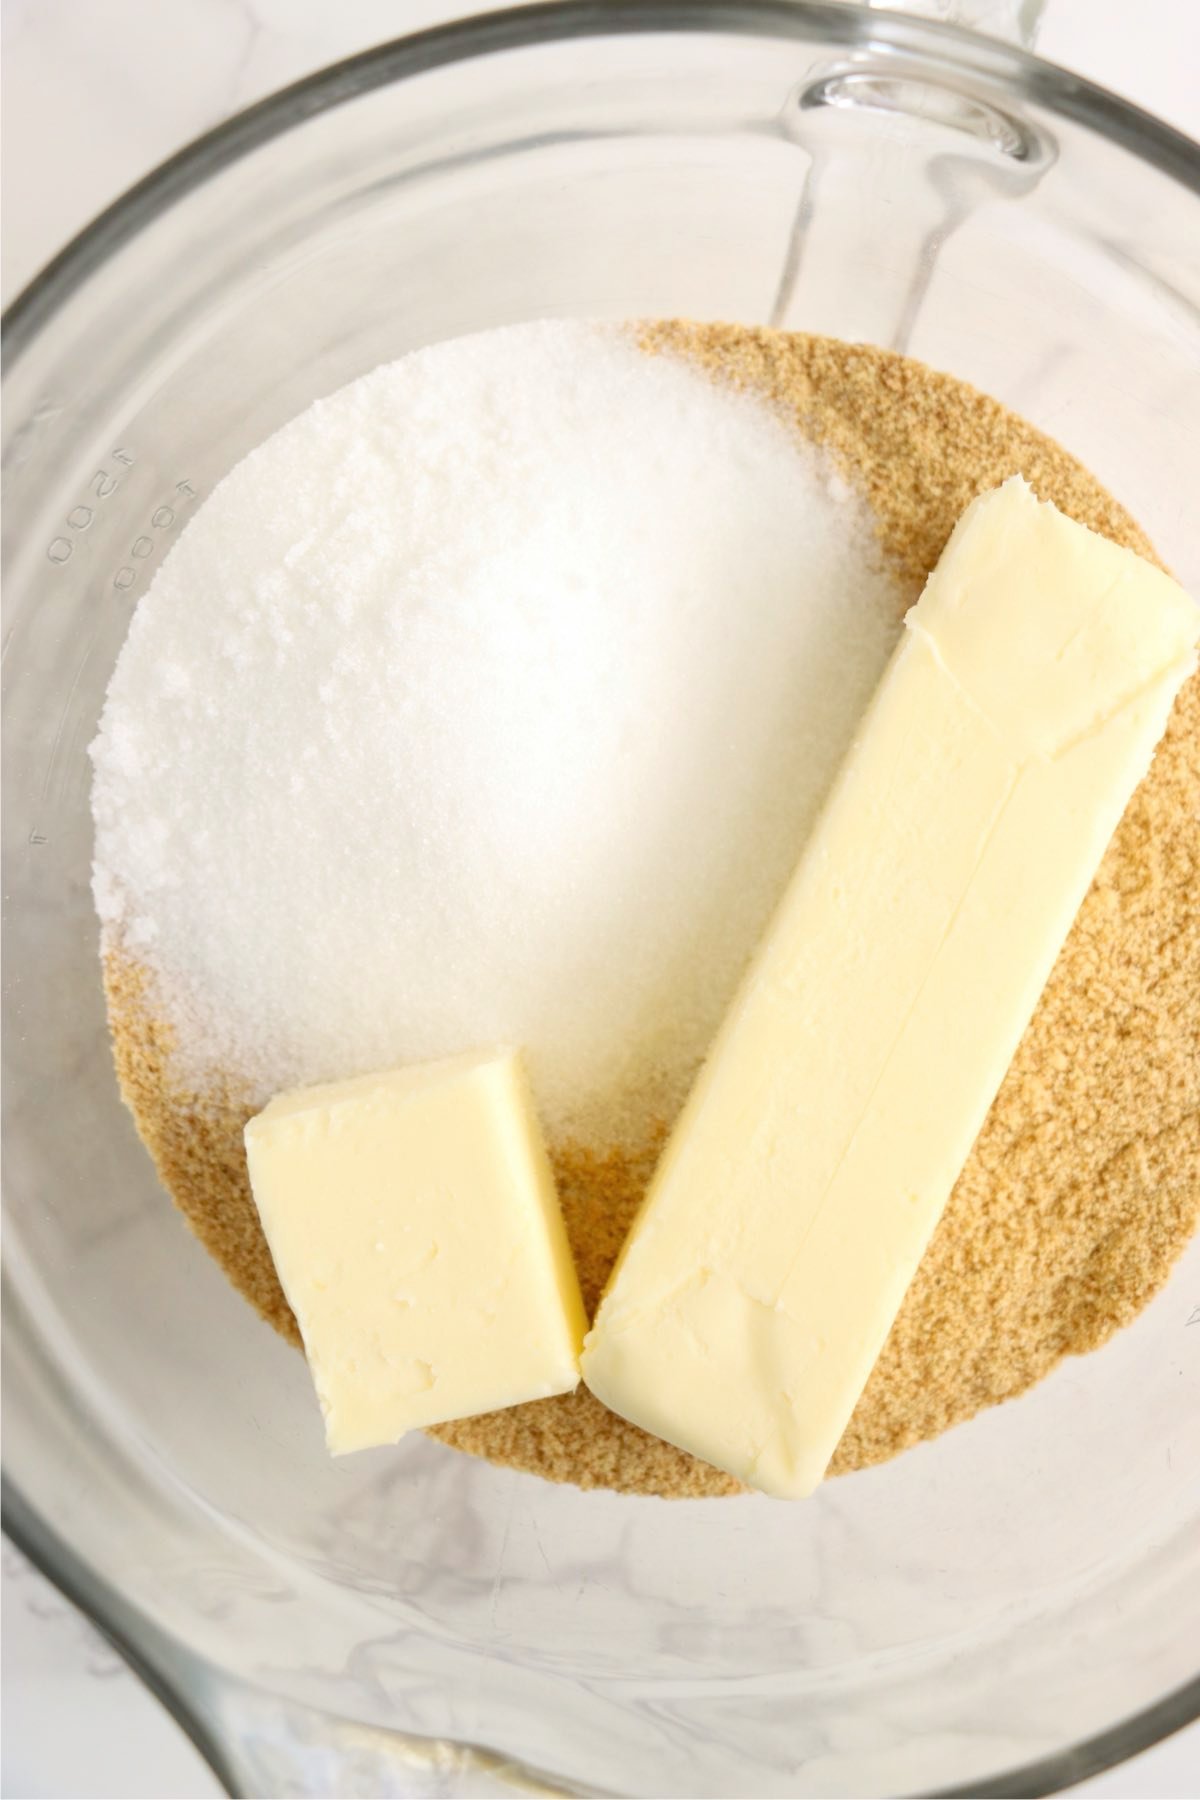
- Step 1: In a medium mixing bowl, combine graham cracker crumbs, sugar and butter. Work together well.
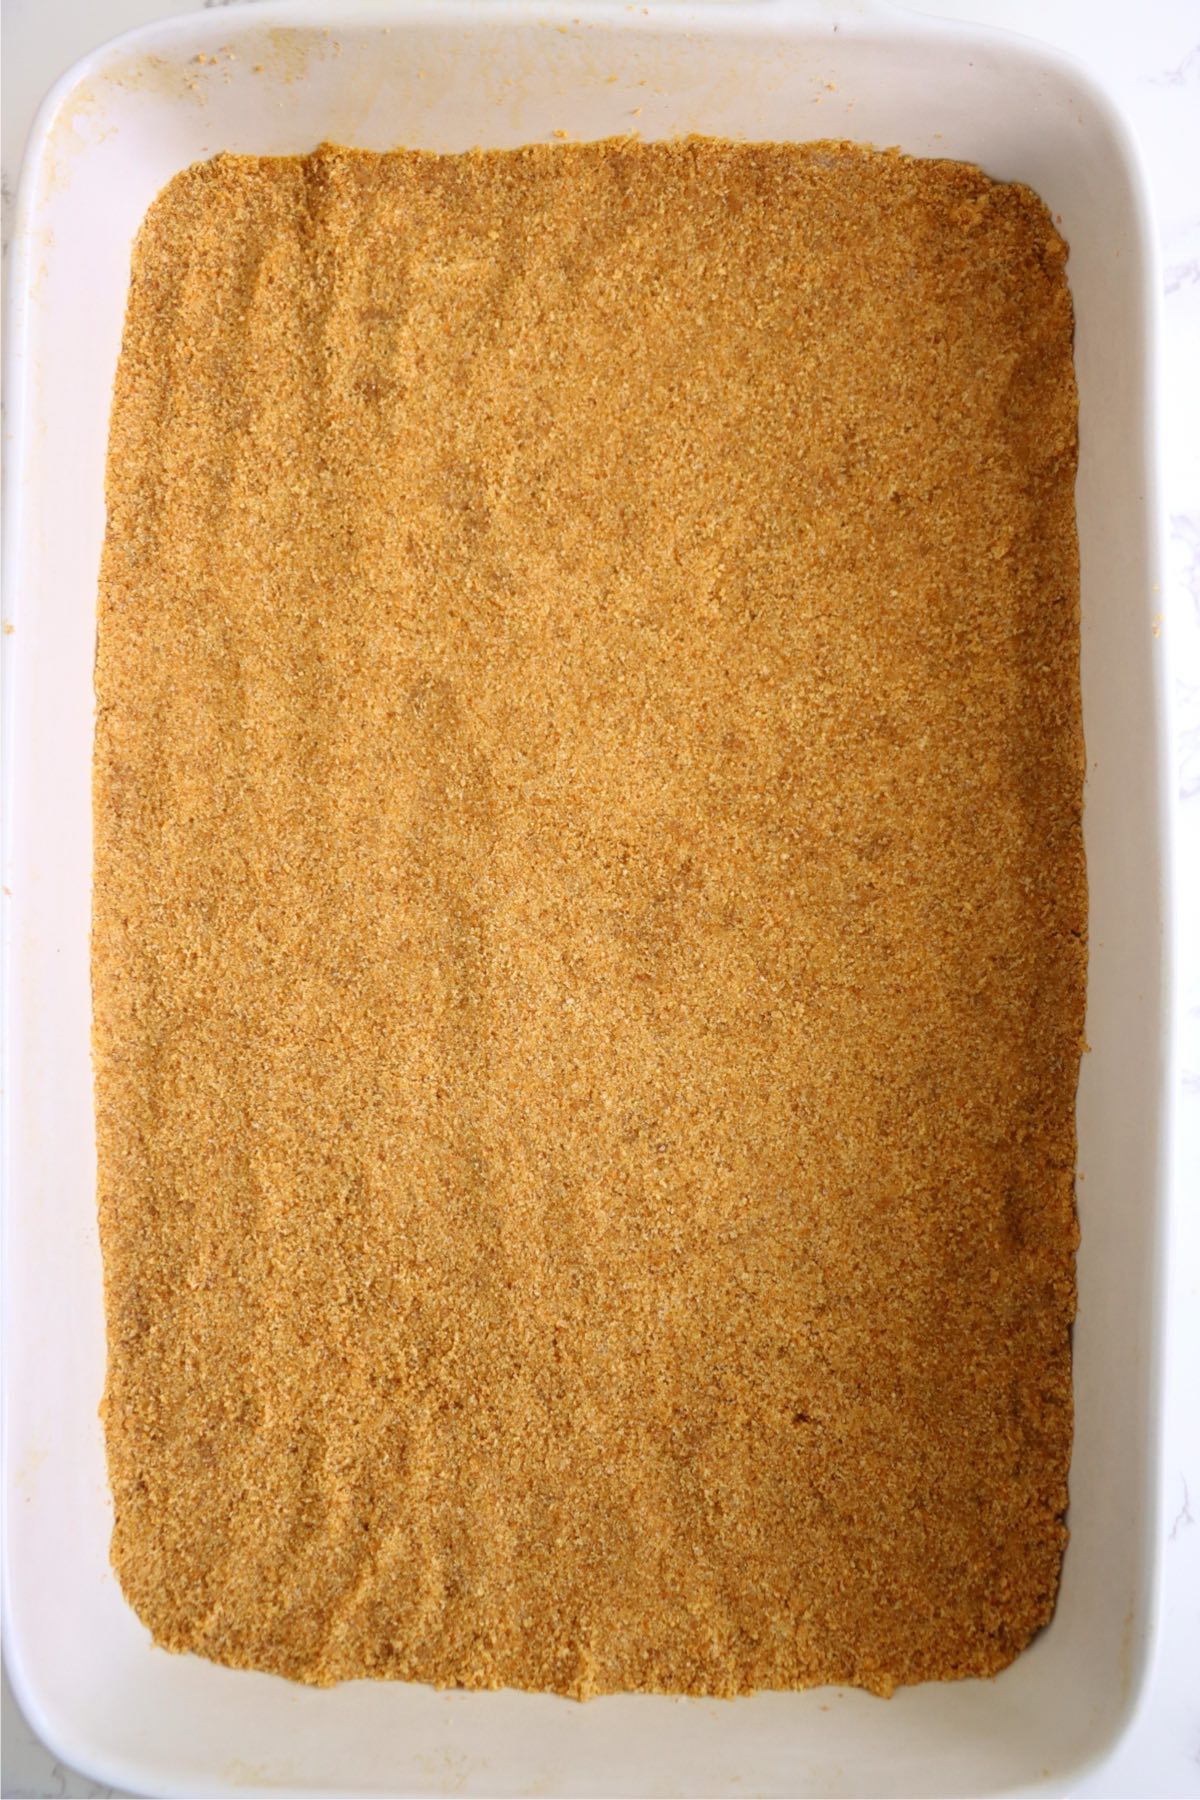
- Step 2: Using your hands, press the crust mixture into a greased 9x13-inch dish.
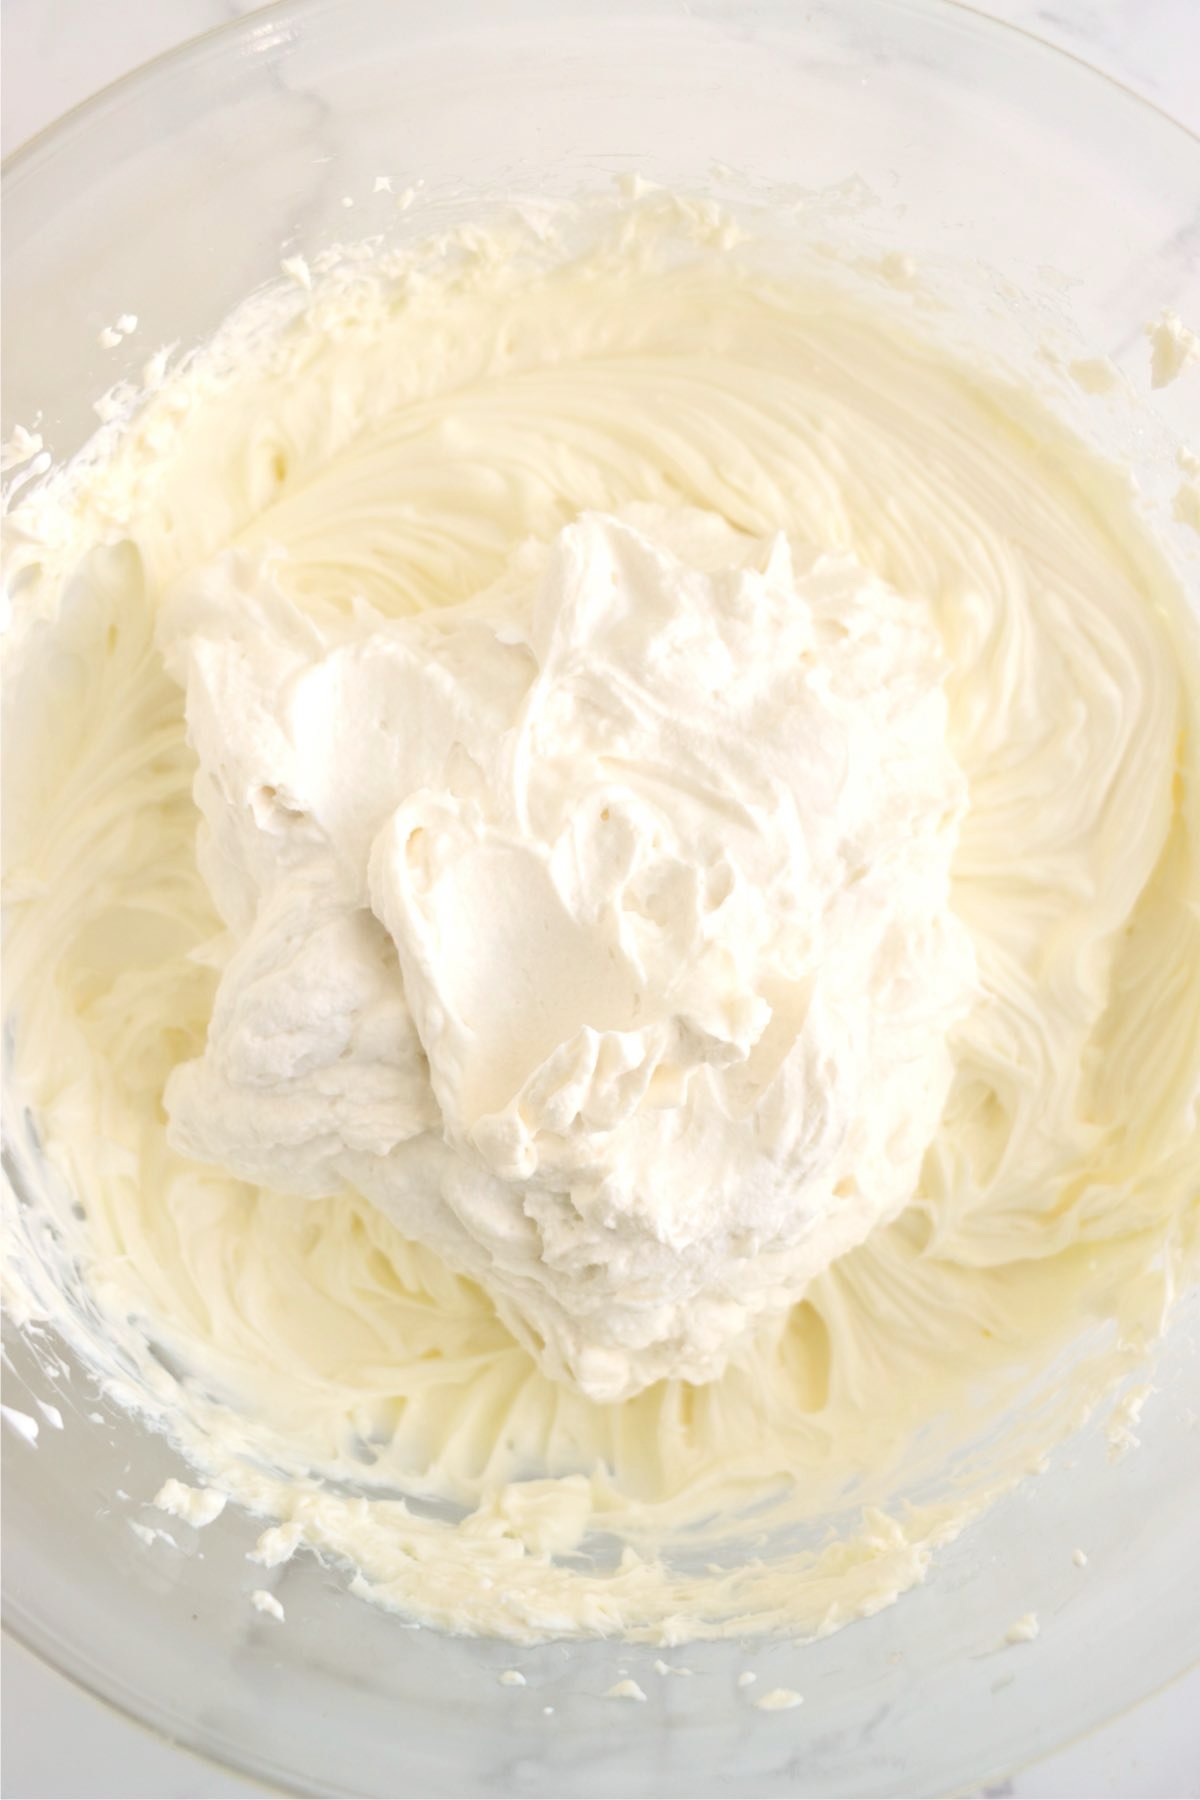
- Step 3: Add the sugar, sour cream, lemon juice, and heavy whipping cream and beat well, then mix in the powdered sugar and vanilla and beat until smooth.
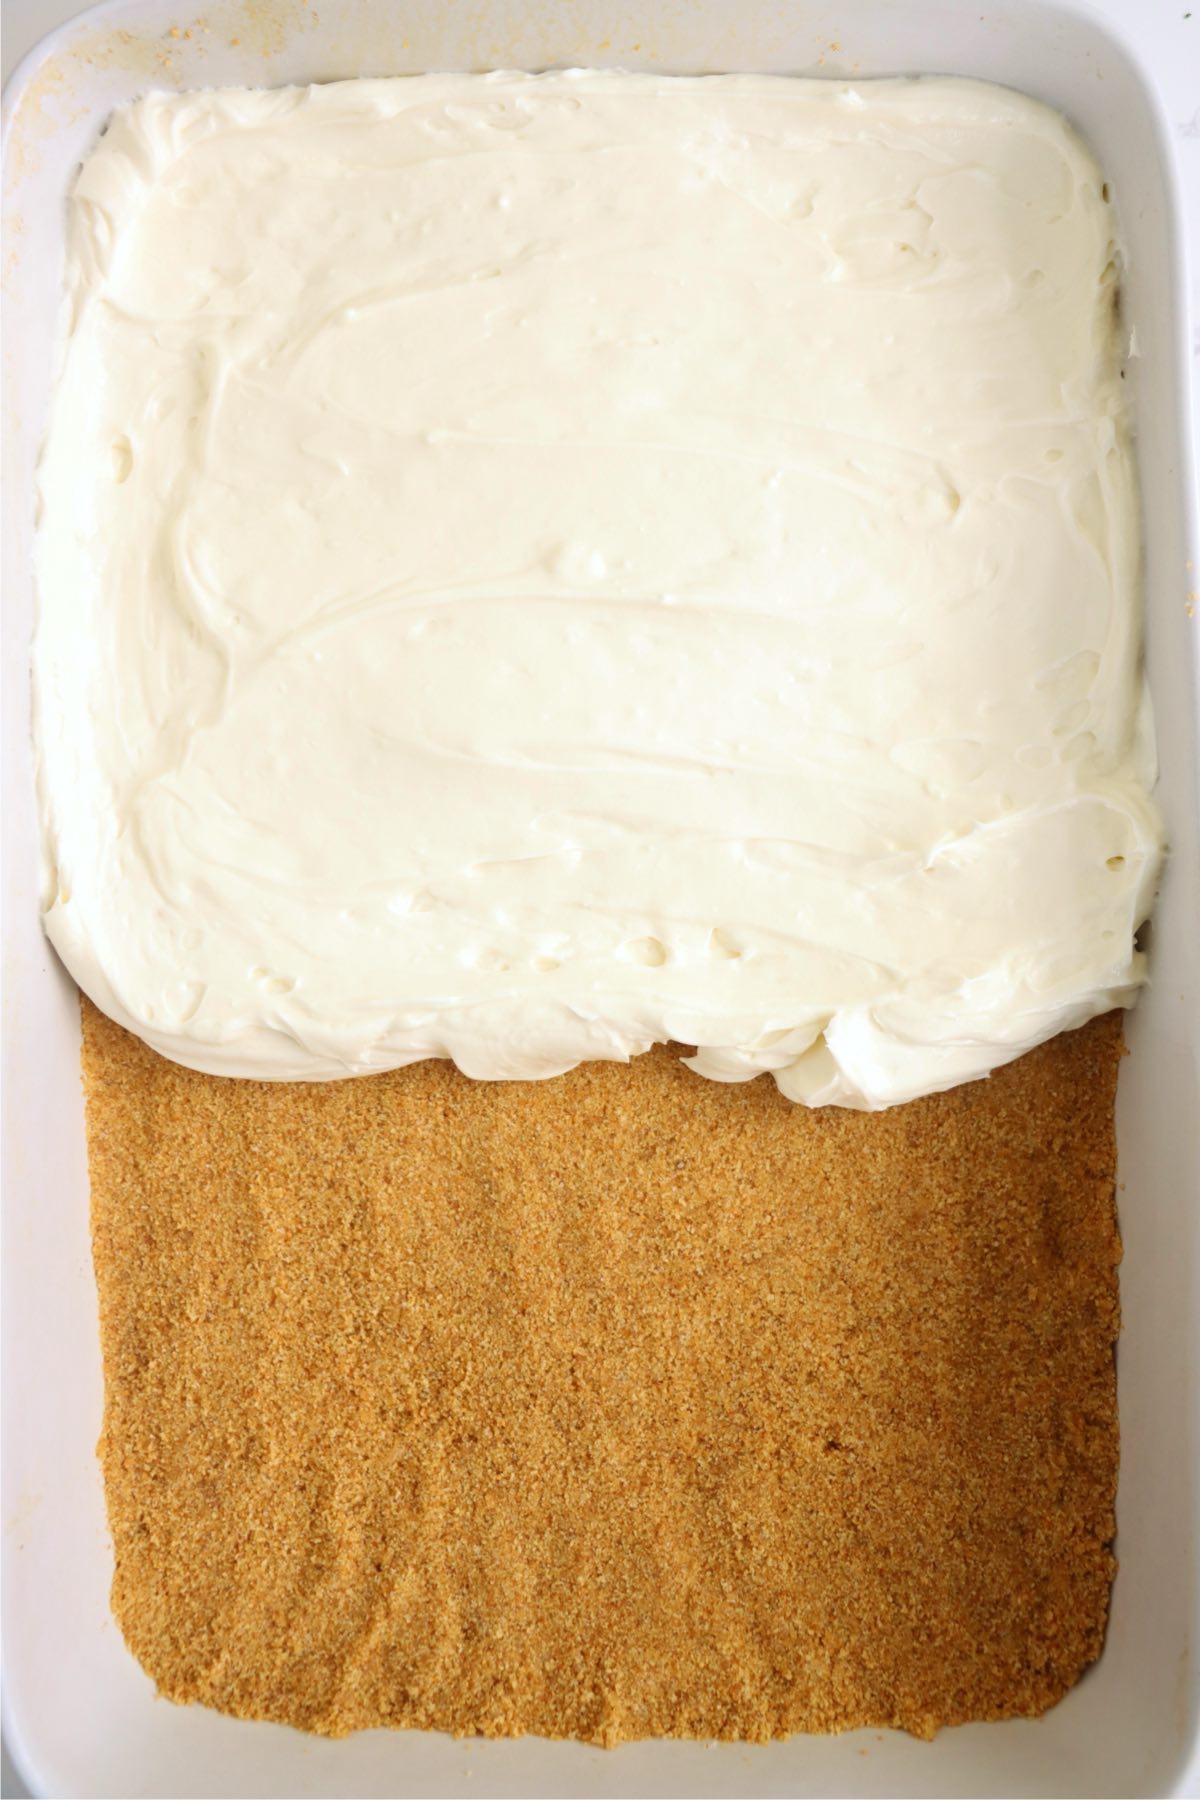
- Step 4: Carefully spread cheesecake mixture over the crust.

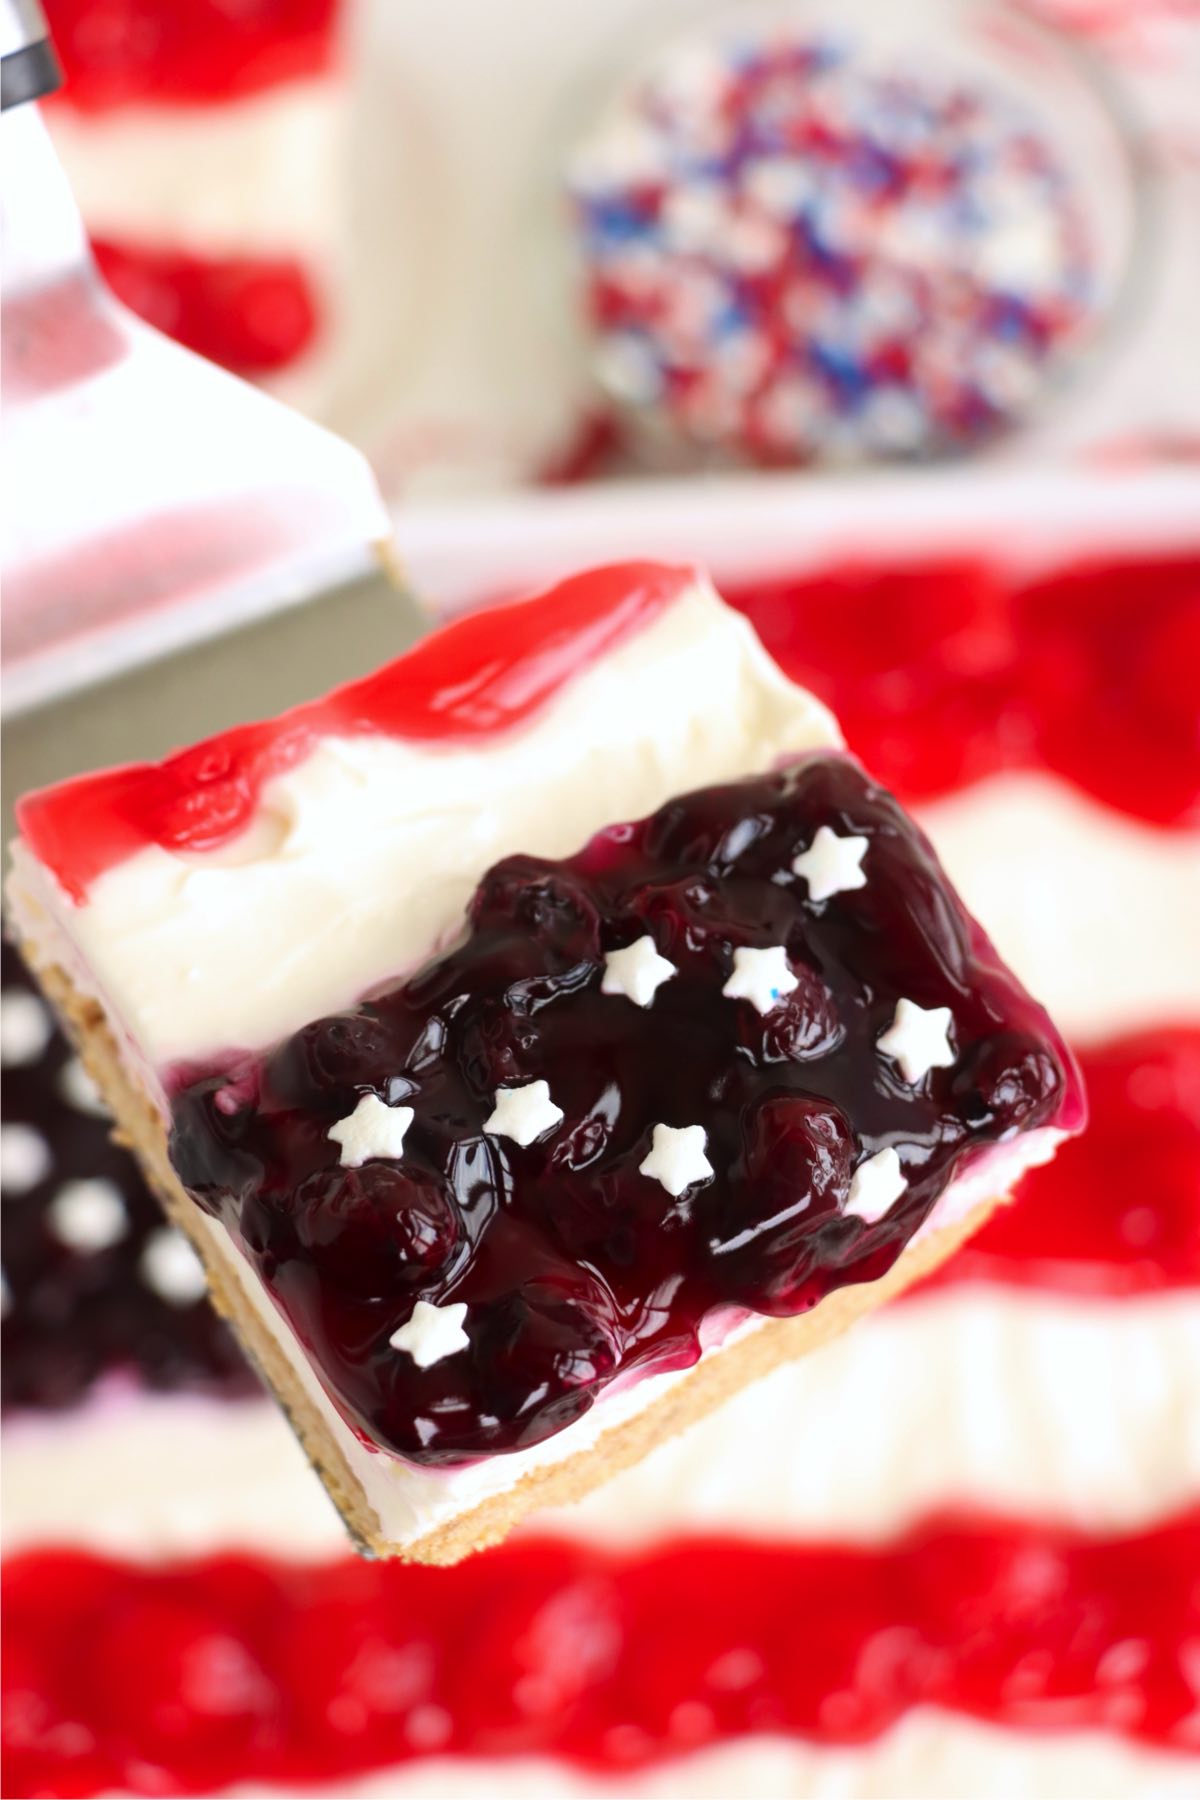
- Step 5: Using a spoon, create a flag design on top of the cheesecake with cherry and blueberry pie fillings-form a blue square for the stars and four red stripes-then refrigerate for at least 6 hours to set.
- Step 6: When you are ready to eat, carefully place the edible stars on the blue square.

Helpful Tips
- No food processor? No problem. Place graham crackers in a sealed Ziploc bag and crush with a rolling pin until fine crumbs form.
- Traveling with the cheesecake? Wait to add the cherry and blueberry topping until just before serving to keep the flag design fresh and vibrant.
- Plan your flag design. Use a toothpick to lightly trace the flag layout on the cheesecake before adding the fruit fillings-this helps guide spacing and keep lines clean.
- Soften your cream cheese. Let the cream cheese sit at room temperature for about 30 minutes before mixing to avoid lumps in the filling.
- Chill thoroughly. For the best texture, chill the cheesecake for at least 6 hours (or overnight) before serving.
- Clean slices. Run a knife under warm water and wipe it clean between cuts to get neat, defined cheesecake slices.
- Use a piping bag for precision. If you want extra clean lines, spoon the cherry and blueberry filling into piping or sandwich bags and snip the corner to apply more precisely.
- Prep ahead. You can make the crust and filling a day in advance, then decorate the top just before serving.
Recipe FAQs
I recommend only preparing this recipe up to a day ahead of time for the best results. Making it the day before your celebration and chilling it overnight is a great way to ensure the flavors meld together and allows the cheesecake time to set, while also saving you time day of.
You can use fresh strawberries, raspberries, or blueberries arranged in a flag pattern-or make your own fruit compote for a homemade touch.
Yes-if you spoon the pie filling on gently and allow the cheesecake to chill for at least 6 hours, the topping should stay in place nicely. If you're traveling with it and concerned about the flag design shifting, you can wait to add the fruit until you arrive. Just keep the cheesecake level and chilled during transport for best results.
Yes, a pre-made graham cracker crust can work, but you'll need to adjust the filling amount or divide it between two crusts since this recipe fills a 9x13 dish.
Storage & Freezing Instructions
Storage Instructions
Store leftovers of your cheesecake in an airtight container in the refrigerator for 3-4 days.
Freezing Instructions
Freezing cheesecake isn't recommended as it may get too mushy once thawed.
More Patriotic Dessert Recipes You'll Love
Looking for other simple no-bake summer dessert recipes like this? Try these:

Did you try this recipe?
If you decide to try this American Flag Cheesecake recipe or any other recipe on my website, please leave a ⭐️ star rating and let me know how it went in the 💬 comments below! I'd love to hear from you!
American Flag Cheesecake
Ingredients
For the Crust
- 2 ¼ cups graham cracker crumbs (1 box)
- ⅓ cup sugar
- ⅔ cup butter (softened)
For the Cheesecake
- 24 ounces cream cheese
- ½ cup sugar
- ¼ cup sour cream
- 3 tablespoons lemon juice
- 1 ¼ cup heavy whipping cream
- ¾ cup powdered sugar
- 1 teaspoon vanilla
For the Topping
- 8 ounces cherry pie filling
- 8 ounces blueberry pie filling
- Edible star sprinkles
Instructions
- Place graham crackers in a blender or food processor. Blend until crumbs are formed.
- In a medium mixing bowl, combine graham cracker crumbs, sugar, and butter. Work together well. Using your hands, press the crust mixture into a greased 9x13-inch dish.
- In a large bowl, beat cream cheese until smooth.
- Add sugar, sour cream, lemon juice, heavy whipping cream. Beat well again.
- Add powdered sugar and vanilla. Beat again.
- Carefully spread cheesecake mixture over the crust.
- Create a flag with your cherry and blueberry pie fillings. Using a spoon, carefully create a blue square for the stars and 4 red stripes.
- Place cheesecake in a refrigerator and chill for at least 6 hours.
- When you are ready to eat, carefully place the edible stars on the blue square.
Notes
- No food processor? No problem. Place graham crackers in a sealed Ziploc bag and crush with a rolling pin until fine crumbs form.
- Traveling with the cheesecake? Wait to add the cherry and blueberry topping until just before serving to keep the flag design fresh and vibrant.
- Plan your flag design. Use a toothpick to lightly trace the flag layout on the cheesecake before adding the fruit fillings-this helps guide spacing and keep lines clean.
- Soften your cream cheese. Let the cream cheese sit at room temperature for about 30 minutes before mixing to avoid lumps in the filling.
- Chill thoroughly. For the best texture, chill the cheesecake for at least 6 hours (or overnight) before serving.
- Clean slices. Run a knife under warm water and wipe it clean between cuts to get neat, defined cheesecake slices.
- Use a piping bag for precision. If you want extra clean lines, spoon the cherry and blueberry filling into piping or sandwich bags and snip the corner to apply more precisely.
- Prep ahead. You can make the crust and filling a day in advance, then decorate the top just before serving.
Leave a Reply