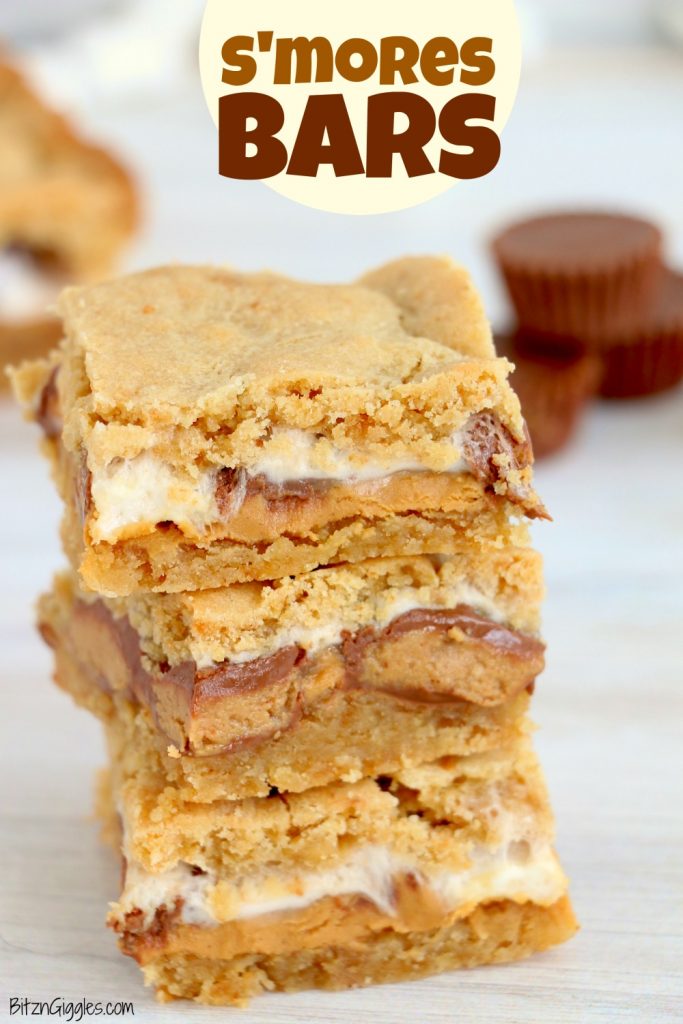
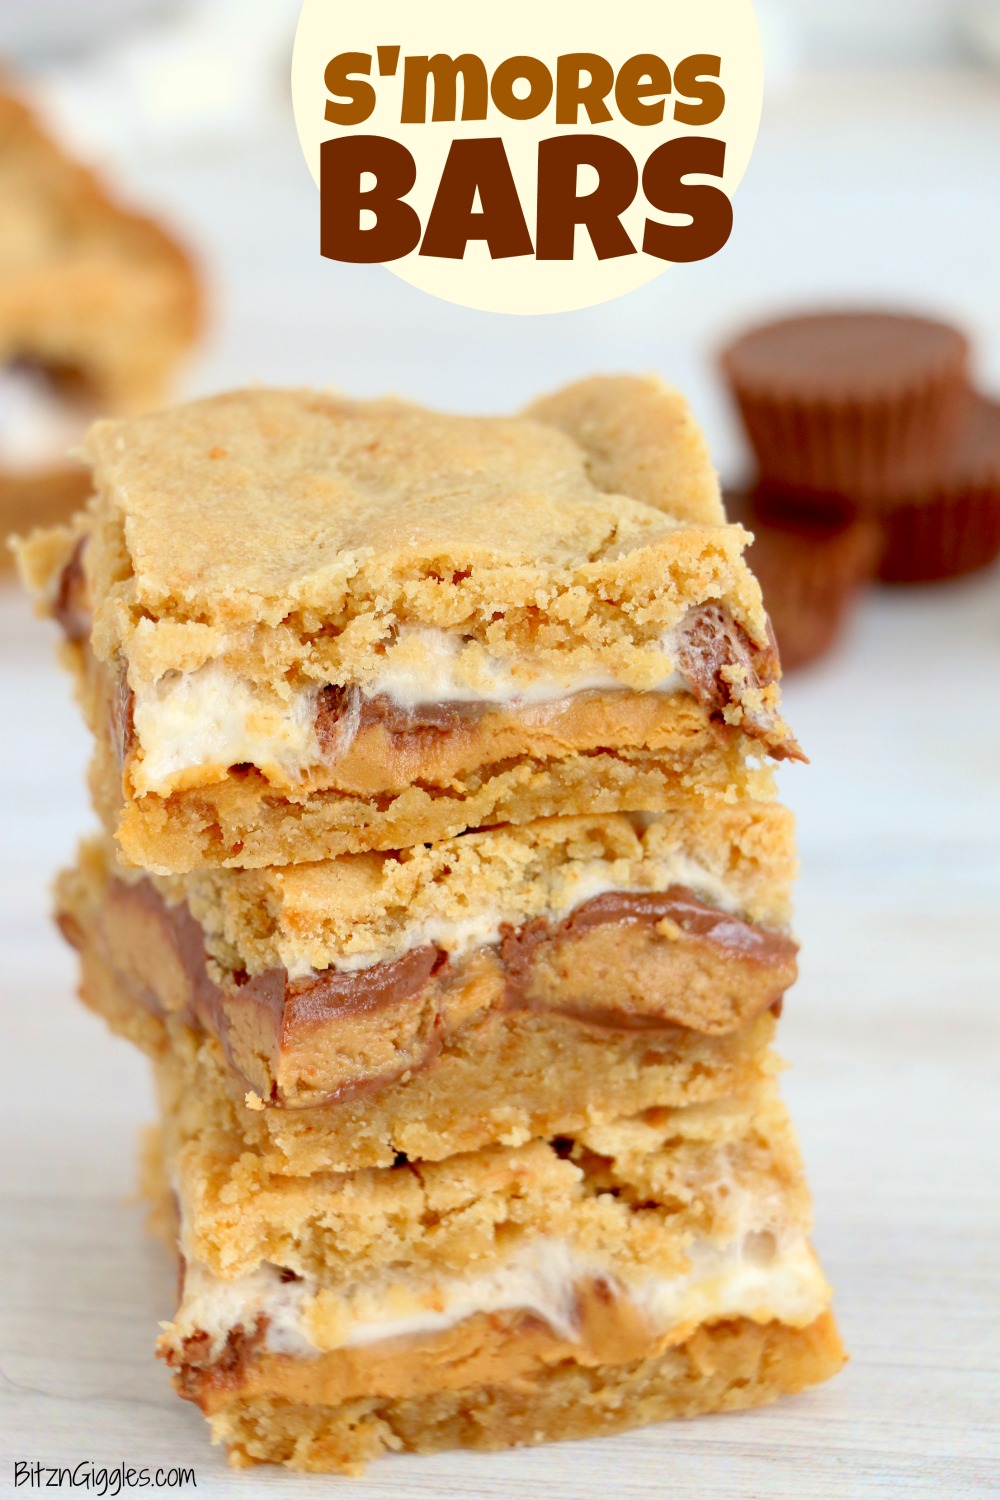
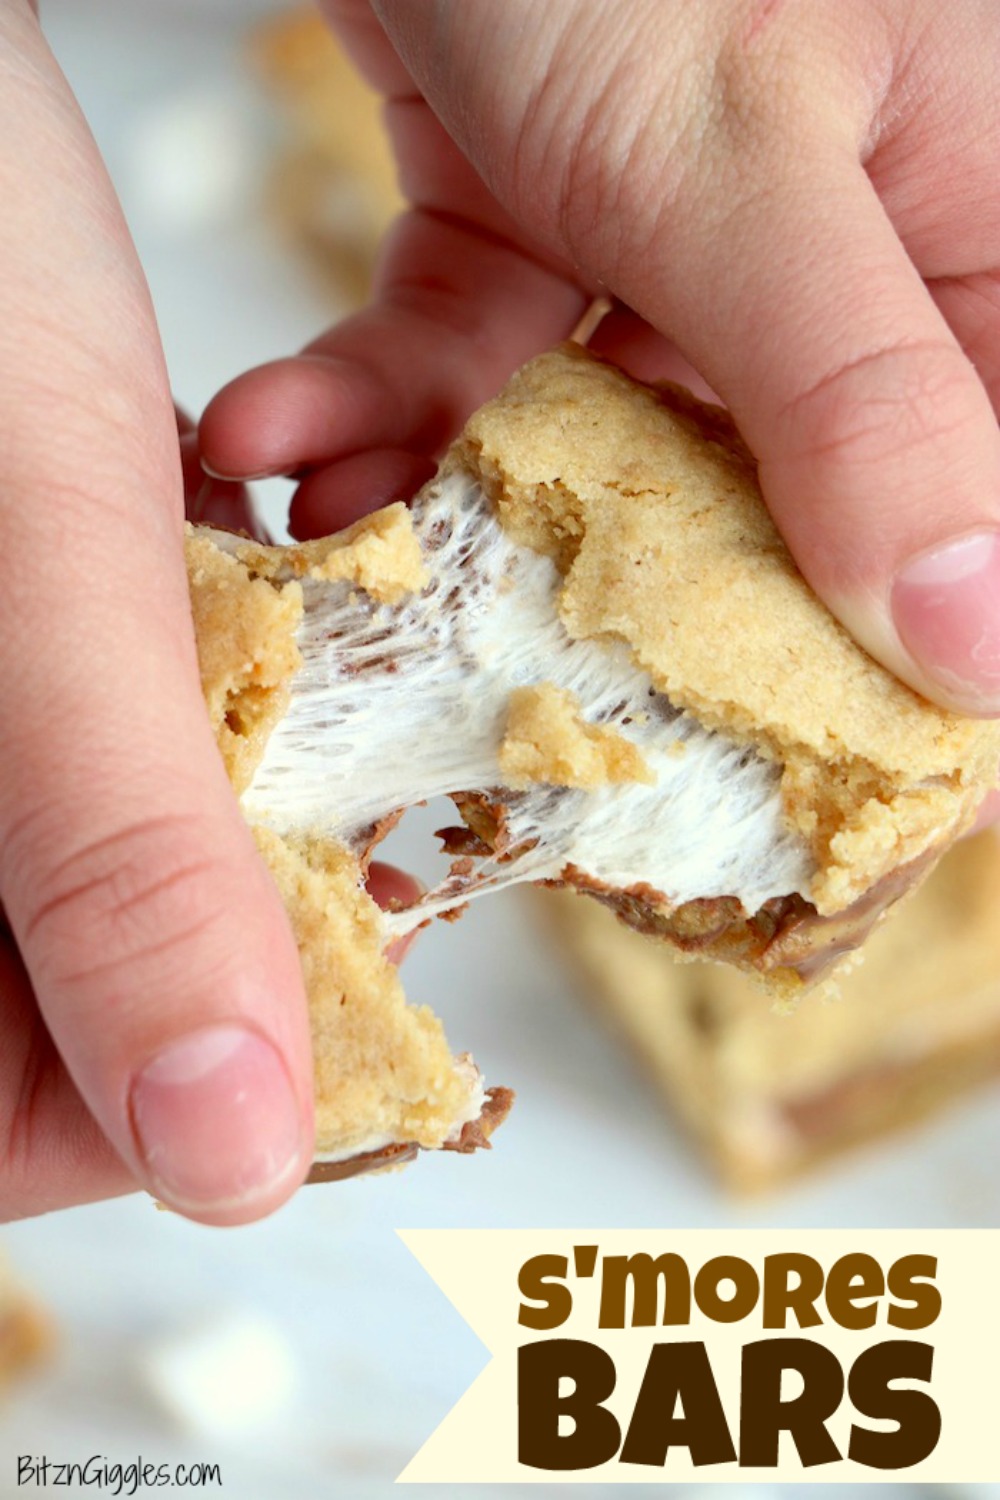
S'mores Bars - Marshmallow, chocolate AND peanut butter, surrounded by a graham cracker crust. If you're a Reese's fan, you're going to love the peanut butter twist on traditional s'mores bars.
Want to Save This Recipe?
This post may include affiliate links. Please see my disclosure.
Since we got the keys to the lake house in June, there's been a constant stream of workers still coming to visit. Landscaping was a major project that took place in the month of July and we just got our fire pit finished a couple weeks ago.
We haven't had a ton of opportunities for campfires this summer, and I'm kinda' bummed about it. Sooo. . .now that we do have a fire pit, though, we're going to have to chop up some wood and take care of that situation.
Along with campfires, always come s'mores (at least with our family). Over the years, various candy bars have made their way into our "s'mores basket." We always make sure we have the traditional chocolate Hershey's bars. Our friends have also turned us onto Ghirardelli milk chocolate caramel squares (OMG, so good). But a favorite among our family and guests are s'mores made with Reese's peanut butter cups.
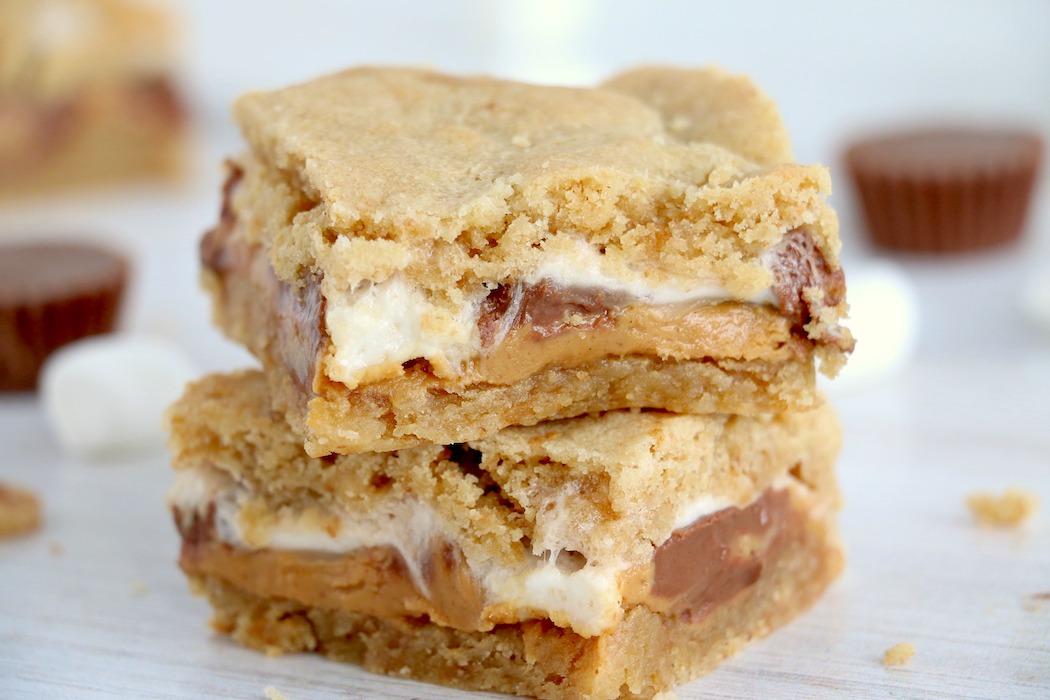
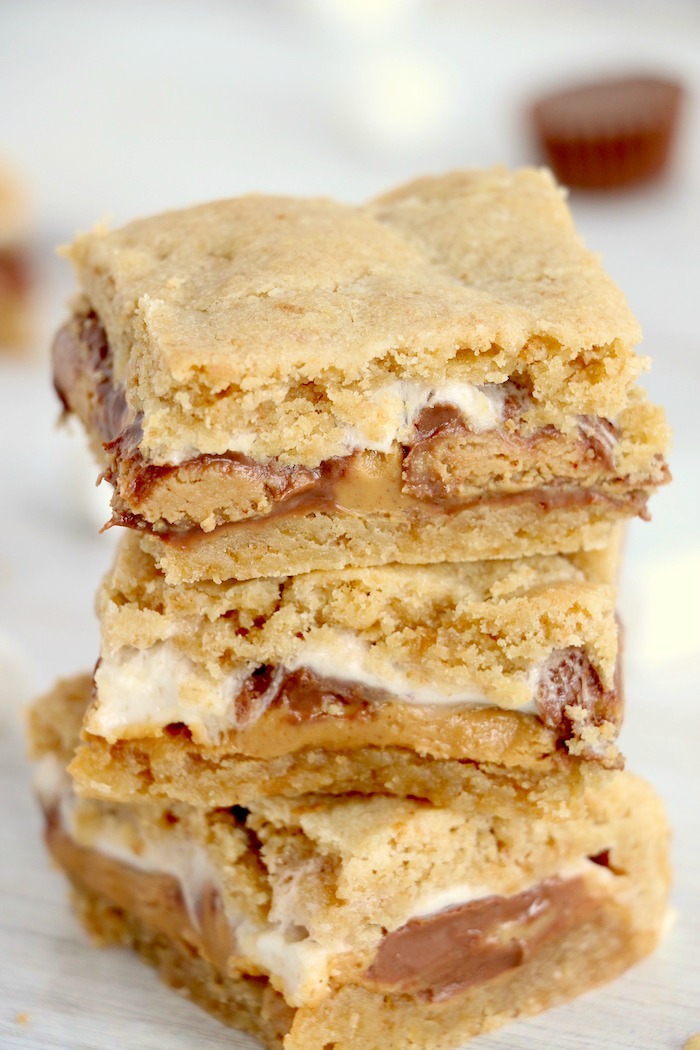
Today, I'm sharing a recipe for s'mores bars filled with marshmallow, chocolate AND peanut butter, surrounded by a graham cracker crust! If you're also craving more s'mores, you have to try these bars!
HOW TO MAKE S'MORES BARS
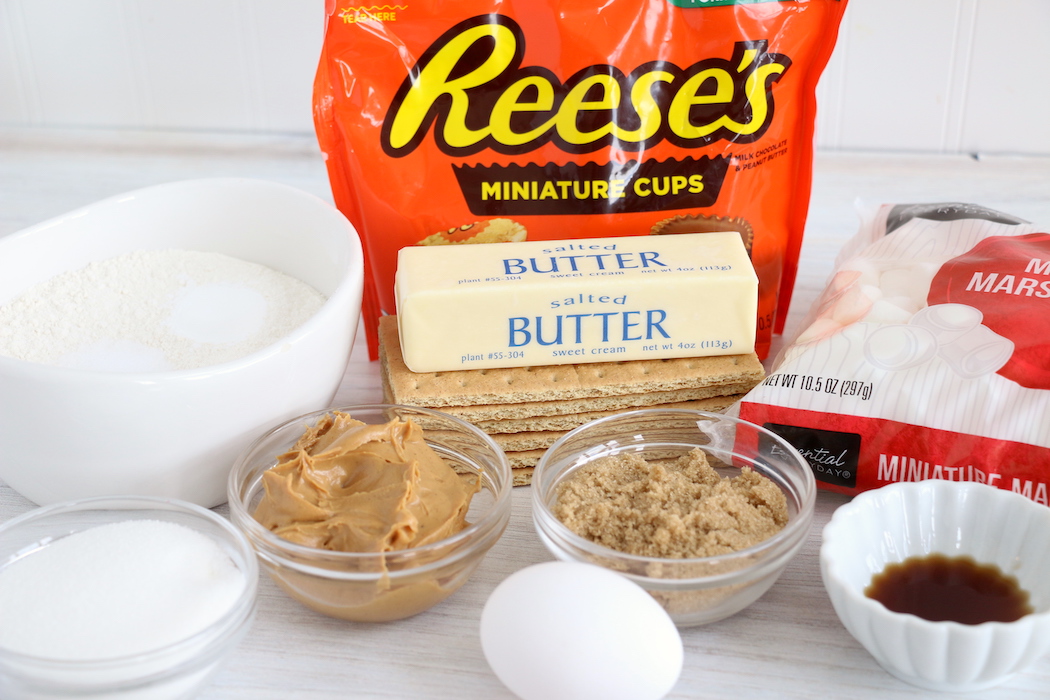
To make these peanut butter s'mores bars, you'll need:
- Butter
- Sugar
- Brown sugar
- Egg
- Vanilla
- Baking powder
- Flour
- Salt
- Graham crackers
- Mini Reese's peanut butter cups
- Creamy peanut butter
- Mini marshmallows
Alright, once you gather all of your ingredients, preheat the oven to 350º Fahrenheit and let's start mixing!
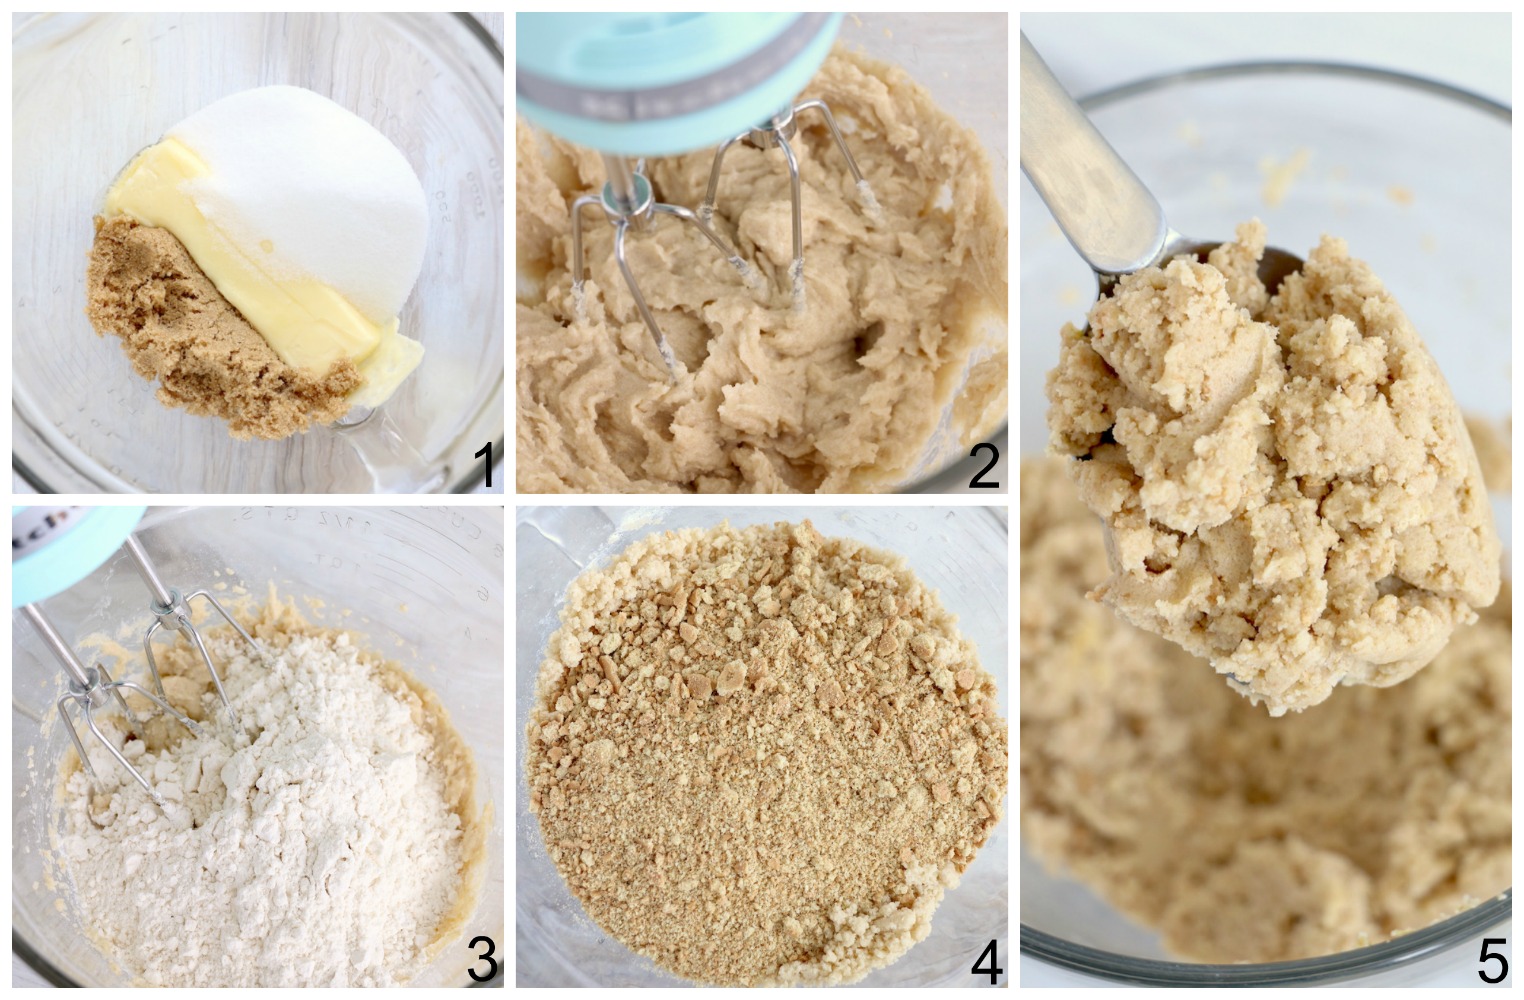
- In a medium mixing bowl, beat the butter and sugars together.
- Add the egg and vanilla and mix well.
- Beat in the flour, baking powder, and salt.
- Stir in the graham cracker crumbs.
- The crust should have somewhat of a coarse consistency.
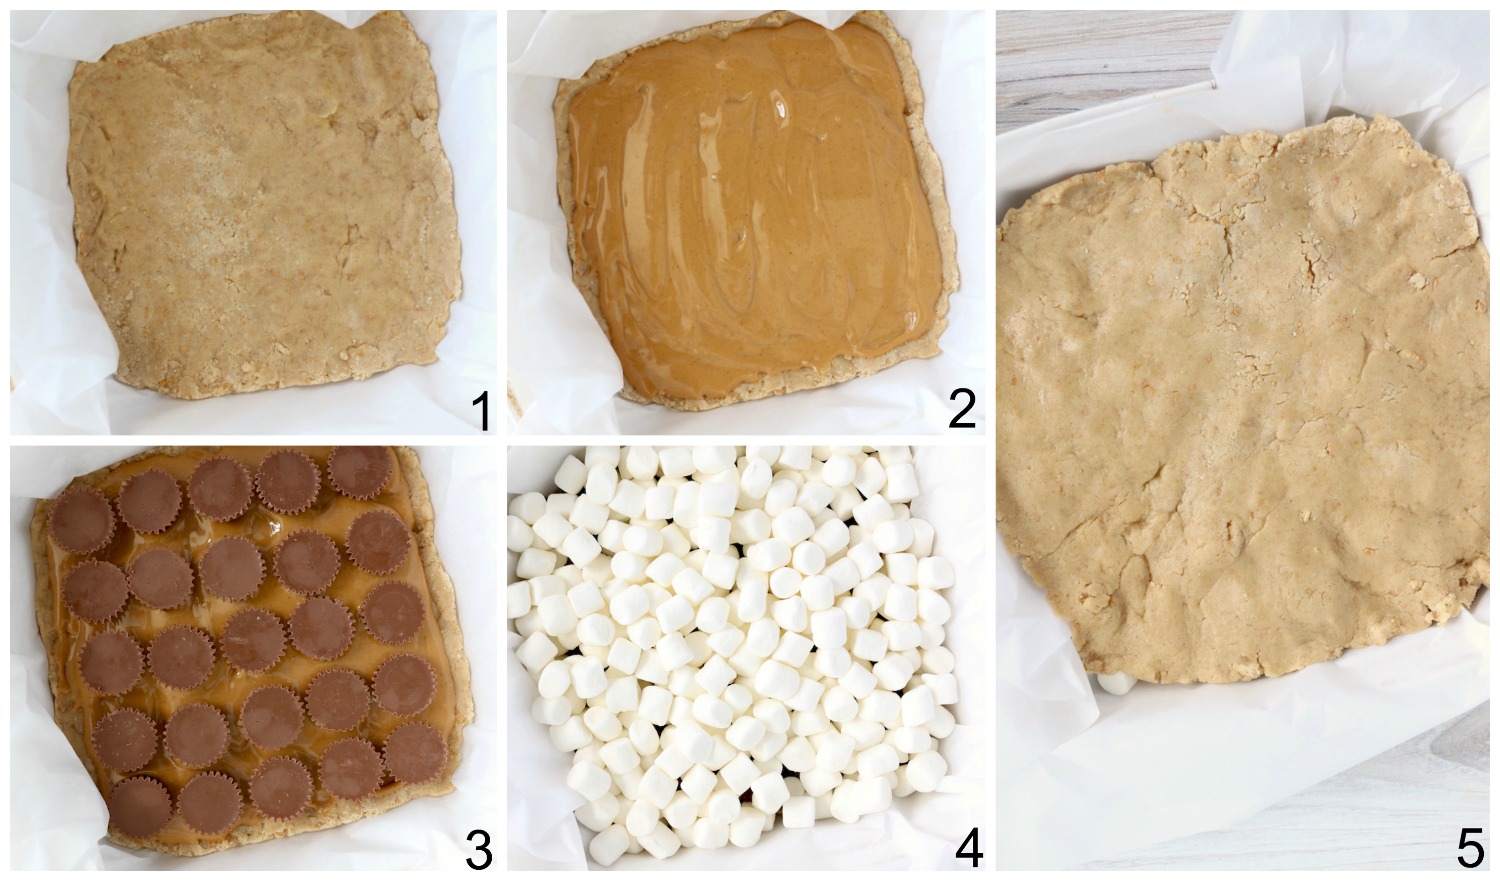
- Now line an 8x8 baking dish with parchment paper and press half of the crust mixture into the baking dish. When you have it flat, gently grab the parchment paper and lift the top layer out of the baking dish. Set it aside. To create the bottom layer, line the baking dish with parchment paper again and press the remaining dough into the bottom.
- Spread the peanut butter over the top of the crust.
- Evenly place the Reese's Peanut Butter Cups on top of the peanut butter.
- Sprinkle the marshmallows on top.
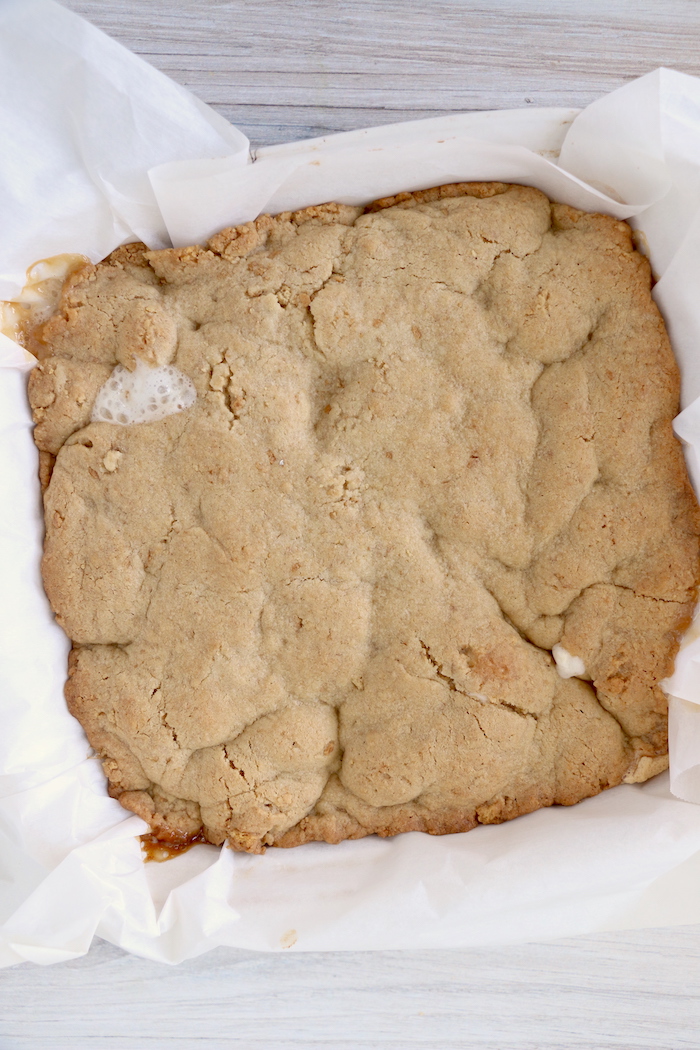
- Cover with the remaining layer of crust and bake for 30 minutes or until the top crust is golden brown.
I just love it when the marshmallow comes bubbling through the top. Sooo good.
WANT SOME FUN FLAVOR SUBSTITUTIONS?
- Instead of peanut butter, use Nutella Chocolate Hazelnut Spread.
- Substitute chocolate bar or candy bar pieces for the peanut butter cups.
- Try chocolate flavored graham crackers in place of the honey flavored.
HOW DO I EASILY SPREAD THE PEANUT BUTTER?
Spreading the peanut butter onto the bottom layer of crust is probably the most challenging step of this recipe. I like to microwave the peanut butter for about 10-15 seconds, so it is easier to spread.

WHAT'S THE BEST WAY TO CUT S'MORES BARS?
Allow the bars to cool before attempting to cut them. If you try and cut them while they're still warm, you'll likely have a gooey mess on your hands.
If this happens, grab some vanilla ice cream plop it on top and just start eating.😉
HOW MANY BARS DOES THE RECIPE MAKE?
I usually say 12 generous-sized bars. If you want to cut them smaller, you can probably get approximately 16 out of the 8x8 baking dish.
HOW DO I STORE S'MORES BARS?
You can store the bars in an airtight container for 3-4 days. You can refrigerate them and they may last a little longer, but I prefer to always enjoy them at room temperature.

READY FOR MORE S'MORES RECIPES?
- No-Bake S'mores Tarts
- Cotton Candy S'mores
- S'mores Dipping Squares
- Caramel Apple S'mores
- S'mores Milkshake
- Oven-Baked S'mores
- Frozen S'mores
S'mores Bars
Ingredients
- ½ cup butter (room temperature)
- ½ cup sugar
- ¼ cup brown sugar
- Large egg
- 1 teaspoon vanilla
- 1 ¼ cups flour
- 1 teaspoon baking powder
- 1 teaspoon salt
- 6 graham crackers (crushed to crumbs)
- 25 mini Reese's Peanut Butter Cups
- ½ cup creamy peanut butter
- 4 cups mini marshmallows
Instructions
- Preheat oven to 350º Fahrenheit.
- In a medium mixing bowl, beat butter and sugars together.
- Add egg and vanilla and mix well.
- Beat in flour, baking powder, and salt.
- With a mixing spoon, stir in graham cracker crumbs.
- Line an 8x8 baking dish with parchment paper.
- Press half of the crust mixture into the baking dish.
- When you have it flat, gently grab the parchment paper and lift the top layer out of the baking dish. Set it aside.
- To create the bottom layer, line the baking dish with parchment paper again and press the remaining dough into the bottom.
- Spread the peanut butter over the top (I like to microwave the peanut butter for 10-15 seconds, so it is easier to spread).
- Evenly place the Reese's Peanut Butter Cups on the bottom layer.
- Sprinkle marshmallows on top.
- Cover with the remaining layer of crust.
- Bake for 30 minutes or until top is golden brown.
Notes
- Try substituting your peanut butter with Nutella.
- Heating the peanut butter in the microwave for 15 seconds makes it easier to spread.
- Allow your S'mores bars cool before cutting into them.
Leave a Reply